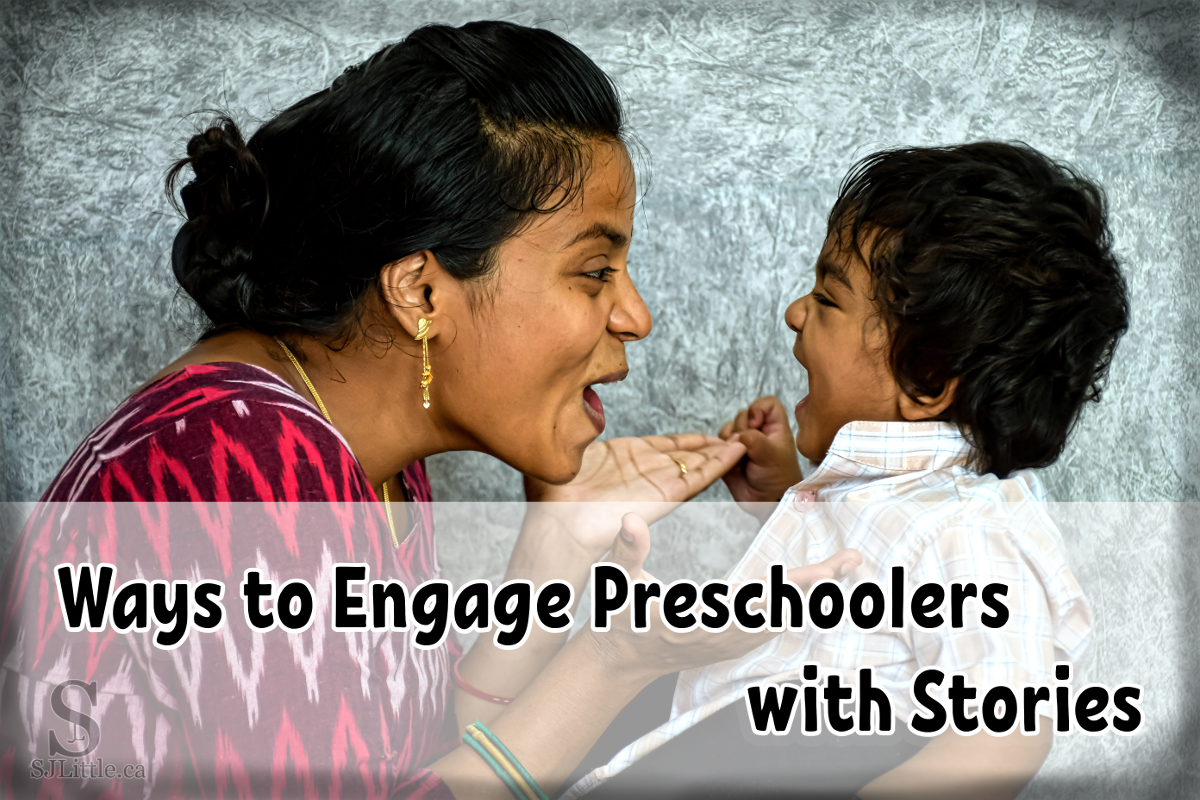
Woman talking to her laughing toddler

Some children get excited for storytime. Other children are restless and simply cannot be bothered to pay attention at storytime. Some adults enjoy reading picture books to their children. Others do not. Regardless, engaging children through story is valuable for pre-reading development.

I hope this helps you on your journey of engaging preschoolers with stories.

Why engage preschoolers with stories without reading a book?

As a preschool teacher, here are some key reasons I would tell a story without using a physical book:

  • Children who have a limited grasp of English, whether due to speech delays or English being a second language, find it hard to follow long strings of words.  Many picture books have a lot of words with only a few storyline clues in the pictures. Several of the methods recommended below show the action of the story rather than just telling about it.
  • Some children have a hard time sitting still in general. Using new and unusual ways to tell a story catches their attention far better. Later, as they learn to follow and enjoy stories, they may be more able and willing to sit for a picture book.
  • Sometimes the child has already heard the story you are telling many times before. They get bored and fidgety because they know exactly what’s coming. This is an important indicator for the storyteller that it is time to find a different story or a new storytelling method to help capture the attention of the audience.

Methods of storytelling
The possibilities are endless, but here are a few ideas to get you started. Keep in mind, you don’t have to make up your own story. Find an engaging preschool book you enjoy and retell the story using one of these methods.

  • Toys as props
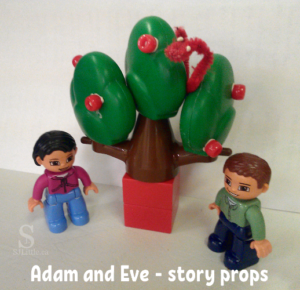
    • Lego/Duplo – If you have time beforehand, you can build whatever building or vehicle the story requires. Better yet, ask the children to help you build it, then set it aside until storytime.
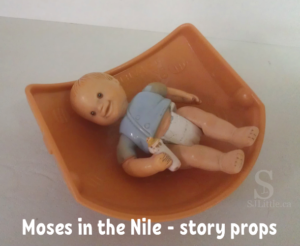
    • Small dolls or animals (stuffed or plastic, etc.) – I recommend using small dolls or animals, especially ones that can bend as needed for the story (some dolls can’t sit down).
  • Playdough
    • Some stories might lend themselves well to playdough. It would likely be best to pre-build all the props you will need, or at least practice building them so that you can make them quickly without losing the children’s interest. Think ahead about how you will make sure all the children can see what you’re doing.
  • Act it out
    • Stand up, put on a hat and play the parts yourself. Only some stories will work well this way, especially for preschoolers. Alternatively, allow the children to be actors. However, here again, I caution you to be intentional to keep things fair.
  • Felt board
    • Felt boards or flannel boards might seem old fashioned, but the children love them. You can buy felt board sets to use that correlate with specific stories or buy generic sets of farm animals or community workers. Also, consider cutting your own shapes out of felt or paper with velcro on the back.
  • Puppets
    • Puppets can be store-bought or homemade. Children thoroughly enjoy puppets with or without a puppet theatre to hide behind. If you don’t want to make the puppet talk, have them whisper in your ear and then repeat what they “told” you, such as:
      • “What’s that, Mr. Rabbit?” “Oh, you’re looking for your carrot?” “Mr. Rabbit says he wants us to help him find his carrot.”
  • Cut out paper shapes
  • Picture book pages
    • When it comes to preschoolers, you don’t have to change things much to make it seem brand new and exciting. Do you have a picture book with a spine that is falling apart? Consider cutting all the pages out and laminating them. Then you can hold up the pages, one at a time, while you tell the story. I encourage you to number the pages for your own reference. Laminating the pages will help them last far longer.

Tips

  • Know the story
    • Whether you make up your own story or retell a story from your favourite picture book, the most important key to storytelling is to know the story well. If the story is written down, read it over several times and practice paraphrasing it. If you need to, write cue cards to jog your memory of the order of events. If it is a repetitive story such as Brown Bear, Brown Bear by Eric Carle, try writing out the first few stanzas to help you get started.
  • Know your audience
    • If the story you want to tell is too complex, or otherwise not age-appropriate, you will lose your audience. It isn’t so much a matter of whether the child is a five year old or a two year old. Rather, pay attention to where they are at developmentally. When you tell a story, watch for cues that they are not following a too complicated story or that they are bored since the story is too simple. This, of course, gets tricky when you have more than one child and a range of developmental levels.
  • Make eye contact
    • Once you’ve learned the story inside out, you won’t have to be looking at the words on the page. This frees you to make eye contact with the children as you are telling the story. Eye contact makes storytelling more personal and engaging.
  • Consider the setup
    • Think about how you can hold whatever props you might be using so that all the children can see them. For larger groups, you may need to sit on a chair while the children sit on the carpet. Or if the children are in chairs, you may need to stand. A child who can’t see the props will find it much harder to be engaged.
  • Involve the children
    • Find ways to involve the children in the story. Some of the methods in the following bullet points work well to enhance the reading of a picture book rather than telling the story without using the picture book.
      • Let them fill in blanks: A key way to do this is by letting the children say parts of the story based on clues you provide. For example, when I’m reading Brown Bear, Brown Bear, I might say “Brown bear, brown bear what do you see? I see a…” then wait for a child to tell me what picture/prop I’m showing.
      • Include actions: Some stories lend themselves well to actions. Kitten’s First Full Moon, by Kevin Henkes, is a good one for this. You can encourage the children to wiggle their noses or pretend to climb a tree with the character.
      • Ask questions: Pause the story from time to time to ask a question. The question could be in line with the story: “Do you think he will do it?” “How did that make her feel?” Or the question might be a side comment that enhances general knowledge: “What colour is her shirt?” “How many buttons does he have?” Be careful to watch for signs of your audience’s engagement with this one. Too many questions, or miss-timed questions, can break the flow of the storyline.
      • Hold props: Most children love being allowed to hold the props, but I caution you on this one. Be very careful about fairness. For small groups of children, or one on one storytimes, allowing the child to hold the props, or find whichever prop you need next, can be excellent. However, if you have a large group of children, but only two props, it may cause arguing over who gets to hold it. On another note, once you’ve let the children hold the props for one story, they may beg to hold them for all future stories. Therefore, consider carefully whether this powerful engagement tool will be beneficial in your setting.

Other resources

Need something simpler, yet still engaging? Check out my post about 7 interactive preschool books. These are a great way to engage a child with picture books who won’t sit for most books. sjlittle.ca/preschool/7-fantastic-animal-guessing-books-for-preschoolers 

For a list of my favourite stories see my Pinterest board: www.pinterest.ca/sjlittleauthor/preschooltoddler-books-s-j-littles-favourite 

Other picture books I also recommend: www.pinterest.ca/sjlittleauthor/books-for-preschoolers-and-toddlers 

What are other ways you’ve engaged preschoolers with stories?

Mother hugging daughter with title "5 Things to Teach When Homeschooling Your Preschooler"


With the current pandemic, you may find yourself homeschooling your preschooler, whether by choice or due to circumstances beyond your control. In order to help you out, I’ve collected a list of 5 things most preschool teachers include every day at circle time.

Circle time is the part of the preschool schedule when all the children gather around, typically sitting on a carpet, while the teacher teaches. Sometimes activities are interactive, while at other times they require listening to the teacher talk. At home, you could schedule a regular sit-down circle time with your child. Alternatively, many of these topics can be integrated into other moments of your day. 

Note that circle time doesn’t have to be long. For younger or more wiggly children, you could start at 5 minutes a day and slowly, over several weeks, build the length up to 10-15 minutes depending on the attention span and interest level of the child.

1. Stories

Storytime is an important part of the day for many areas of child development. Your child will learn pre-reading skills, gain knowledge about many topics, and be exposed to new words. In preschool settings, storytime is often a part of circle time, but in a home setting, you could easily have a reading time that is separate from other circle time activities.

There is so much more I could say about storytime, but that is another topic for another time.

Wondering which books I recommend? Check out my posts: 7 Fantastic Animal Guessing Books and 3 Books to Teach Preschoolers They’re Special as well as my Pinterest boards: S. J. Little’s Favourite Preschool/Toddler Books and Books for Toddlers and Preschoolers 

2. Songs

Scientists have discovered that music is hugely beneficial for brain development. Not only that, but most children enjoy singing. Therefore, nearly all preschools include singing as a daily activity. Some teachers only sing one or two songs a day, others have songs for nearly everything, from clean-up songs to “What’s the Weather” songs and everything in between. Thankfully, being an excellent singer is not required for singing with preschoolers.

From a practical teaching perspective, songs can be useful for:

  • Transitions (example: clean-up songs)
  • Teaching (example: ABC songs)
  • Memorization (example: days of the week songs)
  • Enjoyment (example: The Wheels on the Bus)
  • Exercise (example: If You’re Happy and You Know It)

Chances are you already sing some songs with your child. If you’re looking for more songs to learn, check out some of my favourites:

Visit my Big List of Simple Preschool Songs for more ideas.

3. Letter of the week

To help keep the alphabet from seeming so big and overwhelming, a common strategy for teaching 3-4 year old children is to focus on one letter per week. This typically happens at circle time. There are endless strategies on how to teach each letter. You can use posters or songs or mystery boxes. If your child seems to be losing interest, try switching things up with a new technique. Here is a list of 9 strategies I’ve used: Teaching the ABCs at Circle Time

4. Calendar

Did you know that most preschools review the calendar with the children every day? By that, I mean the children will sing a song about the names of the seven days of the week and discuss which day of the week today is. Then, as a class, they will count the number of days to find out which day it is. They also discuss the name of whichever month it is.

Here’s an example of teaching and singing about the days of the week: 

Understanding the calendar can be tricky for many children. Therefore, repetition is helpful. Also, reviewing the calendar every day provides excellent counting practice. Once a child can count to 30, they are well on their way to being able to count to 100. Having said that, children do get tired of reviewing the calendar every day. So long as your child has a basic understanding of the calendar by the time they start kindergarten, it is up to you whether you want to review the calendar daily or not. You could choose to review the calendar once a week or choose to focus on it daily for one month. However you choose to do it, have fun with it.

5. Weather

Learning to name the different types of weather such as, sunny, snowy, and foggy, is another thing preschoolers learn at school. Since many preschools are run indoors, teachers must be intentional not to forget to talk about the weather. At home, these conversations happen more naturally. As you discuss which type of footwear is needed for the day, or when the weather makes going to the park formidable, you can be teaching your child about the weather.

6. Bonus: Bible stories

In many Christian preschools, Bible reading is an important part of the schedule. Some of the Christian preschools I’ve taught at always read one Bible story every week from a children’s illustrated Bible. When I read a Bible story to my class, I like to pause and sing the “B-I-B-L-E” first to remind everyone that this isn’t just another storybook. The Bible is special and true. If you don’t know the song, I explain the actions and link to a video of it in my post here: 7 Simple Christian Songs for Preschoolers

I highly recommend The Beginner’s Bible by Zondervankidz. They also have free printable colouring sheets and activities on their website here that match the illustrations in it.

I hope this information is helpful to you as you teach your child at home!

Other resources you may find helpful include:

Ready for Kindergarten: 5 key ways to prepare your child academically

8 Tips for Keeping Preschoolers Engaged During Circle Time

Create Your Own Preschool Curriculum for Free

If you have questions you’d like to ask a preschool teacher, feel free to comment below or fill out my contact form.

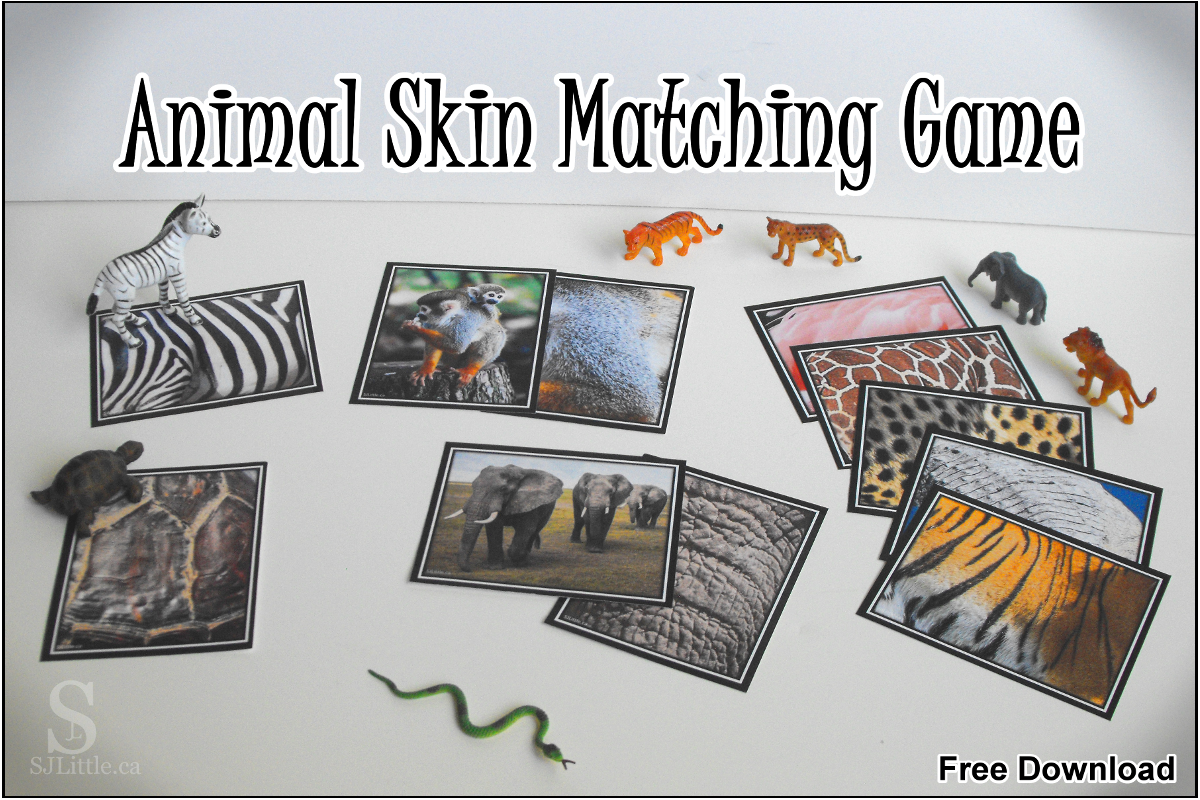
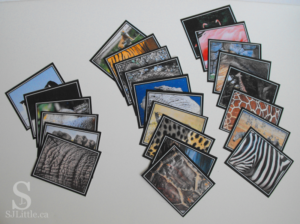
Picture of Animal Skin Matching Game and toy animals


Preschoolers love animals and so do I. Preschoolers also love guessing and learning. That’s why I’ve created this Zoo Animal Skin Matching Game.

Get started

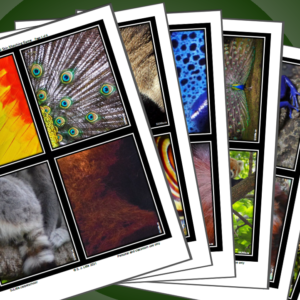
Download and print the free Zoo Animal Skin Matching Game which includes 12 zoo animal skin pictures and photos of the corresponding animals. No sign up needed. (Big thanks to the Unsplash community for providing such excellent photos!)

If you want more than the 12 Zoo Animals, I encourage you to join my email list to receive another set of 12 animals (Exotic Animals) for a total of 24. Alternatively check out my selection of other Animal Skin Matching Games available on Teacher’s Pay Teachers.

Cut out the photos and, if possible, laminate them for increased durability.

OptionalPhoto of Animal Skin Matching Game cards

If you have a set of small zoo animal toys, I would encourage you to use those to match with the printed skin pictures rather than using the matching animal photos I have provided.

Play at home (groups of 1-4 children)

  • Invite the children to gather around.
  • Set several of the animal skins in front of the children. (For younger children start with only a few distinct skins until they catch onto the game. For older children you could set out all 12 skins.)
  • Either set out all the matching animals or hand them to the children one at a time.
  • Encourage the children to match the animals to the cards.
  • Celebrate with the children when they have matched all the animals correctly!
  • Consider furthering the fun and education by using ideas listed in the “extend the learning” section below.

Play in group circle time (groups of 5+ children)

  • Count how many children you have and determine how you will enable each child to have a turn. The print out includes 12 animal skins to match. If you have more than 12 children, consider playing the game twice so that every child can participate.
  • Before circle time, arrange the animal skins on a wall or board where everyone can see them. Have tape or sticky-tack ready so the children can attach the animals to the skins.
  • Once everyone is gathered for circle time, point out the skins and explain that you will play a matching game.
  • One at a time, call the children to the front and hand them an animal. Allow them to match their animal to the appropriate skin. (Younger children may need hints at first.)
  • Consider furthering the fun and education by using ideas listed in the “extend the learning” section below.

Play in a video call

  • Option one: Show one skin at a time and see if the children can guess what animal they belong to. (This works better for older children.)
  • Option two: Show three skins and one animal. Encourage the children to guess which skin belongs to that animal.
  • Consider furthering the fun and education by using ideas listed in the “extend the learning” section below.

Extend the learning

  • Sing the animal song: “If You Want To Be A…
  • Read a zoo themed book. I have collected some of my favourite zoo books on my Pinterest board here.
  • Many of the animal photos have more than one animal. Have fun counting them.
  • See how many colours you can find in the photos.
  • After the children have finished the animal skin matching game, consider taking the opportunity to talk with your children. Topics could include:
    • Observe how different and unique each animal’s skin is, yet they are all animals. Discuss how people all look different but that doesn’t make us any less important – we’re all special!
    • Talk about how each animal is good at something different – monkeys climb trees, turtles carry homes on their backs, giraffes reach leaves at the top of the trees, etc. Then steer the conversation to how each person is good at different things.
    • Ask the children which animal is their favourite, or which they like pretending to be the most.
    • For Christians: Marvel together at how amazingly complex and varied creation is and how that reminds us that God is far more spectacular than all the creatures He has made.

Want more Animal Skin Matching Sets created by S J Little? Check out the following:

Exotic Animal Skin Matching Game

Free when you join S J Little’s email list (see form above)


Farm Animal Skin Matching Game

Free through Teacher’s Pay Teachers


Ocean Animal Skin Matching Game

Available for purchase on Teacher’s Pay Teachers


Boy running with guitar

Last July, I posted 7 Simple Christian Songs for Preschoolers. So many people enjoyed those songs that I decided to follow it up with this post.Girl with hat smiling

If you haven’t visited my first Christian Songs for Preschoolers post, I would encourage you to check it out here. In that post, I talked about the value of these songs and useful ways to sing them.

For now, I will suffice to say that these songs have been chosen because they are easy to sing (no need for a CD player or music major), and they teach valuable truths about God. In fact, singing these Christian songs not only teaches children these truths, but they provide me with much needed reminders too. Enjoy!


Please note: The sample videos I have included were chosen for the clarity of the song and actions. I am not associated with any of them and have not done extensive research into the groups who posted them. Also, while I tried to find videos similar to how I prefer to sing these songs, some actions and/or words may vary from the versions I have recommended for you.

1. Our God is an Awesome God

You may already know this song, as it is the chorus of a much longer song by the same name. It is essential that we remind ourselves that our God is truly an awesome God, especially now as I write this during a pandemic! This song could be sung several times in a row getting a little faster each time.


Our God is an awesome God,

He reigns from heaven above,

With wisdom, power, and love,

Our God is an awesome God.

Actions:

God – point up

Awesome – thumbs up

Reigns – wiggle fingers like rain coming down

Heaven – point up

Wisdom – point to mind

Power – show muscles

Love – hug self

2. Oh Be Careful Little Eyes What You SeeLittle boy doing actions

With internet access so readily available, let’s start teaching our children, when they are young, the wisdom of being careful of what we expose ourselves to. I appreciate how this song reminds us that it is out of love for us that God asks us to be careful. He knows it is for our good. Depending on the age of your children, you can do simple actions by only pointing to the body part named, or you can point to the body part and then do the second action for the last part of the line.


Oh, be careful little eyes what you see.

Oh, be careful little eyes what you see.

For the Father up above is looking down in love,

So be careful little eyes what you see.


Other Verses:

  • Ears what you hear
  • Hands what you do
  • Feet where you go
  • Mouth what you say
  • Heart whom you trust
  • Mind what you think

Actions:

Eyes, ears, etc. – point to body part

See – hold hand over eyes as though looking far away

Hear – cup hands behind ears

Do – move hands around, perhaps pretend to build something

Go – walk in place

Say – cup hands around mouth, as though yelling

Trust – open hands flat in front of self, as though giving or receiving a gift

Think – tap chin, as though pondering something

3. God is so Good

A classic song, this one is so gentle and sweet to sing. This might be a good song for just before bed or some other slower part of the day.


God is so good,

God is so good,

God is so good,

He’s so good to me.


Other Verses:

God cares for me…

God died for me…

God loves me so…

God answers prayer…

I praise His name…

Actions:

God/He/His – point up

So good – move arms in large circle, starting at top and moving down

Me/I – point to self

Cares – hug self

Loves – cross arms over heart and rock side to side

Prayer – clasp hands in prayer

4. Ho-Ho-Ho-Hosanna

I once was in a choir that used this song as a warm-up during practices. Its repetitive rhythm makes it fun to sing, while its words make it a valuable reminder. Let us never forget the joy of what Jesus did for us!


Ho, ho, ho, hosanna,

Ha, ha, hallelujah,

He, He, He, He saved me,

I’ve got the joy of the Lord!

Actions:

Ho/hosanna – cup hands around mouth

Ha/hallelujah – put hands on tummy and lean back as though laughing

He/Lord – point up

Me – hug self

5. Jesus Loves Me

Chances are, you sang this song as a child. While it is a little more complicated than some of the others in this list, the truths it reminds us of are worth it. Also, don’t limit it to being a child’s song. I know I often need the reminders it offers.


Jesus loves me this I know,

For the Bible tells me so,

Little ones to Him belong,

They are weak but He is strong.

Yes, Jesus loves me.

Yes, Jesus loves me.

Yes, Jesus loves me,

The Bible tells me so.

Actions:

Jesus – (for younger children) point up

          – (for older children) sign language for Jesus – touch middle finger from one hand to palm of other hand and vice versa 

Loves – hug self

Me – point to self

Know – point to brain

Bible – hold hands like book and open

Little ones –  pretend to pat young children on the head

Him/He – point up

Weak – slump and hang arms limply

Strong – show muscles

Yes – sign language for yes – make fist and move it up and down

6. I Say L (L-O-V-E)

This song will be better for children who are starting to grasp the concept that letters can be put together to form words. The actions are complicated to learn, but your more advanced preschoolers will enjoy the challenge. Also, this song has three sets of actions. You can choose to use one or all three depending on your children and goals. There are the full-body actions which are great for getting wiggles out. Then there are also the finger actions and the hand actions which can be done sitting. Some children will find the finger actions more challenging, if they have not yet developed strong fine motor muscles and hand-eye coordination.


I say L

I say L-O

L-O-V

L-O-V-E

Everybody needs God’s love,

Everybody needs God’s love,

Everybody needs God’s love,

Everybody needs God’s love.

Actions:

Rather than repeating the L-O-V-E actions after singing “Everybody needs God’s love,” I recommend having the children give themselves a hug. You can also hold “love” rather than making the “ch” sounds portrayed in the video.

This song has three sets of actions: full-body, hand, and finger

Full-body actions:

L – hold right arm up and left arm horizontal

O – connect hands above head, creating circle

V – extend both arms above head at angles

E – use one arm as top of E and the other arm as middle of E, then lift leg to create bottom of E


Hand actions: (using both hands)

L – with wrists touching, hold right hand straight up and left hand horizontal

O – with wrists touching, cup hands to make circle

V – with wrists touching, hold hands vertically forming a V

E – keep hands connected as they are for V, but turn horizontal. Curl fingers slightly for top and bottom of E and connect thumbs for middle of E


Finger actions: (using one hand only)

L – use pointer finger and thumb to make L

O – connect fingers and thumb to make circle

V – make peace sign

E – fully extend thumb, pointer finger and middle finger while tilting so that the thumb is on the bottom

7. Isn’t He Wonderful

Yet another well-loved classic, this catchy tune will stick in your head. Try singing it quiet or loud, while matching the size of your actions to the volume of your voice.


Isn’t He wonderful, wonderful, wonderful,

Isn’t Jesus my Lord wonderful.

Eyes have seen, ears have heard,

It’s recorded in God’s Word.

Isn’t Jesus my Lord wonderful.

Actions:

He/Jesus my Lord – point up (or clap rhythm as in video)

Wonderful – move arms in large circle starting in middle

Eyes – point to eyes

Ears – point to ears

God’s Word – hold hands as book and open

I hope you enjoyed these additional Christian songs for preschoolers!

Title "5 Types of Storytime Seating" on colourful background

Circle time. That point when the entire class gathers around the teacher for songs, stories, and activities.

This can be a tricky part of the day for the teacher, as the children wiggle and get distracted by their friends. Different seating arrangements can help eliminate certain distractions. Also, different seating arrangements work better in different environments and with different budgets. Here are some pros and cons of 5 unique types of storytime seating for preschoolers that I’ve used. 

Note: the images included are for your reference. They do not indicate any partnership with or recommendation for those specific carpets and/or companies. The links are not affiliate links.

1. Small carpet (with no individual spots)

  • This could be any rug you have around that is big enough for all the children to sit on. I have seen blankets or bamboo mats used as well.
  • Pros:
    • Use what you have, rather than buying a new expensive rug
    • Can fit a large number of children on a smaller space since there aren’t individual spots to sit on
    • Gives the children a defined area to sit during storytime
  • Cons:
    • Beware, rugs with very colourful designs can make it hard to spot toys, thus making clean up difficult and stepping on toys more likely
    • Children may jostle for position and argue since there are no boundaries providing needed personal space
    • Children are likely to crowd into multiple rows causing added distraction
    • Children have a hard time seeing what the teacher is holding since they are not arranged well

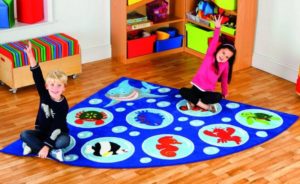
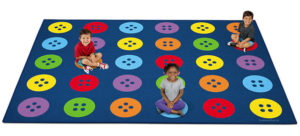
2. Carpet with multiple rows of individual seating spots

  • These carpets can be square or designed to fit into a corner like a slice of pizza. Often, if all the spots are filled, you will end up with three rows of children directly behind each other.

Preschoolers sitting on corner circletime rug Children sitting on large classroom carpet


  • Pros:
    • Typically specifically designed for school type settings
    • Often high-quality carpets that will last several years
    • Often include an educational element such as shapes, or numbers
    • Children have specified spots to sit on with the goal of having the seating well-spaced – not too close and not too far
    • Multiple sizes designed for different numbers of children are available
  • Cons:
    • Often expensive
    • May be hard to clean
    • Can cause difficulties with children kicking those in the row in front of them
    • Back row of children often are not as attentive to the teacher

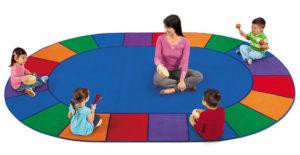
3. Large oval or rectangular rug (with seating spots)

  • These are very standard storytime seating for preschools to have. There are many different designs from letters to woodland animals and more.Children sitting on rug for circletime
  • Pros:
    • No back row of children meaning the teacher can see all the children and the children are not distracted the same way as those with multiple rows
    • Many beautiful designs to choose from, including educational themes
    • Are large enough to accommodate many children
    • Individual spots on the rug for children to sit on
    • Typically specifically designed for school type settings
    • Often high-quality carpets that will last several years
  • Cons:
    • Your classroom must have a large open space to set this rug
    • Difficult to find a place for the teacher to sit where all the children can see (some may be behind another child along the side)
    • Depending on where the teacher sits, some children will be sitting a considerable distance from the teacher making it difficult to see what the teacher is holding, or for the teacher to hear the child talking
    • Most are very heavy if you have to move them
    • Can be difficult to clean
    • Typically expensive

4. Individual story spots or carpets

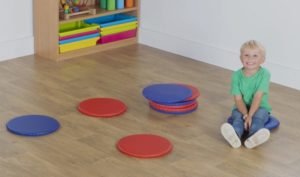
  • Story spots come in a wide variety of shapes, sizes, and colours. They may be individual sized squares of carpet, or circle shaped cushions. They could even be laminated pieces of paper. The thing that makes them all fit in the same category is that they are one spot per child and that they are movable.Child sitting on story spots
  • Pros:
    • Spots can be rearranged to whatever shape fits your space.
    • Can be stacked on the shelf during playtime allowing more space for toys
    • Might be machine washable
    • You choose how many to use rather than always having 12 spots if you only have 10 children.
  • Cons:
    • Spots are not secured to the floor allowing children to move them around which can be distracting
    • Creates an extra task for the teacher (or children) to set them up and put them away every day
    • If used on hard floor, the spots may be slippery if stepped on
    • Can be expensive

5. Tape

  • Rather than buying a rug, take a roll of masking tape and put it on the floor in a large “u” or semi-circle around the teacher’s chair. The children will sit on the tape. (Alternatively cut pieces of paper and use clear tape to secure them to the floor)
  • Pros:
    • Inexpensive
    • Can be placed in any shape, according to your needs
    • Can adjust length of tape to accommodate any size of class
    • Children do not argue over getting their favourite colour or letter
    • No second row (unless you want to make one)
    • No heavy rug or stack of story spots to deal with
  • Cons:
    • Children may pick at the tape and pull it off
    • Lack of individual spots means the children sometimes sit too close to each other causing irritation
    • Leaving the tape down for several weeks, or during deep cleaning, may leave lines on the floor
    • Tape will need to be replaced from time to time as it wears out or the children pull it off
    • Not ideal on hard floor as it does not protect children from hard surfaces or cold floors

That’s a long list of pros and cons to consider. If you were to ask me which storytime seating for preschoolers I prefer, I would likely say using tape is my preference. However, this, of course, depends on the program and the space available.

What is your preferred storytime seating for preschoolers? Can you think of pros or cons I didn’t include in this post?

Struggling to keep your children engaged at storytime? Here are some helpful ideas:

Ways To Engage Preschoolers With Stories

8 Tips for Keeping Preschoolers Engaged During Circle Time