Children jumping and title "3 No-Prep Outdoor Game to Play with Your Preschooler"


As the weather gets warmer, it’s valuable to get kids outside and moving. That’s what these classic 3 games are all about. Best of all, they are no-prep outdoor games so you can play them just about any time and anywhere.

You may already be familiar with some of these games. Perhaps you played them as a child. I know I did. Whatever the case, if you’re looking for more games to play with your preschooler, keep reading.

Tips for No-Prep Outdoor Games

Before we get into the games themselves, I have a few tips for you.

  • Keep a close eye on the children’s interest level. Try to end the game just before the children begin feeling bored. This way, they will remember it as a fun game. If you wait until they are extremely tired and bored, they are less likely to enjoy the game again in the future.
  • Choose a playing space based on the age and stamina of your children. For older children choose a larger playing area, for younger children, a smaller space will do. You could use a field, your backyard, a multipurpose room, or a patio (with good railings). Get creative.
  • Have fun! If you are enjoying the game your child is far more likely to have fun playing.

What Time is it, Mr. Wolf

Even if you don’t know this game, there’s a good chance your children might. This game can be used in a variety of settings, including swimming lessons and skating lessons.

Number of Children:

  • Large group
  • Small group
  • One-on-one with an adult

Child Development:

  • Counting
  • Gross motor movements (running and stepping)
  • Turn-taking (waiting for their turn to be the wolf)
  • Following instructions

How to Play:

Select one person to be the “wolf”. Have them stand on the opposite side of the playing space. Have the other players line up side by side on the starting line.

Together, all the players (except the wolf) call, “What time is it, Mr. Wolf?”

The wolf calls back a number between 1 and 12, or “Lunchtime!”

If the wolf says, “It’s 3 o’clock,” all the players take three steps toward the wolf.

Then all the players ask again, “What time is it, Mr. Wolf?”

Whenever the wolf chooses, he can reply, “Lunchtime!” When he does, the wolf chases all the players back to the starting line.

If the wolf tags anyone before they reach the starting line, they become the wolf. For small groups of 8 children or less, just the person who was tagged first becomes the wolf and the first wolf becomes a player. For larger groups, every child who is tagged joins the wolf so that, as the game progresses, there are more and more wolves and less players.

For older children, have the wolf turn around so that they cannot see how close the players are getting. This is not necessary for preschool children and it can be tricky to keep them from peeking.

Red Light, Green Light

Fantastic for use while teaching transportation or safety themes, this game is well-loved and for good reason. While this game absolutely works without any prep, it can be improved by choosing something to use as the “red light” and the “green light”. In the past, I have used printed stop and go signs, blank red and green pieces of construction paper, red and green hula hoops, red and green cones, or whatever else I had on hand.

Number of Children:

  • Large group
  • Small group
  • One-on-one with an adult

Child Development:

  • Gross motor movements (running and stopping)
  • Ear-body coordination (hearing instructions and obeying them)
  • Listening skills (learning to respond to “stop” or “red light”)

How to Play:

Choose who will be the “caller”. The caller can be a child or a teacher/parent. Have the caller stand on one side of the playing space. Have all the children stand side by side on the opposite side of the playing area. 

When the caller says, “Green light!” all the players run toward the caller. When the caller says, “Red light!” all players must stop where they are. The caller continues to call “red light” and “green light” until all the players reach where the caller is standing. Then a new caller is selected and all the players return to the opposite side of the area.

For 8 or fewer children, allowing the children to be the caller works well. For bigger groups of preschool children, it may be best to only have the teacher be the caller. This is especially helpful if you are under tight time constraints. When the teacher is the caller they can control the game. For example, they can make it shorter if gym time is almost over.

For elementary aged children, this game becomes a challenge to not be caught moving when it’s a red light. If caught moving, they are sent back to the start line. For preschool children, remembering to follow the instructions is often exciting and engaging without being sent back to the beginning. However, if a child really isn’t responding to the red light, sending them back to the starting line will help them be more intentional to pay attention next time.

Extend the Fun:

  • Extend the fun by adding more colours. This works especially well if you have visuals to hold up for each colour. Some ideas include:
    • Orange = go slow
    • Blue = (stop and) turn around
    • Purple = hop
  • Are you doing a transportation or safety theme? Try making visuals representing the stop and walk crosswalk signals to help children learn what they mean.

Mother May I

I recommend this game for a small group of 3-5 children who are aged 3-5. This is due to how slow the game can be when each child moves separately. For larger groups, try having all the children take the steps together, much like What Time is it Mr. Wolf.

As an adult, this game may seem pointless, but many children love it. They enjoy having the power to make choices when they are the “mother”. Be careful to ensure that every child has a turn to be the mother.

If you are uncertain about using this game’s traditional name “Mother May I” try calling it something like “Monkey May I”.

Number of Children:

  • Small group

Child Development:

  • Variety of gross motor movements (large steps/small steps, and if extending the play: jumps and turns)
  • Turn-taking (waiting for their turn to ask to move and to be the mother)
  • Making choices (preschoolers love being able to choose and that’s why this game holds appeal for them)
  • Counting
  • Following instructions (if extending the play, following 2-step directions)
  • Good manners

How to Play:

Select one child to be the mother. The rest of the children line up on one side of the playing space while the mother stands on the opposite side.

For this game, each child has a turn to ask the mother what number of steps they can take. Typically, I limit the number to anything between 1-12. Have the first child ask, “Mother, may I take 3 steps?”

The mother gets to choose. They can say, “You may,” at which point the child who asked moves the prescribed number of steps. Alternatively, the mother can say, “No.” If the mother says, “No,” she must then tell the child how many steps they may take, for example, “You may take 2 steps.” The child who asked will then take only 2 steps forward.

Following that, it is the next child’s turn. Continue giving the children turns. The game ends when a child reaches the mother. Then choose another mother and have all the children go back to the starting line.

Again, I stress that when playing this game, it is very important to give every child a turn being the mother.

Extend the Fun:

Once the children have played several rounds, change things up by describing the type of step. “Mother, may I take 1 giant leap?” “Mother, may I take 12 tip-toe steps?”

Ideas include:

  • Tiny steps
  • Giant steps
  • Small hops
  • Big jumps
  • Backwards steps
  • Tip-toe steps

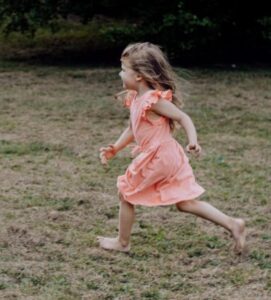
Final ThoughtsGirl running outside

Do you have older kids? For groups of children aged 4-10 I recommend the game: Farmer Farmer. It is similar to British Bulldog, but with a twist. 

What other no-prep outdoor games do you enjoy playing with your preschoolers?

Do your preschoolers still have energy? Great! Here are two other ideas to help you keep them moving:

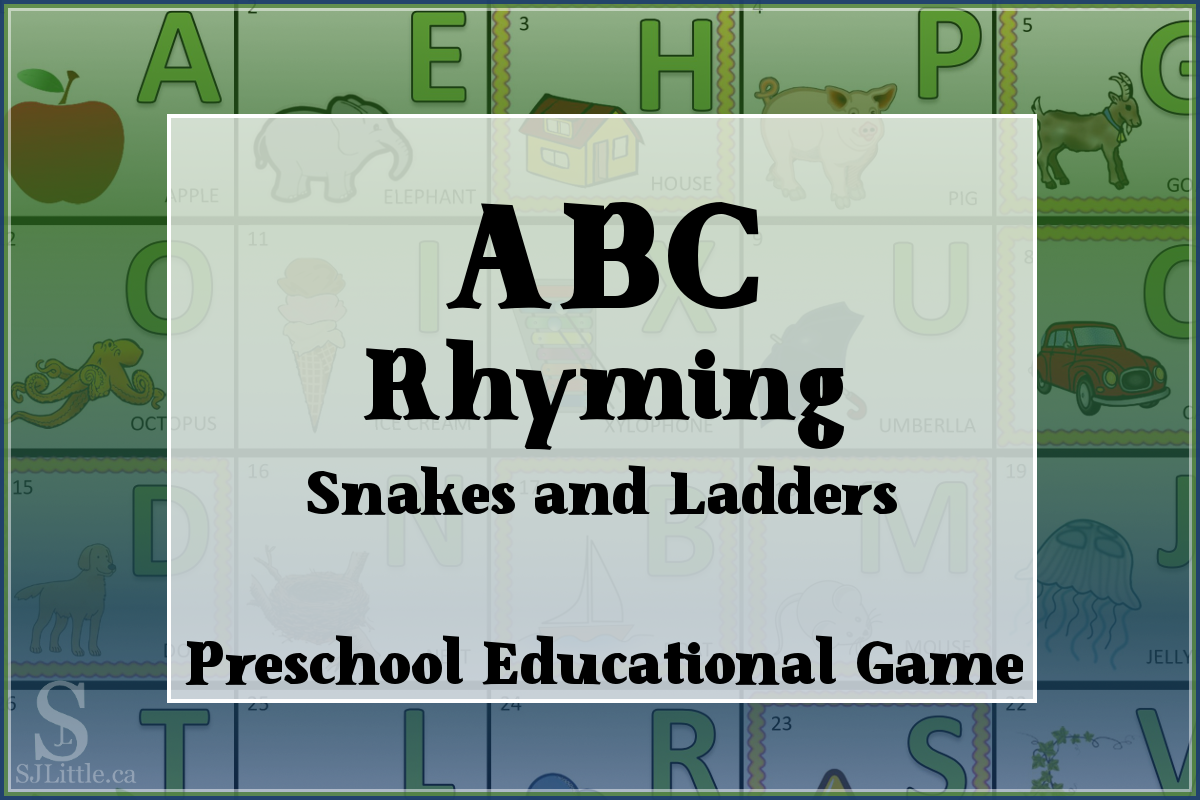
 

Looking for a game to play with your preschooler? Here’s a new one for you to print and enjoy together.

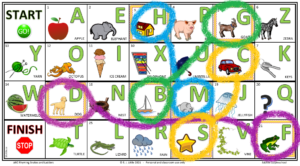
Are you familiar with the classic game Snakes and Ladders? If so, you are well on your way to knowing how to play this game. The primary difference is that, for this game, rather than having snakes and ladders, if a player lands on a yellow framed square, they move to the matching rhyme square. Confused? Don’t worry, I’ll explain.

What You Need

  • The ABC Rhyming Snakes and Ladders Game board printed out
    • Alternatively, open the image on a tablet or iPad and use that as your game board.
  • 1 six-sided die
  • 1 playing piece per person – I encourage you to use plastic pawns from a board game. Alternatively use very small toys, buttons, or even coins. (Beware of choking hazards.)

How to Play

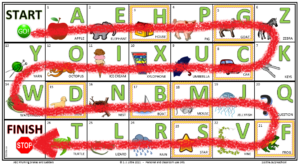
  • Place everyone’s playing piece on the “START” square.

    Direction of play on the game board
  • Have the first person roll the die and move their playing piece accordingly.
    • For example, if they roll “4”, have the person move their playing piece to the fourth square which has the pig on it.
  • Players take turns rolling the die and moving their playing piece to the appropriate square.
    • Further details: Once everyone has had a turn to roll and move their playing piece, the first person gets to roll again. If the first person rolls a “5” on their second turn, they will continue counting from the fourth square with the pig on it until they reach the umbrella.
  • If a player lands on a square with a yellow frame around it, such as the boat, they move to the matching rhyme, in this case, the goat. Only squares with yellow frames have matching rhymes. The player moves to the corresponding rhyme regardless of whether they are moving forwards or backwards. (These moves are equivalent to snakes and ladders.)
  • The goal of the game is to reach the “FINISH” square first.

Educational Elements in ABC Rhyming Snakes and Ladders

Rhyming Matches
  • Rhyming – Listening to the distinct sounds in each word is a challenging skill for many children. It is also an important pre-reading skill. When playing this game with your child keep in mind that learning to rhyme is difficult for a 3 year old and may still be challenging for a 4-5 year old if they have not yet been taught about rhymes. Have patience as you model and teach the skill. Say the words slowly and emphasize the rhyming sounds. Once your child has a handle on rhyming, learning to read will be a little easier.
  • ABC Order – You may have noticed that the letters on this game board are not in alphabetical order. This is intentional. Children are incredibly smart. It is not uncommon for a child to memorize the letters in alphabetical order rather than learning to distinguish each letter by shape.  Mixing up the order of the letters gives an extra challenge and a chance for the parent to see how many letters their child can recognize by sight. I encourage you to take a moment to look at the letters on the board together.
  • Pictures – I have included a picture for each letter. These pictures serve as reminders for the child of what sound the letter makes. Sound out the name of the picture with your child to help them distinguish the sound of the letter at the beginning of the word. Grasping that each letter makes a sound and that those sounds can be combined into words will go a long way in preparing your child to start reading.
  • Counting / Turn-Taking / Waiting – These are three of the hidden developmental bonuses of playing a game like this. Every time your child rolls the die and moves their playing piece, they are practicing counting. Every time they have to wait for their turn, they are sharpening valuable social skills.

Like this free resource? Be sure to tell your friends about it and join my email list for access to other free printables.

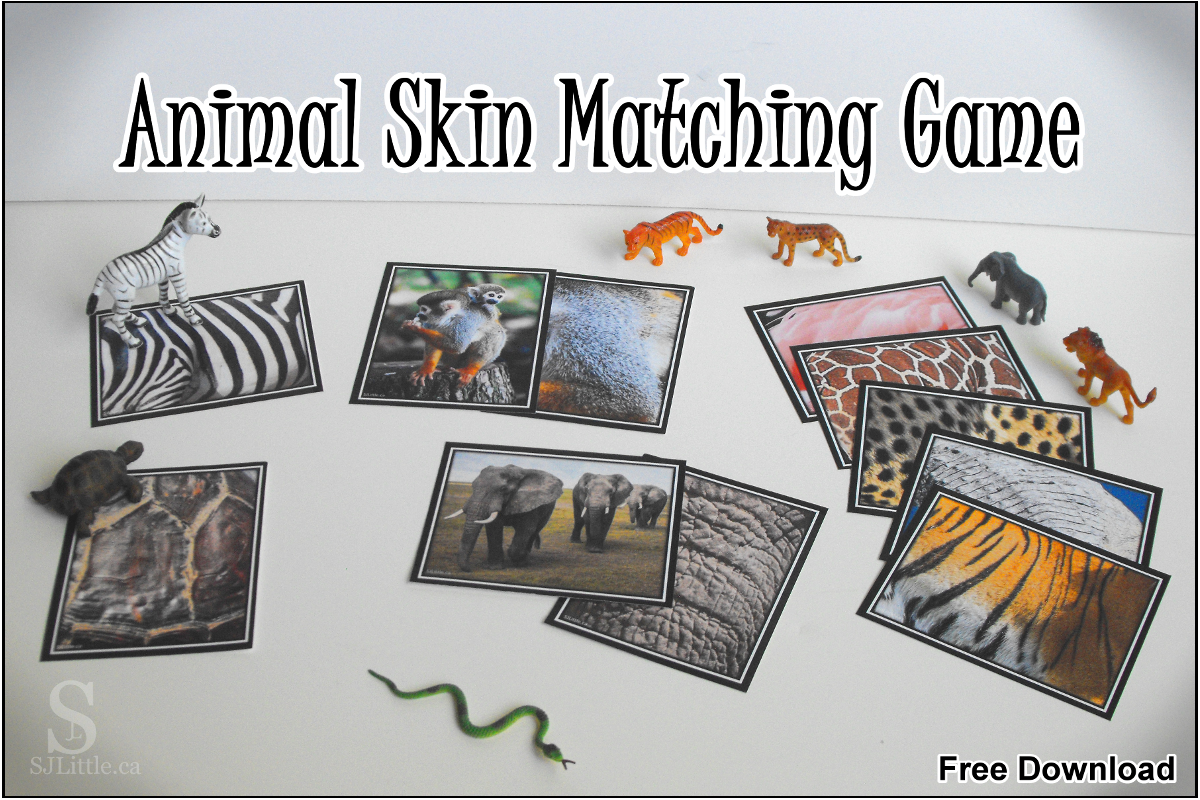
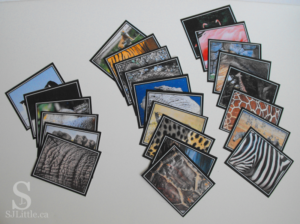
Picture of Animal Skin Matching Game and toy animals


Preschoolers love animals and so do I. Preschoolers also love guessing and learning. That’s why I’ve created this Zoo Animal Skin Matching Game.

Get started

Download and print the free Zoo Animal Skin Matching Game which includes 12 zoo animal skin pictures and photos of the corresponding animals. No sign up needed. (Big thanks to the Unsplash community for providing such excellent photos!)

If you want more than the 12 Zoo Animals, I encourage you to join my email list to receive another set of 12 animals (Exotic Animals) for a total of 24. Alternatively check out my selection of other Animal Skin Matching Games available on Teacher’s Pay Teachers.

Cut out the photos and, if possible, laminate them for increased durability.

OptionalPhoto of Animal Skin Matching Game cards

If you have a set of small zoo animal toys, I would encourage you to use those to match with the printed skin pictures rather than using the matching animal photos I have provided.

Play at home (groups of 1-4 children)

  • Invite the children to gather around.
  • Set several of the animal skins in front of the children. (For younger children start with only a few distinct skins until they catch onto the game. For older children you could set out all 12 skins.)
  • Either set out all the matching animals or hand them to the children one at a time.
  • Encourage the children to match the animals to the cards.
  • Celebrate with the children when they have matched all the animals correctly!
  • Consider furthering the fun and education by using ideas listed in the “extend the learning” section below.

Play in group circle time (groups of 5+ children)

  • Count how many children you have and determine how you will enable each child to have a turn. The print out includes 12 animal skins to match. If you have more than 12 children, consider playing the game twice so that every child can participate.
  • Before circle time, arrange the animal skins on a wall or board where everyone can see them. Have tape or sticky-tack ready so the children can attach the animals to the skins.
  • Once everyone is gathered for circle time, point out the skins and explain that you will play a matching game.
  • One at a time, call the children to the front and hand them an animal. Allow them to match their animal to the appropriate skin. (Younger children may need hints at first.)
  • Consider furthering the fun and education by using ideas listed in the “extend the learning” section below.

Play in a video call

  • Option one: Show one skin at a time and see if the children can guess what animal they belong to. (This works better for older children.)
  • Option two: Show three skins and one animal. Encourage the children to guess which skin belongs to that animal.
  • Consider furthering the fun and education by using ideas listed in the “extend the learning” section below.

Extend the learning

  • Sing the animal song: “If You Want To Be A…
  • Read a zoo themed book. I have collected some of my favourite zoo books on my Pinterest board here.
  • Many of the animal photos have more than one animal. Have fun counting them.
  • See how many colours you can find in the photos.
  • After the children have finished the animal skin matching game, consider taking the opportunity to talk with your children. Topics could include:
    • Observe how different and unique each animal’s skin is, yet they are all animals. Discuss how people all look different but that doesn’t make us any less important – we’re all special!
    • Talk about how each animal is good at something different – monkeys climb trees, turtles carry homes on their backs, giraffes reach leaves at the top of the trees, etc. Then steer the conversation to how each person is good at different things.
    • Ask the children which animal is their favourite, or which they like pretending to be the most.
    • For Christians: Marvel together at how amazingly complex and varied creation is and how that reminds us that God is far more spectacular than all the creatures He has made.

Want more Animal Skin Matching Sets created by S J Little? Check out the following:

Exotic Animal Skin Matching Game

Free when you join S J Little’s email list (see form above)


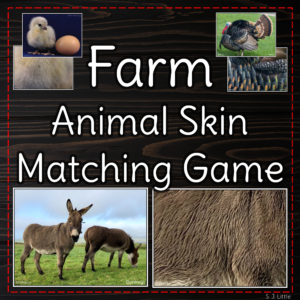
Farm Animal Skin Matching Game

Free through Teacher’s Pay Teachers


Ocean Animal Skin Matching Game

Available for purchase on Teacher’s Pay Teachers


Letters being covered by cloth

This simple game is fantastic for engaging your preschoolers. It makes your children think hard as they try to solve the exciting mystery of what’s missing!

The game itself is extremely basic, yet the modifications and ways of using it to teach specific vocabulary are nearly endless. It can be played with a group of children or just one child.

Why play?

Children love this game! Not only is it fun and interactive, but it also makes your children think hard. Our brains, like our muscles, need exercise and stretching to make them strong. This game provides an excellent brain-stretching exercise for kids, and for adults too. I’ve often been amazed at how quickly my children are able to learn the skills needed to play this game well. You’ll soon find yourself needing to make it harder and harder to keep them challenged.

Not only that, but this game is also a great opportunity to provide a review of the vocabulary your children are learning, whether letter names, or colours, or various zoo animals.

How to play “What’s Missing?”

  1. Collect various unique items.
  2. Show the children the items and review their names.
  3. Cover the items with a blanket to hide them from the children’s sight. While they are hidden, remove one of the items.
  4. Uncover the items and encourage the children to guess what’s missing.
  5. Repeat until all the items have disappeared

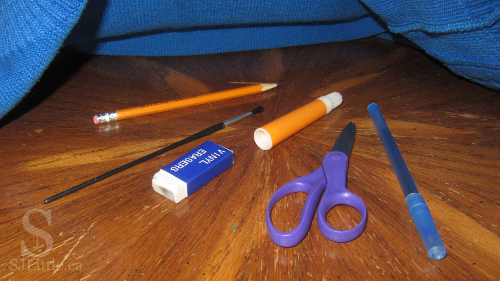
Various office supplies under cloth


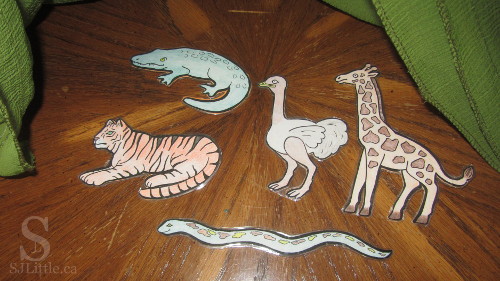
Zoo animal cut outs under cloth


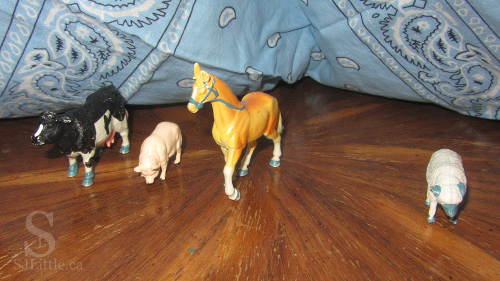
Farm animal toys under bandana


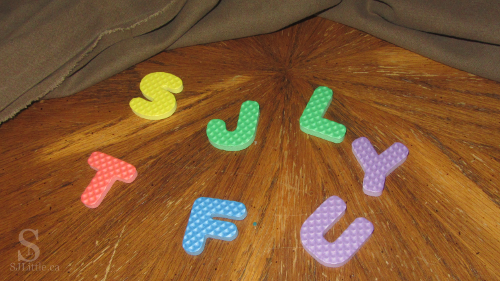
Foam letters under blanket


Tips

Make it engaging:

  • Be excited about figuring out what’s missing. If you’re excited about it, your children will be too.
  • When your children guess right, celebrate with them. When they guess wrong, be encouraging. Learning that it’s okay to make wrong guesses will help them succeed in school and life.
  • Try to play at a level where your children can guess correctly 75% of the time. You want it hard enough that they have to think, but not so hard that they become discouraged and give up.

Which items to choose:

  • You can use just about anything to play this game!
    • Small plastic toys such as farm animals
    • Paper zoo animals that you printed and coloured
    • Random craft/office supplies such as glue stick, pencil, paintbrush, etc.
    • Small cars or construction vehicles
    • Magnetic letters
    • Small blocks of various colours and shapes
  • The more similar the items are to each other the harder the game becomes. Beware that it also becomes far more tricky if the children are unfamiliar with the right words to name the items.

Make it easier:

  • Use fewer items. For a class of two years olds, I often start with only 4 items the first time I play with them. Once they understand the game and are guessing well, I might use more items the next time we play.
  • Use items the children are able to name well. Something like an ostrich is harder for the children to recall that it is missing and to produce the name as a guess.
  • Use items that are very different from each other.
  • When you remove an item, leave its spot empty to help them recall what’s missing.
  • Each time, before covering the items, review the names of the items to help the children memorize them.
  • For younger children, when I get down to one item left, I like to ask them which item they think will disappear. Then I proceed to make the final item disappear.

Make it harder:

  • Start with more items.
  • Use more challenging items, such as the letters of the alphabet or more unusual animals.
  • Use items with fewer differences such as all the items are dolls, but their outfits are different.
  • Remove more than one item per round.
  • After removing an item, rearrange the items before revealing them to the children.

Use it to teach concepts:

    • Each time an item is removed, review the names of the remaining items before covering them again.
    • Choose familiar things for most of the items, but add one or two unfamiliar items. Leave the unfamiliar items until closer to the end so the children get lots of practice saying those names.
    • Choose items that focus on one particular topic. If you want to focus on colours, select items that are identical (or nearly identical) other than their colour. If you want to work on shapes, select items that are nearly identical in colour so that the shape is the most prominent difference.

Play over a video call

Do you have grandkids or nieces and nephews whom you can’t be with in person right now? Try playing this game while having a video call with them. You don’t even need a blanket since you can turn the camera away while you remove an item. Have fun letting them try to guess what’s missing!
I hope you enjoy playing this game with your children! What items did you use?

Looking for another easy, use what you have, activity for your children? Check out: Run Run Run