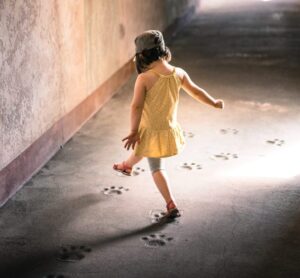
Girl running with a big smile

This game gets children moving with very little prep required. As an easy preschool gym game, it can be adapted to most spaces and adjusted for nearly any theme.

Set up

  • Designate four areas as the sides the children will be running to. 
    • In a gym with four walls, consider attaching a piece of coloured paper or a poster to each wall. (When playing with a group of children, I prefer using a wall rather than a corner so that the children have room to spread out.)
    • In an open area, such as a field, consider placing four different coloured hula-hoops to designate the four sides. (See other options below.) 

Play

  • To start the game, show the children each of the four sides. 
  • Call out an instruction, such as “Run to yellow!”
  • Run with the children to the “yellow” side.
  • Once everyone has arrived, call out another instruction. For example “Hop to blue!”
  • Alternate between actions that are exciting vs. quiet, fast vs. slow, and tricky vs. easy. (See my list of suggested actions below.)
  • Keep an eye on your children’s engagement level. As soon as they start losing interest, or preferably just before they do, wind up the game. Finish with one exciting action followed by one quieter action.
    • Ending with a quiet action will help prepare your children for the transition into the next activity.

Age

  • 2 Year Olds: At the basic level, this game works wonderfully with most 2 year olds. These youngsters will enjoy playing this game many times, if you change it up a bit each time.
  • 3 Year Olds: This is a great game for 3 year olds! They especially enjoy it if you can give them opportunities to call out the instructions.
  • 4 Year Olds: If you include more challenging actions, or perhaps increase the number of sides to 6 or 8, 4 year olds will enjoy this game. However, I recommend only playing it occasionally with 4 year olds, as they may begin losing interest if they play it too often.

Size of group

  • 1 Child: This game can be played with one child. It will go best if you play it with the child. Take turns calling out the instructions.
  • 2-8 Children: Having a small group of children makes this game more exciting, while enabling you to allow each child to have a turn or two calling the instructions.
  • 9+ Children: This gym game is excellent with a large group of children. However, you may not have the time to allow each child a turn to call the instructions. Therefore, unless you are sure you can give every child a turn, it is likely best to call all the instructions yourself.

Ideas for the four sides

  • If you don’t have walls to attach papers to, try using different coloured hula hoops, cones, or blankets. Alternatively, choose pre-existing objects to run to such as a bench, a flagpole, or a tree, etc.
  • If you have walls to attach papers to, your options are endless! For younger children, stick with simpler options, but for older children, enjoy challenging them with new vocabulary that is trickier.
    • Blank coloured paper: could be basic colours (red, yellow, blue, green),  or more tricky colours (purple, orange, brown, grey). You could even do themed colours (for Valentine’s day: red, pink, white, purple).
    • Shapes cut from paper: For 2 year olds, I have done basic shapes (circle, square, triangle, star). For older children try trickier shapes (rectangle, octagon, trapezoid, oval). You can cut whatever shapes you want! For example, you could do pet themed shapes (cat, dog, fish, bird).
    • Posters: if you are in a preschool or childcare facility, chances are you have various posters around. Why not use some of them? You could use transportation, zoo, or dinosaur posters to match the game with what the children are learning. (If you don’t have posters, colouring sheets could work.)
    • Flat objects: Consider using foam letters or large puzzle pieces for the four sides. So long as the four objects can be clearly distinguished by name, you can use just about anything.

Ideas for actions

  • Changing up the actions will help ensure a full-body workout for your preschool children. Be sure to use a variety of easy and challenging actions!
    • Basic actions:
      • Easy
        • RunGirl walking on footprints
        • Hop
        • Fly (running with arms out as wings)
        • Stomp
        • Crawl
      • Medium
        • Skip
        • Walk sideways
        • Tiptoe quietly
        • Slow
        • Long steps
        • Tiny steps
        • Spin
        • Slither (or army crawl)
        • Bear crawl (on hands and feet with knees straight)
      • Hard
        • Hop on one foot
        • Crab walk (on hands and feet with tummy facing up)
        • Walk backwards (not recommended for larger groups, though it can work if you let them go two or three children at a time)
    • Other actions: Children have incredible imaginations! Engage their creativity with theme-based actions.
      • Zoo
        • Stomp like a hippo
        • Walk like a giraffe (stretch arms up and take long steps)
        • Run fast like a cheetah
        • Waddle like a penguin
        • Hop like a kangaroo
      • Dinosaur
        • Growl like a t-rex (make short arms and run while growling)
        • Stretch like a brachiosaurus
        • Fly like a pterodactyl
        • Stomp like a triceratops
      • Bugs
        • Buzz like a bee (make tiny wings with hands and run while buzzing)
        • Fly like a butterfly (flap arms as large gentle wings while crossing slowly and quietly)
        • Jump like a grasshopper
        • Crawl like a ladybug
      • I think you get the idea so I’ll stop my list here. This game could also work with themes such as: farm, under the sea, transportation, emotions, sports or Olympics.

How to choose which action

  • The basic way to play this easy gym game involves someone calling whichever action they want. (If you let the children make their own calls, you’ll end up with a lot of running!) Consider making the game more engaging and visually appealing for your children, especially if they are still learning English or have language delays by doing one of the following:
    • Dice:
      • Before playing the game, choose 6 actions and write them on a die. (You can make your own dice out of cardboard, or try looking for giant dice at your local dollar store.)
      • Hand the die to the child who is calling the instruction. Whatever they roll, that’s the action you’ll do next.
    • Use picture cards:
      • Use themed cards, such as animal cards, to determine the next action.
      • The child who is calling the instruction pulls a card from a bag (looking or not looking, you choose). Whatever action is on the card, that’s what everyone does.
      • If you don’t have picture cards or action cards to use, you can likely find some online to print. As another option, print a copy of my Free Zoo Animal Skin Matching Game cards to use.
    • Use small toys:
      • Alternatively, look around at what you have. Small plastic animals could be drawn from a bag.

This easy preschool gym game will be a fantastic addition to your preschool gym games tool belt. You may even find that it becomes one of your favourites!

Need more action ideas, or want to share your variation of the game? Comment below.

Looking for more no prep, super easy preschool gym ideas to get your children moving? Here are some ideas:

Interested in a preschool song that can go with just about any animal theme? See “If You Want To Be A…” 

Apple, pencils, and blocks on a desk with title over them

A wealth of information exists about child development and what a preschool child needs to know in order to be ready for kindergarten. Depending on where you live and which kindergarten your child will attend next year, the specifics of what they need to know will vary. Regardless, if you focus on these five core areas, your child will be well on their way to being ready for kindergarten.

Of course, there are other areas, such as social and emotional development, that must be matured in order to be ready for kindergarten, but that’s another topic for another time. So, without further ado, here are the top 5 key ways to prepare your child academically for kindergarten.

1. ABCs

This is usually the first thing parents think of when they think about getting their child ready for kindergarten. Singing the alphabet song is a great start, but don’t stop there.

  • Letter recognition
    • Help your child learn to recognize and name the letters. This takes plenty of repetition. Perhaps buy or print an alphabet poster. Point to each letter saying the name, then later, as your child catches on, ask them the name of the letter you’re pointing to. Be sure to mix up the order when you teach your child the letter names, otherwise, they may simply memorize the order of the letters, rather than their shapes. Additionally, throughout your day, when you come across writing, ask your child to name the letters they see.
  • Letter sounds
    • While letter names are important, their sounds are even more critical for learning to read. Ideally, a child who is entering kindergarten should have a strong grasp of the concept that every letter makes a sound and that letters put together make words. They should know many of the letter sounds.  For ideas of how to teach letter sounds to your child, check out this post:  Teaching the ABCs
  • Write own name
    • There is a long standing debate among kindergarten and preschool teachers about who should be teaching children to write. Some teachers argue that children who learn to write incorrectly form bad habits that are hard to break later. Other teachers would disagree with that. Due to this on-going debate, I do not emphasize teaching your child to write all their letters during their preschool years. Girl writingIf they show interest in learning to write, by all means, do not hold them back. Perhaps buy them a workbook that shows which way to write each letter. The big key in teaching children to write correctly is thinking about where we start a letter. When we write “M”, we start at the top for each line. When we write “Z” it is one continuous line. A good rule of thumb to follow is that most letters start at the top.
    • While I do not emphasize writing the whole alphabet, I strongly encourage parents to teach their child to recognize and write their own name before reaching kindergarten. There are loads of fantastic ideas about how to do this on the internet. Try finding one that suits your child’s interests.

2. Counting

Numbers are another of those things that can be taught and practiced throughout the day. “How many apple slices do you want for snack?” “I see you have one, two, three cars parked in the garage.” Teaching numbers really isn’t hard.

  • Counting aloud
    • In order to be ready for kindergarten, children should be able to accurately count out loud up to twenty. Being able to count to thirty would be even better.
  • Number recognition
    • On top of being able to count, they should be able to recognize the written numbers from 0-10. Be sure to practice recognizing these numbers out of order.

3. Fine Motor Skills

Fine motor muscles are simply the hand muscles designed to do small detailed tasks such as holding a pencil or putting beads on a string. If a child’s fine motor muscles are weak, they will find it difficult to hold their pencil correctly. Therefore, focusing on exercising these small hand muscles is a key part of getting ready for kindergarten. Here are a few fun ways to help strengthen your child’s fine motor muscles.

  • Playdough
    • Playing with playdough, or slime for that matter, is an excellent way to strengthen these muscles. While they roll and pull and poke, they are preparing their hand to hold a pencil well.
  • Colouring/Painting
    • Colouring with pencil crayons or crayons also exercises those hand muscles. Did you know that it has sometimes been recommended to give children small broken crayons to colour with? That is because using a crayon that is only an inch or two long forces a child to use more hand muscles since it is too small to be gripped in their fist.
    • Painting with cotton swabs is another super fine motor muscle builder. Using paintbrushes or other painting tools may also work well. Here’s a list of some creative ways to paint that your kids will enjoy:  Beyond the Paintbrush
  • Scissors
    • From my experience, scissor skills are often a forgotten thing. Once a child is three or four, they are capable of using child safety scissors while being supervised. (Supervision with scissors is important as this is also the age of self hair cuts.) Teaching your child to use scissors will strengthen their fine motor muscles. On top of that, your child’s kindergarten teacher will be grateful if your child is fairly competent at using the scissors.
    • When teaching scissors, use the rule of thumb – the thumb always goes on the top, both in how the child is holding their scissors and how they are holding their paper. One simple cutting activity is to give your child an old flyer and let them cut it into a million tiny bits.
    • For more on how to teach your preschooler to use scissors, check out my article: Scissors and Preschoolers – Scissor Basics
  • Other muscles
    • While we’re on the topic of strengthening muscles, just a quick reminder that gross motor activities, such as running, jumping, climbing, throwing a ball, etc. are important too. Not only are they valuable for developing your child’s muscles, such activities also have a huge positive impact on child brain development.
    • Here are a couple of gross motor activities you could try with your preschooler:

4. Broad Knowledge

Having a wide base of general knowledge helps children feel more confident and enables them to more easily grasp new concepts by connecting them to concepts they already know. Therefore, it is valuable for a child to be exposed to a broad range of learning opportunities. This doesn’t have to be complicated. Rather, during your day to day activities, take the opportunities that come. Do you see an orange butterfly? Point it out to your child. Is a cement truck driving by? Tell your child what it is and what it does. In this way, by the time they are ready for kindergarten, your child will have gained a broad range of knowledge that will serve as a launchpad to learning so much more. Here are some things to keep in mind.

  • Shapes and colours
    • Part of the broad knowledge children should have by kindergarten includes being able to recognize and name basic colours and shapes. Again, teaching this doesn’t have to be complicated. As you go about your day, comment about various shapes and colours as you come across them.
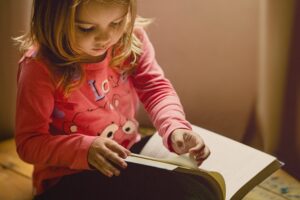
  • Read booksGirl reading book
    • I can’t emphasize this enough. Books are a fantastic way to give your child a wider base of knowledge than your home can give. Read stories about space or under the sea. The options are endless! Most cities have public libraries that are very low cost or free. If you sign up, you’ll never run out of new books to read.
    • Reading books with your child is also a huge part of preparing them to learn to read. Therefore, I strongly encourage you to make storytime a part of your everyday routine.  Here are some fun interactive book suggestions to get you started. 7 Fantastic Animal Guessing Books for Preschoolers
  • Educational screen time
    • While I encourage limiting or avoiding screen time for preschoolers, if you are going to give your child screen time, make sure it is positive and educational. There are many good options out there. For TV shows, I highly recommend Octonaughts. It is scientific and the social interactions between characters are largely positive.

5. Love of Learning

I’ve left this point until last as I want to be sure you remember it. Having a desire to learn is more important to school success than knowing the alphabet inside out. Therefore, as you’re teaching your child the things above, be sure to keep it fun. 

  • Lead by example
    • Keep in mind that your child is likely to pick up on your attitude. If you are excited about learning and asking questions, they will be too. With this in mind, be curious about things. Ask questions like, “I wonder how bees know where to find the flowers?” It’s okay if you don’t know the answer.
  • Learn what they love
    • Encourage your child to learn about what they love. Of course, this is not an excuse to avoid learning things that are important but less exciting to the child. However, especially at this young age, you could use what they love to help teach them other things. Do they love zoo animals? Find an animal ABCs book.
    • Having said that, I would encourage parents to try to focus on the broad open-ended interests of their child. If your child’s favourite is Paw Patrol, try buying them a set of toy dogs rather than a Paw Patrol toy. Why? Because a toy dog set provides a far greater range of potential play possibilities than a specifically Paw Patrol toy would.

In summary, preparing your child for kindergarten doesn’t have to be difficult. Be intentional to seize the learning opportunities in your day-to-day life and your child will be well on their way to being ready for kindergarten. While you’re at it, be sure to have plenty of fun. Learning ought to be a captivating adventure.

Interested in creating your own curriculum? It isn’t that hard when you know which steps to take. Check out: Create Your Own Preschool Curriculum for Free

Toys laying abandoned.

Are your kids bored of their toys? Are they disengaged and uninterested? Try rotating their toys.

Toy rotation is highly beneficial in preschools, daycares, day homes and even in everyday family life.

Benefits of toy rotation

  • After a toy is packed away for a length of time, children become excited to play with it again because they haven’t seen it for so long.Child surrounded by toys
  • Putting away some toys for rotation may leave your child with less toys to play with. Believe it or not, this can lead to deeper engagement with the few toys that are available. With too many toys a child may bounce from one toy to another, rather than fully playing with any one toy. Sometimes less is truly more.
  • Having fewer toys available also shrinks the amount of mess a child can make with their toys at any given time.

How long should toys be available?

The answer depends greatly on your child, your child’s age, and the toy itself. Because the recommended length of time is so situationally dependent, watch how engaged your child is. When they show signs of being less engaged, it’s time to rotate. Be aware, leaving toys out, until your child is bored, may significantly decrease their excitement at seeing those toys again later. Therefore, try to do the rotating on a high note so they will associate good memories with the toys for next time.

Older children, such as elementary aged children, may be able to regulate the rotating themselves. Store all their toys on a shelf. Allow them to get out and play with only one or two types of toys at a time – perhaps the cars and the blocks. When the elementary aged children realize they are getting tired of the toy, they will ask to get out a different type of toy. Have them first clean up and put away the toy they are tired of, then they may get out the next toy. In this way, they can take some responsibility for rotating their own toys.

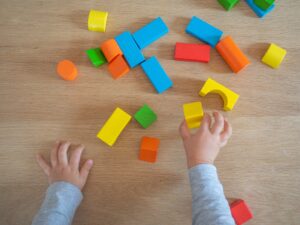
What about at preschools and daycares, etc?Child playing with wooden blocks

I have been a part of preschools and daycares who rotated their toys once a week, every other week, once a month, or never. Where the toys were never rotated, the children were extremely bored. They engaged in very little meaningful play and often misbehaved.

I personally would recommend rotating the toys every week or two. Some toys, such as large wooden blocks, may not need rotating as often, while other toys, such as puzzles, may only engage each child for one sitting and therefore benefit from frequent rotation.

Toy rotation in preschool and daycare settings comes with the benefit of providing a good toy washing routine. Every time new toys are set out, the old ones can be washed and left to dry before being packed away.

Does toy rotation make a difference?

My years of experience have given me reason to enthusiastically say “yes!” Have you seen the difference toy rotation makes?

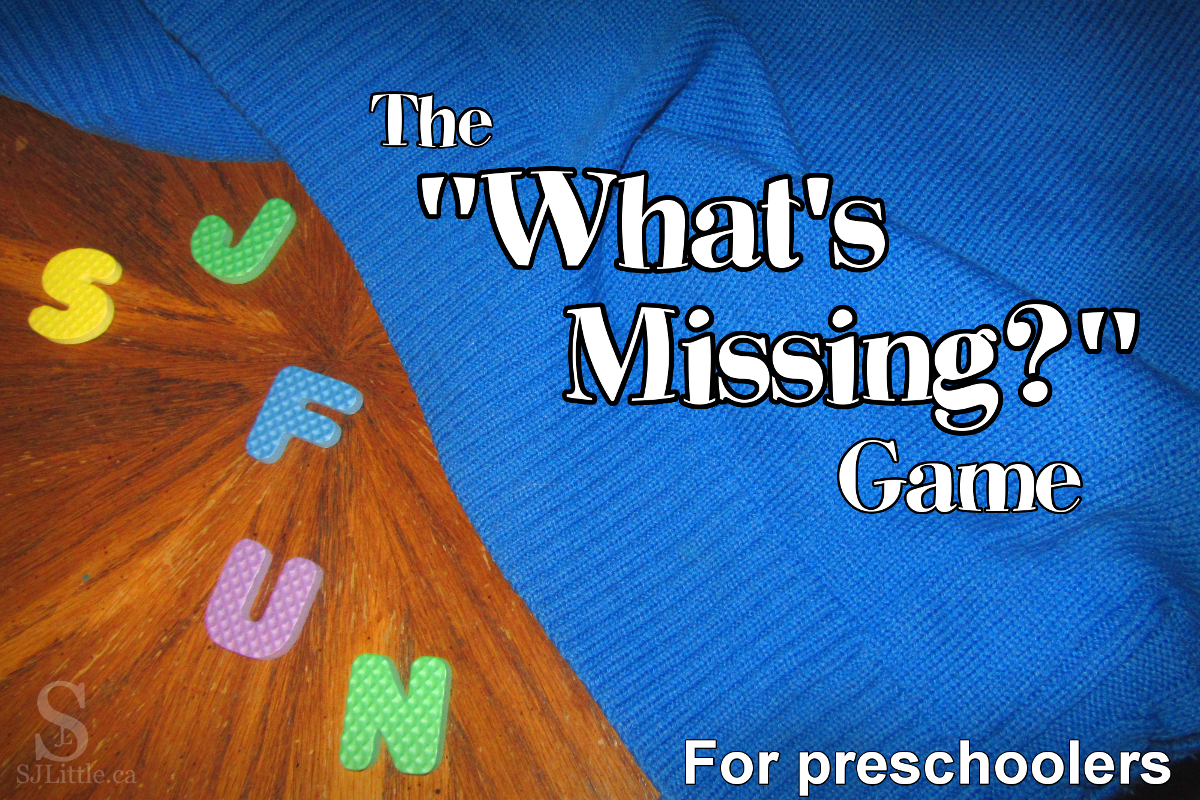
Letters being covered by cloth

This simple game is fantastic for engaging your preschoolers. It makes your children think hard as they try to solve the exciting mystery of what’s missing!

The game itself is extremely basic, yet the modifications and ways of using it to teach specific vocabulary are nearly endless. It can be played with a group of children or just one child.

Why play?

Children love this game! Not only is it fun and interactive, but it also makes your children think hard. Our brains, like our muscles, need exercise and stretching to make them strong. This game provides an excellent brain-stretching exercise for kids, and for adults too. I’ve often been amazed at how quickly my children are able to learn the skills needed to play this game well. You’ll soon find yourself needing to make it harder and harder to keep them challenged.

Not only that, but this game is also a great opportunity to provide a review of the vocabulary your children are learning, whether letter names, or colours, or various zoo animals.

How to play “What’s Missing?”

  1. Collect various unique items.
  2. Show the children the items and review their names.
  3. Cover the items with a blanket to hide them from the children’s sight. While they are hidden, remove one of the items.
  4. Uncover the items and encourage the children to guess what’s missing.
  5. Repeat until all the items have disappeared

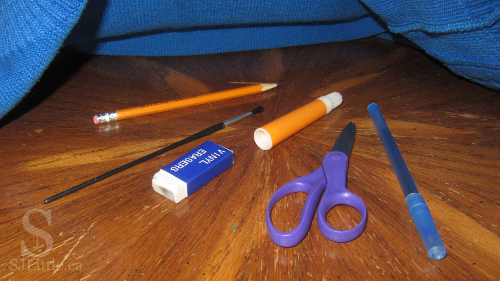
Various office supplies under cloth


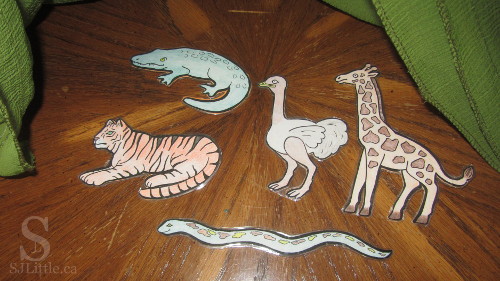
Zoo animal cut outs under cloth


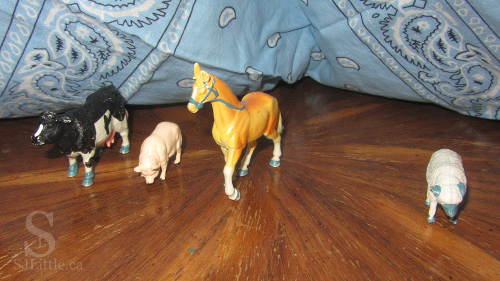
Farm animal toys under bandana


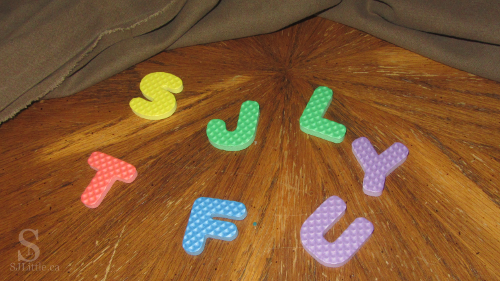
Foam letters under blanket


Tips

Make it engaging:

  • Be excited about figuring out what’s missing. If you’re excited about it, your children will be too.
  • When your children guess right, celebrate with them. When they guess wrong, be encouraging. Learning that it’s okay to make wrong guesses will help them succeed in school and life.
  • Try to play at a level where your children can guess correctly 75% of the time. You want it hard enough that they have to think, but not so hard that they become discouraged and give up.

Which items to choose:

  • You can use just about anything to play this game!
    • Small plastic toys such as farm animals
    • Paper zoo animals that you printed and coloured
    • Random craft/office supplies such as glue stick, pencil, paintbrush, etc.
    • Small cars or construction vehicles
    • Magnetic letters
    • Small blocks of various colours and shapes
  • The more similar the items are to each other the harder the game becomes. Beware that it also becomes far more tricky if the children are unfamiliar with the right words to name the items.

Make it easier:

  • Use fewer items. For a class of two years olds, I often start with only 4 items the first time I play with them. Once they understand the game and are guessing well, I might use more items the next time we play.
  • Use items the children are able to name well. Something like an ostrich is harder for the children to recall that it is missing and to produce the name as a guess.
  • Use items that are very different from each other.
  • When you remove an item, leave its spot empty to help them recall what’s missing.
  • Each time, before covering the items, review the names of the items to help the children memorize them.
  • For younger children, when I get down to one item left, I like to ask them which item they think will disappear. Then I proceed to make the final item disappear.

Make it harder:

  • Start with more items.
  • Use more challenging items, such as the letters of the alphabet or more unusual animals.
  • Use items with fewer differences such as all the items are dolls, but their outfits are different.
  • Remove more than one item per round.
  • After removing an item, rearrange the items before revealing them to the children.

Use it to teach concepts:

    • Each time an item is removed, review the names of the remaining items before covering them again.
    • Choose familiar things for most of the items, but add one or two unfamiliar items. Leave the unfamiliar items until closer to the end so the children get lots of practice saying those names.
    • Choose items that focus on one particular topic. If you want to focus on colours, select items that are identical (or nearly identical) other than their colour. If you want to work on shapes, select items that are nearly identical in colour so that the shape is the most prominent difference.

Play over a video call

Do you have grandkids or nieces and nephews whom you can’t be with in person right now? Try playing this game while having a video call with them. You don’t even need a blanket since you can turn the camera away while you remove an item. Have fun letting them try to guess what’s missing!
I hope you enjoy playing this game with your children! What items did you use?

Looking for another easy, use what you have, activity for your children? Check out: Run Run Run

Title "5 Types of Storytime Seating" on colourful background

Circle time. That point when the entire class gathers around the teacher for songs, stories, and activities.

This can be a tricky part of the day for the teacher, as the children wiggle and get distracted by their friends. Different seating arrangements can help eliminate certain distractions. Also, different seating arrangements work better in different environments and with different budgets. Here are some pros and cons of 5 unique types of storytime seating for preschoolers that I’ve used. 

Note: the images included are for your reference. They do not indicate any partnership with or recommendation for those specific carpets and/or companies. The links are not affiliate links.

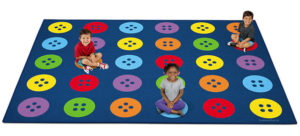
1. Small carpet (with no individual spots)

  • This could be any rug you have around that is big enough for all the children to sit on. I have seen blankets or bamboo mats used as well.
  • Pros:
    • Use what you have, rather than buying a new expensive rug
    • Can fit a large number of children on a smaller space since there aren’t individual spots to sit on
    • Gives the children a defined area to sit during storytime
  • Cons:
    • Beware, rugs with very colourful designs can make it hard to spot toys, thus making clean up difficult and stepping on toys more likely
    • Children may jostle for position and argue since there are no boundaries providing needed personal space
    • Children are likely to crowd into multiple rows causing added distraction
    • Children have a hard time seeing what the teacher is holding since they are not arranged well

2. Carpet with multiple rows of individual seating spots

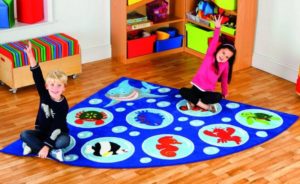
  • These carpets can be square or designed to fit into a corner like a slice of pizza. Often, if all the spots are filled, you will end up with three rows of children directly behind each other.

Preschoolers sitting on corner circletime rug Children sitting on large classroom carpet


  • Pros:
    • Typically specifically designed for school type settings
    • Often high-quality carpets that will last several years
    • Often include an educational element such as shapes, or numbers
    • Children have specified spots to sit on with the goal of having the seating well-spaced – not too close and not too far
    • Multiple sizes designed for different numbers of children are available
  • Cons:
    • Often expensive
    • May be hard to clean
    • Can cause difficulties with children kicking those in the row in front of them
    • Back row of children often are not as attentive to the teacher

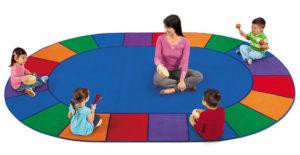
3. Large oval or rectangular rug (with seating spots)

  • These are very standard storytime seating for preschools to have. There are many different designs from letters to woodland animals and more.Children sitting on rug for circletime
  • Pros:
    • No back row of children meaning the teacher can see all the children and the children are not distracted the same way as those with multiple rows
    • Many beautiful designs to choose from, including educational themes
    • Are large enough to accommodate many children
    • Individual spots on the rug for children to sit on
    • Typically specifically designed for school type settings
    • Often high-quality carpets that will last several years
  • Cons:
    • Your classroom must have a large open space to set this rug
    • Difficult to find a place for the teacher to sit where all the children can see (some may be behind another child along the side)
    • Depending on where the teacher sits, some children will be sitting a considerable distance from the teacher making it difficult to see what the teacher is holding, or for the teacher to hear the child talking
    • Most are very heavy if you have to move them
    • Can be difficult to clean
    • Typically expensive

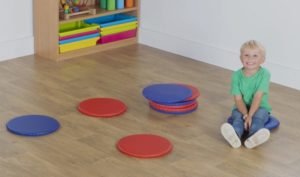
4. Individual story spots or carpets

  • Story spots come in a wide variety of shapes, sizes, and colours. They may be individual sized squares of carpet, or circle shaped cushions. They could even be laminated pieces of paper. The thing that makes them all fit in the same category is that they are one spot per child and that they are movable.Child sitting on story spots
  • Pros:
    • Spots can be rearranged to whatever shape fits your space.
    • Can be stacked on the shelf during playtime allowing more space for toys
    • Might be machine washable
    • You choose how many to use rather than always having 12 spots if you only have 10 children.
  • Cons:
    • Spots are not secured to the floor allowing children to move them around which can be distracting
    • Creates an extra task for the teacher (or children) to set them up and put them away every day
    • If used on hard floor, the spots may be slippery if stepped on
    • Can be expensive

5. Tape

  • Rather than buying a rug, take a roll of masking tape and put it on the floor in a large “u” or semi-circle around the teacher’s chair. The children will sit on the tape. (Alternatively cut pieces of paper and use clear tape to secure them to the floor)
  • Pros:
    • Inexpensive
    • Can be placed in any shape, according to your needs
    • Can adjust length of tape to accommodate any size of class
    • Children do not argue over getting their favourite colour or letter
    • No second row (unless you want to make one)
    • No heavy rug or stack of story spots to deal with
  • Cons:
    • Children may pick at the tape and pull it off
    • Lack of individual spots means the children sometimes sit too close to each other causing irritation
    • Leaving the tape down for several weeks, or during deep cleaning, may leave lines on the floor
    • Tape will need to be replaced from time to time as it wears out or the children pull it off
    • Not ideal on hard floor as it does not protect children from hard surfaces or cold floors

That’s a long list of pros and cons to consider. If you were to ask me which storytime seating for preschoolers I prefer, I would likely say using tape is my preference. However, this, of course, depends on the program and the space available.

What is your preferred storytime seating for preschoolers? Can you think of pros or cons I didn’t include in this post?

Struggling to keep your children engaged at storytime? Here are some helpful ideas:

Ways To Engage Preschoolers With Stories

8 Tips for Keeping Preschoolers Engaged During Circle Time