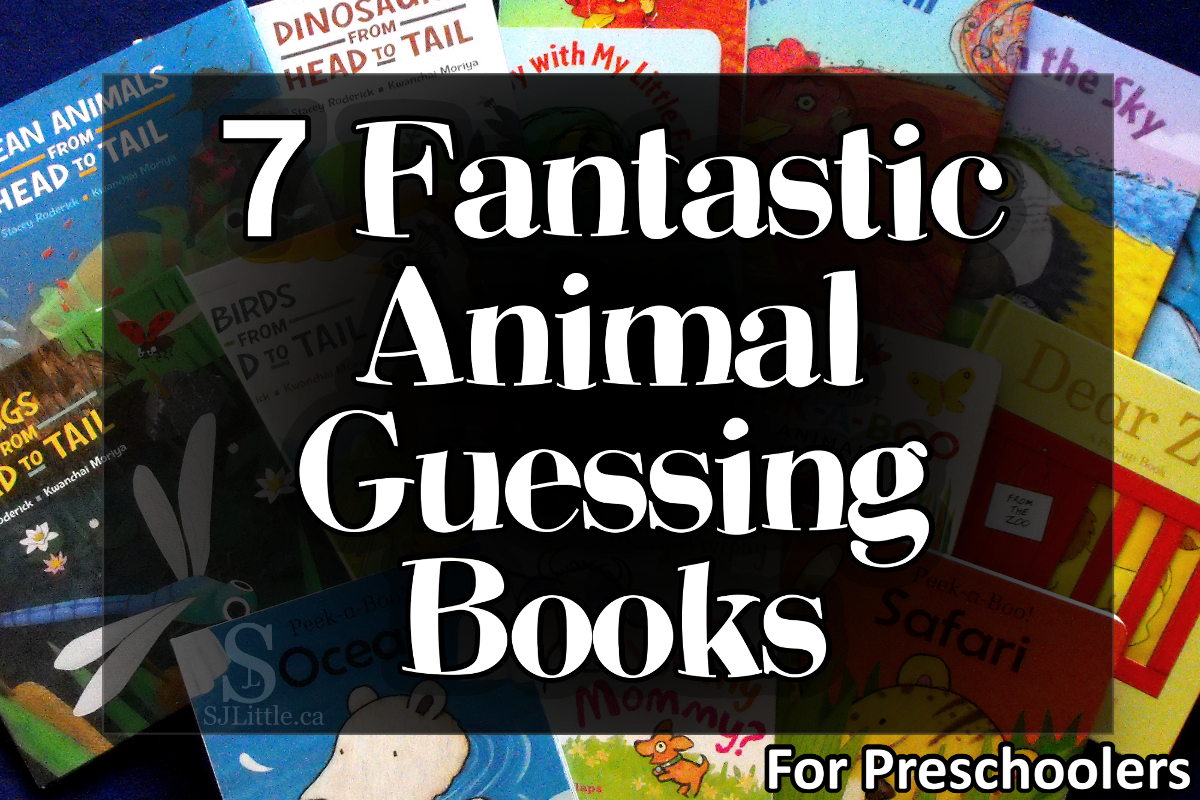
The following are some of my favourite animal picture books that get children interacting at storytime. These guessing books for preschoolers give clues, whether visual or through words, about what animal may be hiding on the next page or under the flap. Especially at the beginning of the school year, I find these books intrigue youngsters who are otherwise unwilling to sit for stories.
1. Are You My Mommy?
(Lift the flap)
Written and Illustrated by Mary Murphy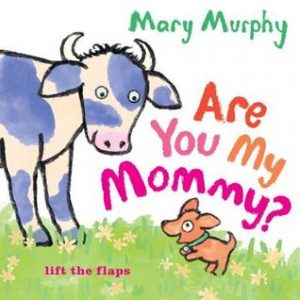
This is currently one of my absolute favourite preschool books. The storyline – a puppy looking for his mommy – is simple enough for my two year old class to follow and enjoy. As the puppy asks each hidden animal if they are his mommy, the children try to guess the animal based on visible clues. My two year olds enjoyed naming each farm animal after I opened the flap, while my three year olds were typically able to guess the animal before I opened it. Now here’s the part that makes this little board book so fantastic. I found that most of my three year olds were well versed in, and becoming bored of, the typical farm animal names: horse, cow, pig… In fact, many of my two year olds knew them all. Mary Murphy doesn’t stop with just the standard farm animals. Instead, under each flap is a baby to go with the mommy. These baby animal names were brand new for my three year olds. They hadn’t heard of ducklings, piglets, and calves before. This kept my advanced students engaged and learning while still providing review of the standard animal names for my children who were newer to learning English.
Reading tips:
- By using identical phrasing on each page you can invite your children to say it with you: “Are you my mommy?” “No, I’m a ___(allow children to name the animal)__, and this is my baby calf.”
- I like to use a different voice for each animal. It helps the children stay attentive.
- Because this book is, to my knowledge, only available as a small board book, some older preschoolers may scoff at it as being for babies. Therefore, how you introduce this book is important. I like to tell the children I need their help naming the animals. Also, because the baby animal names were new to my class, I decided to read it on two days during our farm week. To prepare the children for this, I told them I was going to read the book today, and then a different day I would read it to them again to see if they remembered it. This way I didn’t get any “we already read that” complaints when I pulled the book out the second day.
2. Peek-a-Boo! Ocean
(Lift the flap)
Written and Illustrated by Jess Stockham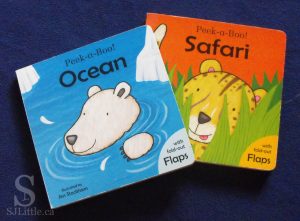
This series of books is right up there among my favourites. They are good-sized board books with only 5 page spreads each. The sad thing about these books, however, is that, to my knowledge, they are no longer in print. Also, since children are often rough on lift the flap books, they are quickly disappearing from my local library.
As a preschool teacher, I find that many children have trouble settling into our circle time routine during the first number of classes. Especially with my two year olds, I find it works best to start with songs for the first few weeks, then slowly transition to adding some books in those times of singing. These Peek-a-Boo books are excellent first books for circle time during that transition. With my two year olds, I might wait a month before beginning to introduce these books and then moving to other books, while for the three year olds I’d start with these books in the first week or two.
What’s so great about these books? Let me tell you. My favourite part is the way Jess Stockham has left little clues visible so the children can try to guess which animal is hiding behind the flap. For example, the children might be able to see the animal’s tail or ear. Another thing I appreciate about this book is how bold and simple the pictures are. On top of that, the flaps are large, nearly as large as the book.
Reading tips:
- When you read the words, such as “Who’s ear is this?” Point to the place where you see the ear peeking out from behind the flap.
- After opening the flap, your children might enjoy it if you tell them something about the animal, such as the sound it makes or where it lives, for example: “The polar bear lives at the North Pole where it is really cold.”
Other titles in this series include:
- Peek-a-Boo! Safari
- Peek-a-Boo! Forest
- Peek-a-Boo! Jungle
3. Do You Want to Be My Friend?
Written and Illustrated by Eric Carle
This nearly wordless picture book is a lot of fun for 3-4 year olds. Each page shows the tail of the animal you will see when you turn the next page. Children enjoy trying to guess which animal each tail belongs to. The book includes a wide variety of animals some of which my three year olds were not familiar with. The variety of animals would fit well with a zoo theme. When I tried this book with my two year olds, it seemed too long and the animals and their tails too tricky for guessing. Therefore, I’d recommend this one for 3-4 year olds.
Reading tips:
- Only two of the pages have words on them. I typically end up repeating the same phrase on every page: “Do you want to be my friend?”
- Wait a moment before turning the page and encourage the children to guess.
4. My First Peek-a-boo Animals
(Lift the flap)
Written and Illustrated by Eric Carle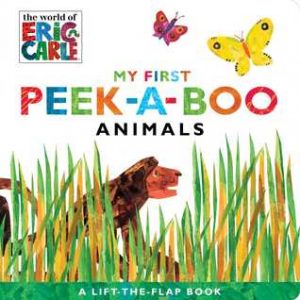
This short book is unique. Each page has a four line poem giving clues to what animal might be hiding behind the flaps. The large flaps do not cover the entire animal leaving toes, tails, and maybe a nose sticking out. 2-4 year olds can enjoy this book, however, I would say that my two year olds were not able to guess based on the poems. Also, as a teacher at a preschool that uses typical themes, I find it hard to know which theme to use this book in. It has a random combobulation of animals from a lion, to a horse, to a butterfly, to a turtle, to an elephant and more. Still, regardless of what theme you put it under, this is an engaging book for preschoolers.
Reading tips:
- Based on the age and development level of your children decide whether or not to read the poems. If you wanted, you could encourage the children to guess simply based on the visual clues sticking out from under the flap and read the poem after you’ve revealed the animal.
5. Dear Zoo
(Lift the flap or pop-up version)
Written and Illustrated by Rod Campbell
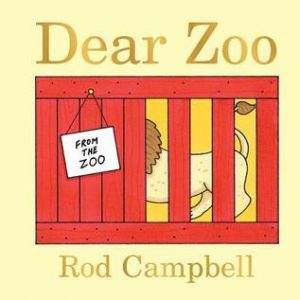
The simple repetitive words and basic storyline of this classic book make it excellent for youngsters. Only a couple of the pages have visual clues as to what animal is hiding making them hard to guess. Each animal has a description word, such as big, fierce, scary, jumpy, etc. These words could be used as clues to encourage guessing. They also enhance the learning side of this book as the children may not be familiar with some of the description words.
Reading Tips:
- I highly recommend the pop-up version rather than the lift-the-flap as the pop-ups add tremendously to the excitement and engagement factor. However, note that the pop-up version is more likely to rip if left unsupervised in little hands.
- One small group of 3-4 year olds I read this book to, enjoyed it so much that we read it several times in the first sitting. By the third or fourth time through, the children had memorized most of the animals and description words. They loved being able to fill in the words rather than hearing me read it.
6. Bugs From Head to Tail
Written by Stacey Roderick
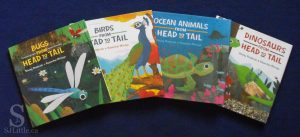
Illustrated by Kwanchai Moriya
I highly recommend the Bugs and Ocean Animals books of this fairly recent series. Both books have a wide variety of animals some of which are familiar to most preschoolers and some of which will be new to them. While these books do not have flaps to lift, the pages have been cleverly designed so that on one page you see a part of an animal as a clue, such as their feet or tail, etc. Then you turn the page to find out what animal it is.
While I really enjoy the Bird book, most of the birds are far too specific for 2-3 year olds, unless the children have a specific interest in knowing unique animal names.
Reading Tips:
- On the page that reveals which animal it is, the animal name is given as well as a lengthy blurb about that animal. The details in the blurb are targeted for a much older age group, therefore I entirely skip them. (Also, the dinosaur book’s blurbs are primarily based on speculations about the dinosaurs’ behaviours, not known facts, so I don’t read them.)
Other titles in this series include:
- Dinosaurs From Head to Tail
- Birds From Head to Tail
- Ocean Animals From Head to Tail
7. I Spy Under the Sea
Written and Illustrated by Edward Gibbs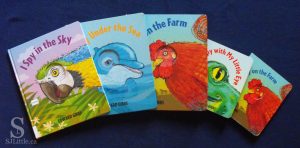
I was surprised how much my wiggly three year old class enjoyed this book! First, we look through a spy hole to see what’s on the next page. I read the clues, such as “my arms are called tentacles.” Then the children try to guess what animal it might be before I turn the page. My class guessed some of the animals easily while others they’d never heard of which kept the book from being boring for my more advanced children. While the artsy illustration style is not my favourite, my class had no problem with it.
To my knowledge, this series is available as hardback and board book.
Reading Tips:
- Encourage the children to try guessing even if they’ve never heard of the animal. Be sure your response to their guesses is encouraging. Especially with the quieter children, when they gather the courage to voice a guess, be careful not to turn them off by laughing at their guess.
- Read the book ahead of time so that you know what’s coming. That way you can provide extra clues. For example, when I read the Under the Sea book to my class, we’d seen clownfish on our field trip the week before which I was able to use as an added clue.
Other titles in this series include: (Each focuses on various preschool topics as listed below.)
- I Spy With My Little Eye (colours and clues)
- I Spy Under the Sea (clues and numbers)
- I Spy Pets (food and clues)
- I Spy in the Sky (colours, big/small describers, and clues)
- I Spy on the Farm (colours, first letters, and animal sounds)
Interested in learning other ways to capture your young audience at storytime? Skim through these creative tips and ideas: Ways To Engage Preschoolers With Stories
 children home? Ever had someone complain because your children used chalk where someone else didn’t want it? I have.
 Supplies Needed:
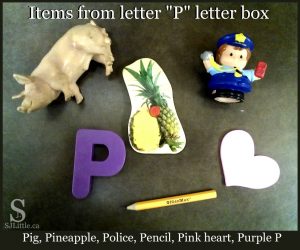
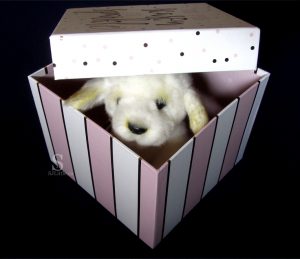 Prior to class, find an item starting with the letter of the week. Place that item in a box as the mystery item. Show the children the box telling them that something is hiding inside it. Inform them that the item starts with the letter of the week. Review with them what sound the letter makes.
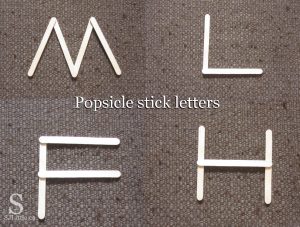 Then hand out enough popsicle sticks to every child. (You could make this a game by handing too many or too few sticks to some of the children and having them count to tell you if they have the wrong number.)