Toys laying abandoned.

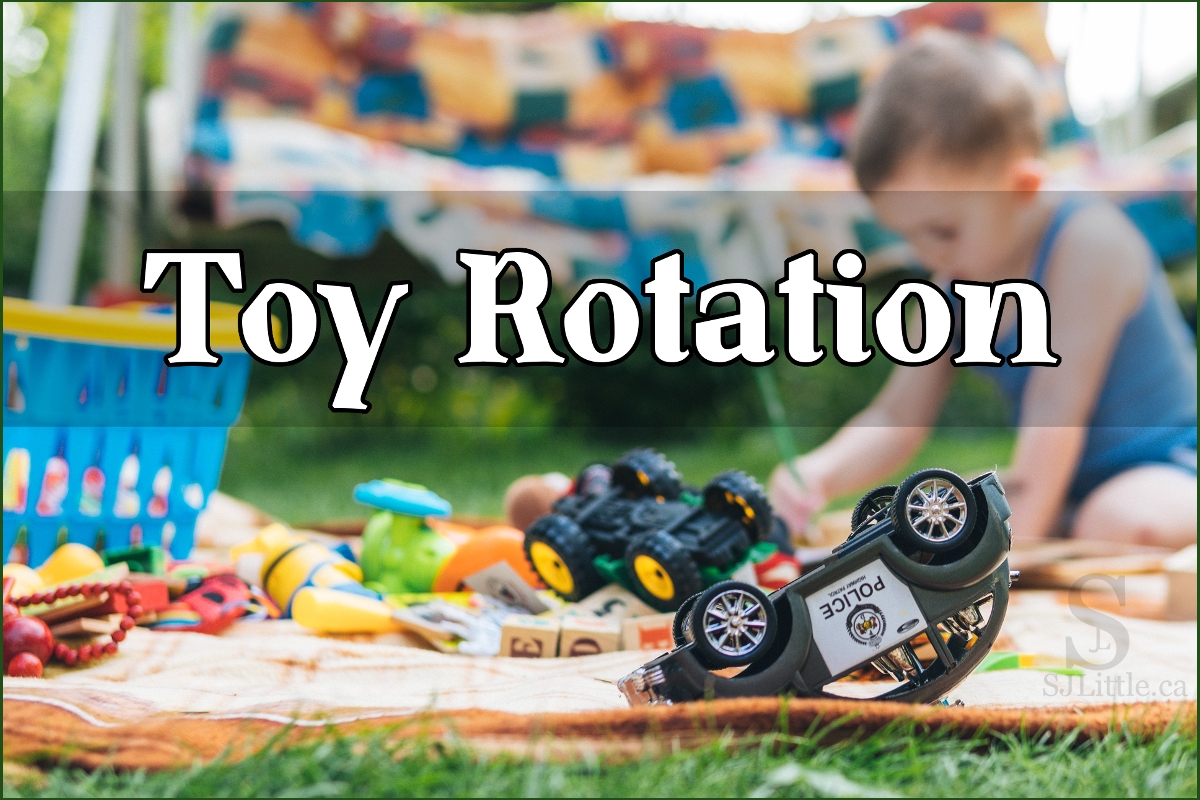
Are your kids bored of their toys? Are they disengaged and uninterested? Try rotating their toys.

Toy rotation is highly beneficial in preschools, daycares, day homes and even in everyday family life.

Benefits of toy rotation

  • After a toy is packed away for a length of time, children become excited to play with it again because they haven’t seen it for so long.Child surrounded by toys
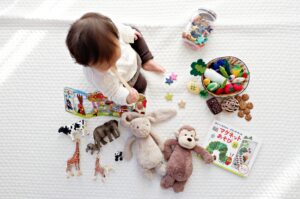
  • Putting away some toys for rotation may leave your child with less toys to play with. Believe it or not, this can lead to deeper engagement with the few toys that are available. With too many toys a child may bounce from one toy to another, rather than fully playing with any one toy. Sometimes less is truly more.
  • Having fewer toys available also shrinks the amount of mess a child can make with their toys at any given time.

How long should toys be available?

The answer depends greatly on your child, your child’s age, and the toy itself. Because the recommended length of time is so situationally dependent, watch how engaged your child is. When they show signs of being less engaged, it’s time to rotate. Be aware, leaving toys out, until your child is bored, may significantly decrease their excitement at seeing those toys again later. Therefore, try to do the rotating on a high note so they will associate good memories with the toys for next time.

Older children, such as elementary aged children, may be able to regulate the rotating themselves. Store all their toys on a shelf. Allow them to get out and play with only one or two types of toys at a time – perhaps the cars and the blocks. When the elementary aged children realize they are getting tired of the toy, they will ask to get out a different type of toy. Have them first clean up and put away the toy they are tired of, then they may get out the next toy. In this way, they can take some responsibility for rotating their own toys.

What about at preschools and daycares, etc?Child playing with wooden blocks

I have been a part of preschools and daycares who rotated their toys once a week, every other week, once a month, or never. Where the toys were never rotated, the children were extremely bored. They engaged in very little meaningful play and often misbehaved.

I personally would recommend rotating the toys every week or two. Some toys, such as large wooden blocks, may not need rotating as often, while other toys, such as puzzles, may only engage each child for one sitting and therefore benefit from frequent rotation.

Toy rotation in preschool and daycare settings comes with the benefit of providing a good toy washing routine. Every time new toys are set out, the old ones can be washed and left to dry before being packed away.

Does toy rotation make a difference?

My years of experience have given me reason to enthusiastically say “yes!” Have you seen the difference toy rotation makes?

Blue carpet with title

One morning, not so long ago, I spent some time praying before my day got started.

As is my habit, I brought before the Lord my family and friends and those whom I know have heavy burdens just now.

I glanced at the clock, it was time to get moving. I had things to do and breakfast to eat.

To close my time of prayer, I took a moment to kneel as I asked Him to be Lord of my day.

It was at that moment, as I knelt, that I saw them.Bugs on a carpet

First, I saw one little red-ish speck on the carpet, then I saw another. Leaning closer I realized they were bugs.

To my dismay, one careful survey of the surrounding area revealed several more bugs of the same type.

They weren’t fast bugs, nor terribly scary ones. It had surely taken them quite some time to get to where they were now. They looked almost like mini caterpillars, so small that, had I been standing, I likely wouldn’t have noticed them.

If there were so many of these bugs scattered across the floor, then naturally I had to assume there was a source of food nearby. Clearly they must have a well-fed flourishing colony.

I surveyed the carpet again. The scattering of bugs appeared to radiate from one particular cabinet.

Bugs on a rug

Immediately I could guess their food source. That cabinet had previously spent many years as the cat food place. While we had a dog, it was necessary to place the cat food on top of this cabinet to keep the dog from eating it.

My cats, unfortunately, were rather messy eaters. When they ate dry cat food, they always left large amounts outside the bowl. Despite our greatest efforts, some of that cat food fell down the back of the cabinet.

There was little doubt in my mind that it was that old spilled cat food that nourished these little bugs. To them, it was a feast allowing them to multiply. To me, it was an old unreachable space that had not fully been cleaned out.

Later that day, the effort was made to move this heavy cabinet so as to reveal the hidden and unreachable places behind it.

After a thorough vacuuming and cleaning, the spot was declared good and the heavy cabinet put back in place.

So what? Why do I share this morning’s adventure? Because it got me thinking.

Do I have hidden and unreachable places in my life that need to be revealed and cleaned?

It is a convicting question. I can recall times in the past when God has brought to light things I hadn’t dealt with, which in turn had begun feeding bugs. Things that I didn’t realize or remember were there until I started seeing bugs and, with God’s help, found the source – a process which sometimes took months or years.

No matter how many bugs I got rid of, if I never found the source – the thing that was feeding them – I would forever find more bugs.

The cabinet in my house behind which the old cat food lay was heavy and hard to move. When I trace the bugs in my life to their source, I may find something similar. The source may be blocked by something I can’t move myself. Often only God can clean and heal those areas.

How then, am I to notice these bugs in my life?

More often than not, it must be God who enables me to spot the bugs in my life.

I believe it is primarily when I walk closely with the Lord with a humble heart that He reveals these bugs to me and guides me to their sources.

When did I spot the bugs in my house? When I knelt to pray.

Had I walked through the same room remaining on my feet and busy going about my day, I would never have noticed them.

I believe there is a lesson there for me. Yes, I need this reminder.

More often than not, it is when I take time to pray that God reveals to me the bugs that must be dealt with in my life.

May I more often join David in praying:

“Search me, God, and know my heart; test me and know my concerns. See if there is any offensive way in me; lead me in the everlasting way.” (Psalm 139:23-24 CSB)

Indeed, “may the words of my mouth and the meditation of my heart be acceptable to You, Lord, my rock and my Redeemer.” (Psalm 19:14 CSB)

Letters being covered by cloth

This simple game is fantastic for engaging your preschoolers. It makes your children think hard as they try to solve the exciting mystery of what’s missing!

The game itself is extremely basic, yet the modifications and ways of using it to teach specific vocabulary are nearly endless. It can be played with a group of children or just one child.

Why play?

Children love this game! Not only is it fun and interactive, but it also makes your children think hard. Our brains, like our muscles, need exercise and stretching to make them strong. This game provides an excellent brain-stretching exercise for kids, and for adults too. I’ve often been amazed at how quickly my children are able to learn the skills needed to play this game well. You’ll soon find yourself needing to make it harder and harder to keep them challenged.

Not only that, but this game is also a great opportunity to provide a review of the vocabulary your children are learning, whether letter names, or colours, or various zoo animals.

How to play “What’s Missing?”

  1. Collect various unique items.
  2. Show the children the items and review their names.
  3. Cover the items with a blanket to hide them from the children’s sight. While they are hidden, remove one of the items.
  4. Uncover the items and encourage the children to guess what’s missing.
  5. Repeat until all the items have disappeared

Various office supplies under cloth


Zoo animal cut outs under cloth


Farm animal toys under bandana


Foam letters under blanket


Tips

Make it engaging:

  • Be excited about figuring out what’s missing. If you’re excited about it, your children will be too.
  • When your children guess right, celebrate with them. When they guess wrong, be encouraging. Learning that it’s okay to make wrong guesses will help them succeed in school and life.
  • Try to play at a level where your children can guess correctly 75% of the time. You want it hard enough that they have to think, but not so hard that they become discouraged and give up.

Which items to choose:

  • You can use just about anything to play this game!
    • Small plastic toys such as farm animals
    • Paper zoo animals that you printed and coloured
    • Random craft/office supplies such as glue stick, pencil, paintbrush, etc.
    • Small cars or construction vehicles
    • Magnetic letters
    • Small blocks of various colours and shapes
  • The more similar the items are to each other the harder the game becomes. Beware that it also becomes far more tricky if the children are unfamiliar with the right words to name the items.

Make it easier:

  • Use fewer items. For a class of two years olds, I often start with only 4 items the first time I play with them. Once they understand the game and are guessing well, I might use more items the next time we play.
  • Use items the children are able to name well. Something like an ostrich is harder for the children to recall that it is missing and to produce the name as a guess.
  • Use items that are very different from each other.
  • When you remove an item, leave its spot empty to help them recall what’s missing.
  • Each time, before covering the items, review the names of the items to help the children memorize them.
  • For younger children, when I get down to one item left, I like to ask them which item they think will disappear. Then I proceed to make the final item disappear.

Make it harder:

  • Start with more items.
  • Use more challenging items, such as the letters of the alphabet or more unusual animals.
  • Use items with fewer differences such as all the items are dolls, but their outfits are different.
  • Remove more than one item per round.
  • After removing an item, rearrange the items before revealing them to the children.

Use it to teach concepts:

    • Each time an item is removed, review the names of the remaining items before covering them again.
    • Choose familiar things for most of the items, but add one or two unfamiliar items. Leave the unfamiliar items until closer to the end so the children get lots of practice saying those names.
    • Choose items that focus on one particular topic. If you want to focus on colours, select items that are identical (or nearly identical) other than their colour. If you want to work on shapes, select items that are nearly identical in colour so that the shape is the most prominent difference.

Play over a video call

Do you have grandkids or nieces and nephews whom you can’t be with in person right now? Try playing this game while having a video call with them. You don’t even need a blanket since you can turn the camera away while you remove an item. Have fun letting them try to guess what’s missing!
I hope you enjoy playing this game with your children! What items did you use?

Looking for another easy, use what you have, activity for your children? Check out: Run Run Run

Road disappearing into dark night

Not long ago, I was driving through the Canadian prairies where the world seemed to stretch out forever, with only the occasional farmhouse to break the endless fields.

It was night, and the highway had no street lights to guide me. Beyond what my headlights illuminated, I had no idea where the road led as it wound through the darkness.

The road had many long straight stretches, then suddenly it would turn.

I glanced in my rearview mirror – pure blackness. There was no one in sight behind me.

Not too far in front, the taillights of a truck guided me onward. I appreciated his presence.

His lights showed me when the road ahead turned to the right or left. His continued progress reassured me that there was good paved road for me to drive on. The journey felt less lonely knowing that someone else was driving the same route.

Gradually, however, the truck increased the distance between us. Being on the flat open prairies, I could still see his lights, but he was a long way in front of me now.

From time to time, as I watched his lights so far ahead of me, I was surprised to see him turn sharply in the darkness. In such vast prairie, shouldn’t the road continue straight? But, no. When I finally reached the place where he’d turned, I found that the road did indeed turn.

I was sad when the truck finally outdistanced me so far that I could no longer see his lights. I felt more alone and the road was far more unknown.Left turn road sign

As I continued along, I quickly became grateful for the road signs warning of upcoming turns. Without those bright signs reflecting the beam of my headlights, driving at such speed would have been dangerous. I don’t know if I would’ve spotted the turns soon enough to steer safely around them. They would have come so unexpectedly that I would have continued straight off the road and into the nearest field.

Eventually, as I drove along, I glanced in the rearview mirror again. This time I spotted headlights! No longer was I the only one driving that way. Now it was my turn to be the one venturing into the empty darkness to show the vehicle behind me where the road led. 

What can I learn from these observations, I wondered. Is there a life lesson for me here?

Yes, I believe there is.

More often than not, as I go about my life, I do not know where or when the road is going to turn. I can see no further ahead than the few meters my headlights show me.

Thankfully, in such times, God provides guidance. He has said, “I will instruct you and teach you in the way you should go; I will guide you with My eye.” (Psalm 32:8 NKJV)

One of the ways He guides, is by planting road signs along the way. Those road signs reflect especially brightly when I have my headlights on, or rather, when I am being intentional to stay in the Bible and prayer. 

Sometimes those signs are black and white in clarity, screaming, “turn now or you’ll end up a wreck!”

At other times, those signs are harder to understand. “What is the best way to love God in this situation?”

Thankfully, there are many times when God brings someone into my life who has gone ahead. Someone who is further along on the path I am currently driving and whose example, or taillights, helps me know when and where to turn. 

Paul understood that God brings people into my life to help guide me. He said, “Follow my example, as I follow the example of Christ.” (1 Corinthians 11:1 NIV)

Having said that, I must be careful who’s example I follow. It is possible that someone may ignore the signs and veer off the road, continuing straight through the fields. Or perhaps they might turn left when I need to take a right to get to my desired destination.

Ultimately, it is Jesus’ example I must be led by. As Hebrews says, “let us run with perseverance the race marked out for us, fixing our eyes on Jesus…” (Heb. 12:1b-2a NIV) 

Through all life’s twists and turns, He guides me. He will never leave me.

Praise the Lord that He has gone before me, and that He sends people and warning signs to help guide me along the way!

Boy running with guitar

Last July, I posted 7 Simple Christian Songs for Preschoolers. So many people enjoyed those songs that I decided to follow it up with this post.Girl with hat smiling

If you haven’t visited my first Christian Songs for Preschoolers post, I would encourage you to check it out here. In that post, I talked about the value of these songs and useful ways to sing them.

For now, I will suffice to say that these songs have been chosen because they are easy to sing (no need for a CD player or music major), and they teach valuable truths about God. In fact, singing these Christian songs not only teaches children these truths, but they provide me with much needed reminders too. Enjoy!


Please note: The sample videos I have included were chosen for the clarity of the song and actions. I am not associated with any of them and have not done extensive research into the groups who posted them. Also, while I tried to find videos similar to how I prefer to sing these songs, some actions and/or words may vary from the versions I have recommended for you.

1. Our God is an Awesome God

You may already know this song, as it is the chorus of a much longer song by the same name. It is essential that we remind ourselves that our God is truly an awesome God, especially now as I write this during a pandemic! This song could be sung several times in a row getting a little faster each time.


Our God is an awesome God,

He reigns from heaven above,

With wisdom, power, and love,

Our God is an awesome God.

Actions:

God – point up

Awesome – thumbs up

Reigns – wiggle fingers like rain coming down

Heaven – point up

Wisdom – point to mind

Power – show muscles

Love – hug self

2. Oh Be Careful Little Eyes What You SeeLittle boy doing actions

With internet access so readily available, let’s start teaching our children, when they are young, the wisdom of being careful of what we expose ourselves to. I appreciate how this song reminds us that it is out of love for us that God asks us to be careful. He knows it is for our good. Depending on the age of your children, you can do simple actions by only pointing to the body part named, or you can point to the body part and then do the second action for the last part of the line.


Oh, be careful little eyes what you see.

Oh, be careful little eyes what you see.

For the Father up above is looking down in love,

So be careful little eyes what you see.


Other Verses:

  • Ears what you hear
  • Hands what you do
  • Feet where you go
  • Mouth what you say
  • Heart whom you trust
  • Mind what you think

Actions:

Eyes, ears, etc. – point to body part

See – hold hand over eyes as though looking far away

Hear – cup hands behind ears

Do – move hands around, perhaps pretend to build something

Go – walk in place

Say – cup hands around mouth, as though yelling

Trust – open hands flat in front of self, as though giving or receiving a gift

Think – tap chin, as though pondering something

3. God is so Good

A classic song, this one is so gentle and sweet to sing. This might be a good song for just before bed or some other slower part of the day.


God is so good,

God is so good,

God is so good,

He’s so good to me.


Other Verses:

God cares for me…

God died for me…

God loves me so…

God answers prayer…

I praise His name…

Actions:

God/He/His – point up

So good – move arms in large circle, starting at top and moving down

Me/I – point to self

Cares – hug self

Loves – cross arms over heart and rock side to side

Prayer – clasp hands in prayer

4. Ho-Ho-Ho-Hosanna

I once was in a choir that used this song as a warm-up during practices. Its repetitive rhythm makes it fun to sing, while its words make it a valuable reminder. Let us never forget the joy of what Jesus did for us!


Ho, ho, ho, hosanna,

Ha, ha, hallelujah,

He, He, He, He saved me,

I’ve got the joy of the Lord!

Actions:

Ho/hosanna – cup hands around mouth

Ha/hallelujah – put hands on tummy and lean back as though laughing

He/Lord – point up

Me – hug self

5. Jesus Loves Me

Chances are, you sang this song as a child. While it is a little more complicated than some of the others in this list, the truths it reminds us of are worth it. Also, don’t limit it to being a child’s song. I know I often need the reminders it offers.


Jesus loves me this I know,

For the Bible tells me so,

Little ones to Him belong,

They are weak but He is strong.

Yes, Jesus loves me.

Yes, Jesus loves me.

Yes, Jesus loves me,

The Bible tells me so.

Actions:

Jesus – (for younger children) point up

          – (for older children) sign language for Jesus – touch middle finger from one hand to palm of other hand and vice versa 

Loves – hug self

Me – point to self

Know – point to brain

Bible – hold hands like book and open

Little ones –  pretend to pat young children on the head

Him/He – point up

Weak – slump and hang arms limply

Strong – show muscles

Yes – sign language for yes – make fist and move it up and down

6. I Say L (L-O-V-E)

This song will be better for children who are starting to grasp the concept that letters can be put together to form words. The actions are complicated to learn, but your more advanced preschoolers will enjoy the challenge. Also, this song has three sets of actions. You can choose to use one or all three depending on your children and goals. There are the full-body actions which are great for getting wiggles out. Then there are also the finger actions and the hand actions which can be done sitting. Some children will find the finger actions more challenging, if they have not yet developed strong fine motor muscles and hand-eye coordination.


I say L

I say L-O

L-O-V

L-O-V-E

Everybody needs God’s love,

Everybody needs God’s love,

Everybody needs God’s love,

Everybody needs God’s love.

Actions:

Rather than repeating the L-O-V-E actions after singing “Everybody needs God’s love,” I recommend having the children give themselves a hug. You can also hold “love” rather than making the “ch” sounds portrayed in the video.

This song has three sets of actions: full-body, hand, and finger

Full-body actions:

L – hold right arm up and left arm horizontal

O – connect hands above head, creating circle

V – extend both arms above head at angles

E – use one arm as top of E and the other arm as middle of E, then lift leg to create bottom of E


Hand actions: (using both hands)

L – with wrists touching, hold right hand straight up and left hand horizontal

O – with wrists touching, cup hands to make circle

V – with wrists touching, hold hands vertically forming a V

E – keep hands connected as they are for V, but turn horizontal. Curl fingers slightly for top and bottom of E and connect thumbs for middle of E


Finger actions: (using one hand only)

L – use pointer finger and thumb to make L

O – connect fingers and thumb to make circle

V – make peace sign

E – fully extend thumb, pointer finger and middle finger while tilting so that the thumb is on the bottom

7. Isn’t He Wonderful

Yet another well-loved classic, this catchy tune will stick in your head. Try singing it quiet or loud, while matching the size of your actions to the volume of your voice.


Isn’t He wonderful, wonderful, wonderful,

Isn’t Jesus my Lord wonderful.

Eyes have seen, ears have heard,

It’s recorded in God’s Word.

Isn’t Jesus my Lord wonderful.

Actions:

He/Jesus my Lord – point up (or clap rhythm as in video)

Wonderful – move arms in large circle starting in middle

Eyes – point to eyes

Ears – point to ears

God’s Word – hold hands as book and open

I hope you enjoyed these additional Christian songs for preschoolers!