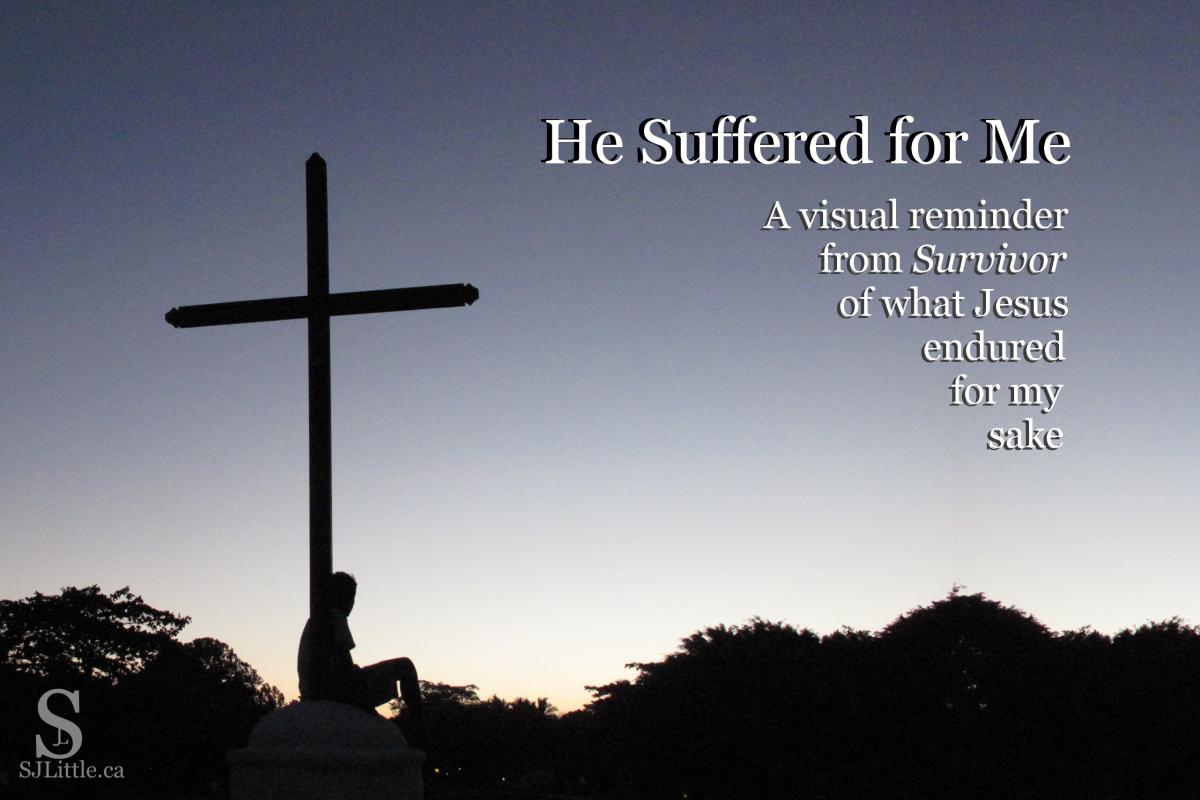
He Suffered for Me written on shadow of a cross


It’s the week of Easter. The time to celebrate Jesus’ gruesome death on the cross for us, and His resurrection back to life.

It’s a time to slow down and reflect. A time to remember the very core of our Christian faith. The very event without which all of Christianity would be a waste of time.

Yet sometimes I find myself so caught up with the busyness of life that I struggle to reconnect with the significance of Easter. I’ve heard this story time and time again since childhood. It is incredibly easy to skim by it and hurry on to some more recent excitement.

Jesus died for me – great! I know that, now what?

Not so fast.

Last November, I was reminded just how much Jesus endured for my sake, while watching the TV show Survivor. I couldn’t help but see the comparison. While what the contestants endured doesn’t come close to the pain Jesus felt, it gave me a visual that renewed my awe of Jesus’ sacrifice for me.

Survivor: Season 37, Episode 10

It was a hot sunny day. The contestants prepared for a competition to win immunity, that is, a guarantee that they would not be voted off the show that evening.

The competition was explained. Each contestant would stand on a tiny perch attached to a pole, and hold handles above their shoulders – to me this resembled the shape of the cross. Anyone who let go was eliminated from the competition.

However, before the competition began, the host tempted the contestants to opt out of the competition in exchange for food – incredibly tempting to those who’ve been surviving on rice and whatever else they can scrounge up.

Praise the Lord that He didn’t give in to the temptation to say no to the suffering of the cross! He could so easily have refused to go, but, for my sake, He endured it.

Links to scenes from the competition on Youtube:

4th Individual Immunity Challenge Part 1

https://www.youtube.com/watch?v=nIZUlkuWqoM

4th Individual Immunity Challenge Part 2

https://www.youtube.com/watch?v=HM6sFV_4jGI

Please note, I do not support everything portrayed in this reality TV show. Viewer discretion recommended.

A few of the contestants took the food offered, the rest got into position.

The first contestant only held on for a few minutes. Others for half an hour, their faces twisting in discomfort. They fought to endure long enough to win the prize.

On and on the competition went. Some contestants constantly shifted, hoping to relieve the pain. Others stood stock still, focusing on staying up. Some groaned and moaned. One or two, upon letting go, sank to the ground for a time before standing up to move to the side where they watched the others compete.

Finally, only two remained. One tried to convince the other to let him win, but neither would give up, despite being so utterly exhausted. At last, after 5 and a half hours of painful enduring, only one man was left standing. He was named the victor and received the reward.

Watching this competition, my mind recalled Jesus’ suffering. Not only did He endure a similar position for hours, but He was whipped nearly to death first. He was stripped naked and openly mocked. He was spat on and had a crown of thorns pressed into his skull. On top of all that, He endured the wrath due me for my sins.

He endured all that for me.

He could so easily have given up!

When Judas betrayed Jesus in the Garden of Gethsemane and one of Jesus’ disciples tried to fight back, Jesus said:

“Put your sword back in its place… Do you think I cannot call on My Father, and He will at once put at My disposal more than twelve legions of angels? But how then would the Scriptures be fulfilled that say it must happen in this way?”  Mat. 26:52-54 NIV

Jesus chose to endure suffering beyond what I can comprehend. Why? Because He loves me.

What a wonderful Saviour we serve.

Happy Easter – He is risen indeed!
Teaching ABCs by S. J. Little with picture of alphabet puzzle

With spring comes wiggly children. Keeping the attention of a class full of preschoolers this time of year is challenging. Sometimes changing up your methods for teaching the ABCs can regain their enthusiasm for learning letters.

Below I have collected 9 unique techniques for teaching the ABCs at circle time.

For more tips, check out my article: 8 Tips for Keeping Preschoolers Engaged During Circle Time

  1. Letter posters

Many teachers use a set of posters with one poster per letter. Typically these include the letter and pictures of one or more items starting with that letter. Each week the poster for the letter of that week will be displayed. Then during circle time the teacher points to the poster and asks the children if anyone knows what letter it is and what the objects are.

  1. Singing

Many songs exist for helping children learn about letters. One that I’ve used is:

Letter “A” Says a
Tune: Farmer in the Dell


Letter “A” says a,

Letter “A” says a,

Every letter makes a sound,

Letter “A” says a.

If you use the same song every week the children will be able to focus on the letter and sound rather than the tune of the song, however, changing it up may keep their attention better.

  1. Air tracing

For children who learn best through large body movements, this technique is wonderful. As you tell the class the letter, use your whole arm to trace the letter in the air in front of you. Encourage the children to copy you. You could also have them trace it in the ground with their finger (or foot). Alternatively, have them shape their whole body into the letter. For example, for letter t they can stand straight with their arms perpendicular to their sides. Get creative and have some fun.

  1. Letter box

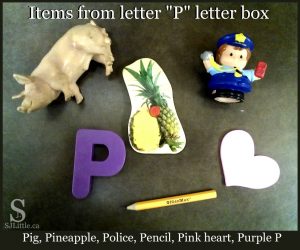
Items to put in a letter box for letter "P" - pig, police, pencil, pineapple, pink heart, purple P

Prior to class fill a small box with four or five items beginning with the letter of the week. Look through your toy bins, puzzles and playdough cookie cutters. I also like to include the letter itself whether on a puzzle piece, or block, or magnet.

At circle time, I show the children the box and have them chant with me while tapping the beat:

Open up the box

Open up the box

Open, open, open, open

Open up the box.

I then bring out one item at a time, asking if they know what each is and discussing how each relates to the letter. This adds excitement and mystery to learning about the letter.

  1. Mystery item

A little different from the letter box, this activity works best when at least a handful of children in the class already have a good sense of the alphabet.

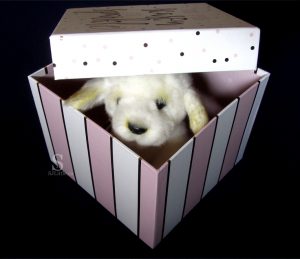
Toy dog peeking out of boxPrior to class, find an item starting with the letter of the week. Place that item in a box as the mystery item. Show the children the box telling them that something is hiding inside it. Inform them that the item starts with the letter of the week. Review with them what sound the letter makes.
Ask the children to guess what item may be inside the box. Be gentle and encouraging with those who guess items starting with the wrong sound, otherwise, they may not be willing to guess next time. For any guesses that are the right sound, you could answer, “maybe…” Then ask for a few more guesses before revealing the item.

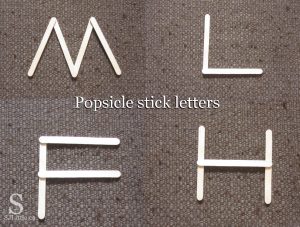
  1. Popsicle stick letters

This is another good one for hands-on learners, however, this technique only works with certain letters.

When the letter of the week is one with no curves, you could try this technique. Prior to class, determine how many popsicle sticks you will need to make the letter. Also, ensure you have enough for every child to make their own letter.

At circle time, use the sticks to show the children how to make the letter.Popsicle sticks can be used to form letters Then hand out enough popsicle sticks to every child. (You could make this a game by handing too many or too few sticks to some of the children and having them count to tell you if they have the wrong number.)


Once every child has the correct number of sticks, show them again how to form the letter by placing the popsicle sticks on the ground in the correct shape.

Be encouraging as this is very tricky for children the first few times they do it. You may have to show several of them one on one. You could also encourage more advanced children to help those who are struggling. Once you’ve done this a few times the children will catch on better.

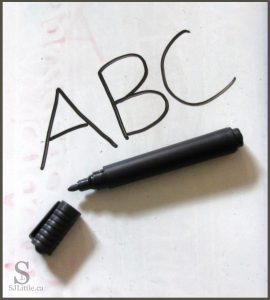
  1. Draw on a whiteboard/chalkboard

Another hands-on way to learn letters and develop writing skills is to have each child write the letter at circle time. This can be done one at a time or all at once depending on the materials available to you.

One at a time:

On the bulletin board, securely attach a larger writing surface whether a chalkboard, whiteboard, or large laminated poster to be used as a whiteboard.

One at a time, invite each child to come up and try writing the letter of the week on the board. Be sure to write it first so they have something to copy. Be encouraging as not only are they being courageous to try writing the letter, they are also practicing being comfortable in front of a crowd which does not come easily for some children.The letters ABC written on a whiteboard

All at once:

Pass out individual whiteboards or chalkboards to each child. On your own whiteboard or chalkboard demonstrate writing the letter, then encourage each child to try it on their boards. Some children may need one on one help with this.

  1. While taking attendance

Some teachers take attendance during circle time by calling the children one at a time. Rather than just having the children say “here” why not use this time to help them learn their letter?

Before taking attendance, discuss the letter of the week with the children and mention some things that start with that letter.

Next, instruct the children that when you call their name, you want them to say something that starts with the letter of the week. Ideally, have some visual reminder of words starting with that letter. Most likely several of the children will say the same thing. That’s okay.

  1. Alphabet Videos

Something I have not tried but believe could work well is using videos. Youtube has a wide range of short films, often including songs, about learning letters. These could be integrated into the circle time routine.

What other strategies have you found effective for teaching the ABCs at circle time?

Looking to make a curriculum to fit your children’s needs? Here’s some advice you don’t want to miss: Create Your Own Preschool Curriculum for Free

Sometimes I think I know someone well, only to discover that there is so much more to know about them. The missionary Jim Elliot is one of those people for me.

Brushing the Surface

During my growing up years, my Mom initiated a pattern of having family devotions prior to getting to our schoolwork (my siblings and I were homeschooled).

Among others, one of the devotional books I recall enjoying was Hero Tales by Dave and Neta Jackson. It’s a collection of short stories about various Christians throughout history. Listening to my Mom read it, I was introduced to men and women who committed their entire lives to following Jesus. The missionary, Jim Elliot, was one of those individuals. Hearing his story, I felt intrigued and awestruck. I wanted to live for Jesus too!

Getting Acquainted

Later, I began reading the Trailblazer Books by the same authors. Each Trailblazer book tells the story of a historic Christian from the viewpoint of a fictional 8-12 year old. One of the books I read was about Nate Saint, a missionary who worked closely with Jim Elliot. Through it, I began to catch some insight into the challenges Jim Elliot and his team faced. I learned how they followed God’s call to attempt to share the hope of Jesus with the Aucas, a hostile primitive tribe. In this book, I also read a watered down version of Jim’s death as a martyr in the hands of the very people he sought to serve, and of the tremendous impact of his death in drawing many Aucas to Jesus. It seemed to me I had become acquainted with this man.

Reading a book

Going Deeper

Fast forward several years to my time in Bible school. When presented with a list of biographies to read, I chose Through Gates of Splendor written by Jim Elliot’s wife, Elisabeth. In it, I got to know Jim Elliot and his team on a deeper level. Prior to reading this book, I viewed Jim as super-human, untouched by any hardships of life. This book, however, spoke of trials and discouragements along the way. The book included various quotes from Jim Elliot’s journals and letters. One of my favourites is: “He is no fool who gives what he cannot keep to gain what he cannot lose.”* Having read this book, I felt I had a fairly good understanding of who Jim Elliot was.

Journal Reading

Then, at my Bible School, I found a massive green book on the top shelf of the library. It contained the journals of Jim Elliot! On more than one occasion I randomly opened the large book and read entry after entry. I felt intrusive reading his musings. How much more intimately I came to know him! I saw that he was a human, no different from me. I skimmed through his random observations about the unfamiliar culture he lived in. I read his joyous recounting of mountaintop days, and his musings on gloomy days. Most of all, I saw a deep unwavering passion to follow God. I did not get very far through his journals as it was a massive book and my time was so limited. Still, what bits I read shed a beautifully honest light on the personal life of this man who chose to put Jesus first.

Despite having read all these books about Jim Elliot and parts of his journal, I still don’t know him super well. I would not recognize his voice, nor spot him among a crowd. If we were at the same restaurant, I would not be able to pick out his laughter among the murmur of conversation.

How Well Do I Know God?

Then I stop and think about my relationship with God. How well do I know Him?

Since childhood, I have read books written about God. Many of these books were watered down or contained fictional characters alongside real ones.

Even now, in my adult years, I read blog posts and books and listen to sermons teaching about who God is. Many of these include direct quotes from the Bible. These are good, but if I stop there, I will not know God well. Just as the children’s books portrayed only the surface of who Jim Elliot was, I risk knowing only a watered-down version of who God is when I rely on what others have said about Him.

Glasses sitting on open Bible

Reading the Bible for Myself

What a wonderful gift God gave me in His Word, the Bible! Much like Jim Elliot’s journals, reading the Bible gives me incredible insight into who God is. Some parts of the Bible tell the story of what God has done, while other areas reveal the very thoughts of God.  I see how He was jealous for Israel and grieved at their rebellion. I learn of His incomprehensibly great love for me. I read of His desire to be known. All sixty-six books of the Bible were given to me that I might know God and thus know how to live a life pleasing to Him. How critical it is for me to read and study the Bible, being mindful to keep each part in context.  

Speaking of studying God’s Word, I love how the Bible describes those in Berea when Paul began teaching them about Jesus.

“The people here were of more noble character than those in Thessalonica, since they received the word with eagerness and examined the Scriptures daily to see if these things were so.”  (Acts 17:11 CSB)

Seeking to Know God

Yet even here I cannot stop if I truly want to know God.

Jesus criticized some people, saying:

“You pore over the Scriptures because you think you have eternal life in them, and yet they testify about Me. But you are not willing to come to Me so that you may have life.” (John 5:39-40 CSB)

While I must value the Bible, and indeed I read from it practically every day, it is not the sitting down and reading the verses that save me. It is Jesus who saves me.

Man thinking or praying while holding BibleBut how do I get to know Jesus? By reading the Bible I learn the truth of who Jesus is and about His power to save me. Then I must take Him at His Word and believe what He says. I must take time to talk with God, to share my heart with Him, and – through His Word and prayer – to learn to know His heart.


But then the question comes. How much do I really want to know God? I am privileged to live in a house with several Bibles, and through the internet, I have free access to more translations than I can count, yet do I take the time to really dig in? Is knowing Jesus a priority in my life?


Since Then

Writing this post has been a challenge for me, not just because of the weightiness of the topic, but also because of how it convicts me. Some days I read my Bible simply to check it off my to-do list and move on. I don’t always take time to stop and reflect on what God would have me learn about Him through the passage.

Since writing the draft of this post, I did make time to randomly sit down and prayerfully read the first chapter of Colossians. The very next day, when I felt discouraged, God used one of those verses to encourage me by reminding me that He has given me the help I need. Yes, taking time to seek God through His Word and prayer is incredibly valuable.

Will you join me in seeking to be men and women who know God deeply?


*Quote from Through Gates of Splendor by Elisabeth Elliot (2012), Page 155

References:

Elliot, Elisabeth (2012). Through Gates of Splendor. Authentic Media Limited.

A powerful but easy to read book. I highly recommend this biography to any adult who takes their relationship with Jesus seriously! (For further reading on Jim Elliot, I recommend reading Shadow of the Almighty by Elisabeth Elliot. It is a slower read. It follows Jim Elliot’s life more closely with more direct quotes from his journal entries and letters.)

Elliot, Jim (1978). The Journals of Jim Elliot (E. Elliot, Ed.). Fleming H. Revell Company.

(I believe this is the book I read, however, I don’t know the publisher or year of the copy I read.) Reading this incredibly thick book is slow and it is sometimes challenging to understand, however, there is incredible richness in being able to step into the mind of a man of faith who has gone before us. Note, this book contains mature subject matter.

Jackson, Dave, & Jackson, Neta (1997). Hero Tales: A Family Treasury of True Stories from the Lives of Christian Heroes(Vol. II). Bethany House.

A beautiful devotional book which shares an intro and three short stories about various Christians from distant past to modern day and from missionaries to everyday Christians. Excellent for reading as a family. I highly recommend it!

Jackson, Dave, & Jackson, Neta (1997). Fate of the Yellow Woodbee: Nate Saint (Vol. 24, Trailblazer Books). Bethany House.

I highly recommend the Trailblazer Books for children aged 10-12. A few of the books contain somewhat more mature subject matter than others, so having a parent pre-read the books for more sensitive children may be recommended. If you are older than 12, but have never heard of these historic Christians, then I recommend them to you as a light easy intro to these men and women of faith.

Girl holding paintbrush


13 Simple and Inexpensive Ways to Engage Children with Paint and Paper

Perhaps you have some washable paint laying around, but want to change things up. There are many fun alternatives to paintbrushes. Several of them have valuable developmental bonuses for your child beyond merely strengthening creativity.


Basic tools to use instead of paintbrushes:

  1. Fingers    (All ages)Finger Painting - S. J. Little

    • Messy and delightful for most children, simply allowing your child the freedom to finger paint is an excellent sensory experience.
    • Some children dislike the sensation of paint on their fingers. If that is your child, try modelling by doing some finger painting of your own. Reassure them that you’ll help them wash their hands after. If they still resist, don’t push them. Rather, work your way toward it by giving them tools such as sponges where their fingers will likely get a little paint on them, but not as much as with finger painting.
  2. Sponges    (All ages)

    • A straightforward painting experience. Gives the child an opportunity to experiment with gentle and firm pressure.
    • Take an unused sponge and cut it into easy to hold sizes. Rectangles, roughly 8cm tall and 4cm by 4cm on the ends, work well for small hands. Alternatively, if you want to get really creative, you can cut the sponge into shapes such as trees, hearts, or fish.
    • Expect sponge painting to be messy. Only put small amounts of paint for the child to dip the sponge in, as they can easily get an excessive amount of paint.
    • Sponge painting works well with stencils.
  3. Cotton swabs/Q-tips®    (2.5 years+)

    • A personal favourite of mine. The small size of cotton swabs helps exercise the child’s fine motor muscles – the hand muscles used for holding a pencil among many other things. Cotton swabs allow the children to paint dots or small lines – far more detailed than most kids’ paintbrushes. I find the Q-tips® brand works well.
    • Some 2 year olds may find cotton swabs too small to grasp easily and thus may not enjoy using them. Therefore, I recommend them for children 2.5 years old and up.
    • Because cotton swabs are small, it takes more time for the child to fill the page, which encourages them to focus longer than with a large paintbrush. With this in mind, it may be wise to use only half a sheet of paper when working with cotton swabs to make filling the page more attainable.
    • Depending on the child, painting with cotton swabs can be relatively clean.
  4. Yarn    (2.5 years+)

    • Children can create beautiful works of modern art when painting withYarn Painting Sample - S. J. Little a short piece of yarn, and they enjoy doing it. While they’re at it, they will be strengthening their arm muscles by the abundance of up and down and side to side movements.
    • Cut yarn into pieces roughly 8cm in length. I like to have one piece of yarn per colour of paint. Inevitably a few strings will be dropped into the paint leaving them entirely paint saturated. Therefore, I try to have extra strings cut and ready to use for such emergencies.  
    • I recommend using a shallow dish to hold the paint for easy dipping. To start, it may help to use a finger to submerge one end of the yarn into the paint.
    • This yarn painting can get messy. The finished products, however, typically look attractive.
  5. Fork    (3.5 years+)

    • For a unique challenge, hand the child a plastic fork and a shallow dish of paint. Fun picture ideas could be a flower, a chick, or grass. This experience strengthens hand-eye coordination. Problem-solving is also required if trying to paint a specific object.
    • Keeping the paper small is advised as children may not have the attention span needed to fill a whole page.
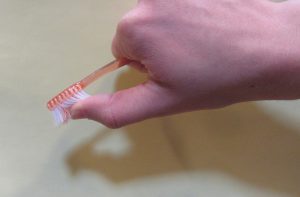
  6. Toothbrush    (4 years+)

    • Want a major fine motor muscle strengthener? Bring out the toothbrush and prepare for a fun, messy time!
    • Toothbrush painting only takes a small amount of paint, but it may be helpful to add a drop of water to the paint. Cover the table and surrounding area or be prepared to wipe it as it will get messy.
    • Encourage the child to hold the toothbrushExample of how to use a toothbrush to make a painting with its bristles facing the paper. Show them how to run their thumb (or finger from the other hand) through the bristles causing the brush to spray droplets of paint onto the paper.


    • Expect most children to have a short attention span for this activity as their hand muscles will likely tire quickly – evidence that it is good exercise for those fine motor muscles.


Things to dip in paint:

Be aware that toys with metal parts may rust if exposed to water when cleaning paint off of them. Also, it may not be possible to get all the paint off whatever items you use, therefore, pick carefully.

  1. Jar/bottle lids    (2.5 years+)

    • Wash and save various bottle and jar lids, then pour paint on a plate and let your child use the lids as stamps. They might make a snowman, a flower, or a lovely modern art pattern. Their fine motor muscles will be strengthened by the various grips required to hold the lids.
    • If your child is prone to putting items in his/her mouth, beware that small lids may be choking hazards.
    • This can get messy and lids can become slippery when paint-covered and thus may fall on the floor. Therefore, if you are working over carpet you may want to cover the floor.
  2. Dinosaurs    (2 years+)

    • Choose some large washable dinosaurs (the smoother their skin the easier to clean – avoid those with metal). Encourage your child to “walk” the dinosaurs through a plate of paint and across their paper leaving dinosaur footprints. The dinosaurs have a fair amount of weight which, combined with all those up and down movements, will strengthen important arm muscles.
    • Children love this activity! However, I caution against using this “dip your toys in paint” idea with young children who do not yet grasp the concept that only certain toys are okay in paint at certain times. The last thing we want is their teddy doing a faceplant in the paint dish.
  3. Cars    (2 years+)

    • If you have some primarily plastic cars with no internal mechanisms which may be damaged by water, this activity can be tremendously thrilling! What’s the developmental value of it? If you give the child an extra large piece of paper to drive their car across, they will likely make many large, full-arm movements using muscles needed for writing. These types of large arm movements are especially important for development in 2-3 year olds.
    • Pour the paint onto a plate and encourage the children to drive the cars back and forth in the paint to coat the wheels before driving the cars around on the paper.Car Track Painting - S. J. Little
    • If you have the option, this is a good activity to cover the entire table with paper for the cars to leave tracks on.
    • As with the dinosaurs above, I caution against doing this with young children who may not yet realize that this does not give them permission to drive the cars through any other sticky paste they can find.


Paper

Changing up the paper is another way to keep painting fresh and exciting.

  1. Size

    • Change up the size of paper you give your child.
      • If they are painting with something small, have only a short amount of time, or have a short attention span, use a small piece of paper.
      • If they enjoy painting, have plenty of time, or are using a large tool, use a full-size piece of paper.
      • Using bigger papers can encourage healthy arm muscle development as they reach to paint on the far edge of the paper.
  2. Shape

    • Before it’s time to paint, cut the paper into a simple shape such as a triangle, heart, circle, or fish. Then allow the child to paint however they want.
  3. Whole table

    • On occasion, covering the whole table with paper and allowing several children to paint on it at once can be a fun change. The children often enjoy being able to paint long lines without running into the edge of the paper. On top of that, having several children painting on the same surface gives a social development aspect to painting.
  4. Colouring sheets

    • Some painting techniques work well on colouring pages. Younger children could use sponges, while older children could use cotton swabs which allow them to paint inside the lines.


        Have fun painting!

What are your favourite paintbrush alternatives for preschool painting?

A toddler pouting

Children often have trouble waiting for their turn. What about me? How do I respond when God asks me to wait?

I just got home from another day of teaching. My head is still ringing with “Teacher!” “Teacher!” “Teacher!”

If you work with young children you may understand. One of my classes today included several children who were eager for adult attention. It seemed any time I got down to play with them, more than five children surrounded me eagerly calling for my attention: “Teacher, watch me!” “Teacher, here’s ice cream!” “Teacher, I want to play!”

And then came art time…

Today we were using watercolour paint. I had four chairs at the art table and four paint brushes.

As I got four children settled and painting, others came by.

“I want it!”

I reply light heartedly “Okay. You will get to paint, but you have to wait until your turn. Why don’t you go play while you wait?”

The child groans and folds his arms.

Another child comes and takes the paintbrush out of another’s hand.

I return the paintbrush to the child currently painting, then turn to the second child. “Do you want to paint?”

The child nods with a frown.

“Okay, you will have a turn, but the art table is all full now, so you go play.”

The child begins crying.

A third child comes. “Me turn! Me turn!”

I ruffle her hair. “Not yet. You go play. I will call you when it is your turn. Don’t worry. I will make sure you have a turn.”

This child scowls and stands watching for a few minutes before moving elsewhere in the room.

I wrote this early in the school year. Thankfully, after a few months, they learned that there is no need to get upset if it isn’t their turn yet. It took time for them to learn that I mean what I say when I tell them that everyone will get a turn. They needed to learn to trust me.

Then I stop and think. How did I respond the last time God asked me to wait?

Honestly, I was frustrated. I didn’t see any reason for me to wait with the plan I had in mind. I wanted to do it right then, but God said wait so many times in so many ways I would have been a fool to ignore it!

I pouted, asking, “But why, God?” I was impatient and waiting made no sense to me.

The Bible mentions waiting for God many times. Sometimes it is the psalmist waiting for God to answer his plea for rescue. At other times it is a command to wait.

One of my favourite verses about waiting for God is Psalm 37:34: “Wait for the Lord and keep His way…”

This time, when God instructed me to wait, I felt incredibly impatient. I did not want to wait! Therefore, He led me across another verse which I then placed by my lamp as a daily reminder.

“The plans of the diligent lead surely to abundance, but everyone who is hasty comes only to poverty.”  Proverbs 21:5 (ESV)

I look forward to the day when I can join in saying:

“Look, this is our God;
we have waited for Him, and He has saved us.
This is the Lord; we have waited for Him.
Let us rejoice and be glad in His salvation.” Isaiah 25:9

For me, that most recent thing God asked me to wait for involved moving towards publishing a particular picture book. At this point, I really don’t know why He told me to wait. It makes no sense to me, but perhaps one day I will see the reason.

What is something God has asked you to wait for? What was the result?