Add A Little – 3 Year Old Curriculum – Unit C

Christmas Stars

Disclaimer: All activities require adult supervision and discretion. Read more...

Want to learn more about Add A Little Curriculum? Check out the Parent / Teacher Guide

Movement Moment

Hide and Seek Stars

Supplies:

  • Two copies of the free printable colouring sheet (or the full-colour version available on TPT). If you have more than 10 children, print a third copy of the colouring sheet to make additional stars.
  • Scissors
  • Crayons, markers, pencil crayons, etc.
  • Optional: Consider using thicker paper and/or laminating your Hide and Seek Stars board and pieces for greater durability.

Click here for your free Star Search Download

Prep:

  • Alternatively, if you prefer to print a full-colour version, check out the 10 Matching Stars on my TPT store.
  • Decorate the stars keeping the matching stars looking like they match (i.e. the star with five dots should be the same colour on both sheets of paper so that they are evidently a pair.)
  • Cut out the stars from one sheet of paper (these are your stars to hide). Do not cut the other sheet of paper (this is your matching board).

Time to Play:

  • “Hide” the stars around the room in obvious places. Consider placing one on a chair, on a windowsill, or even straight on the floor.
  • Place the matching board in the center of the room. Gather your children around and show them the stars. Discuss what colours they are.
  • Explain to your children that you have hidden the stars around the room. Their job is to find the stars and match them to their pair on the matching board.
  • Be excited with the children as they find each star.

Art Activity

Star Shadows

Supplies:

  • Paper
  • Cardboard or thick cardstock
  • Scissors
  • Crayons (Alternatively use paint, or use light coloured oil pastels on black paper.)
  • Tape

Prep:

  • Cut out stars from the cardboard. You need at least one per child who will be doing art at the same time.
  • Optional: Cut out a moon.

Time to Create:

  • Invite your children to the table. Show them the cardboard star.
  • Demonstrate how to make a star shadow picture by doing an example: put a ball of tape on the back of the cardboard star. Secure the star to the middle of your paper.
  • Use a crayon to draw from the cardboard onto the paper all around the cardboard star.
  • Remove the cardboard star and admire the star shadow.
  • Secure a star to your child’s paper and encourage them to try.

Five-Minute Focus

Let’s Learn the ABCs

Letters of the Unit

MNO

Letter Activity

  • Time to Learn:

Now that you’ve made all the Hide and Seek Stars, help your child arrange the stars in the shape of each letter.

Let’s Sing

I’m A Little Christmas Tree

For lyrics and actions, click here.


Let’s Read

Little Blue Truck’s Christmas

Author: Alice Schertle
Illustrator: Jill McElmurry

Let’s Sing

Christian Song

Baby Jesus, Welcome Lord

For lyrics and actions, click here.

Let’s Read

BIBLE

Read the story about Baby Jesus in your Children’s Bible.

Speaking of Christmas…


.


Add A Little – 2 Year Old Curriculum – Unit E

Easter

Developmental Focus: Hand-Eye Coordination

Want to learn more? Check out the Add A Little 2Y Parent / Teacher Guide

Disclaimer: All activities require adult supervision and discretion. Read more…

Muscle Moving

Easter Egg Ramp Slide

Supplies:

  • Large cardboard box or other way to make a ramp
  • Plastic Easter Eggs (or other things that roll)
  • Optional: Basket or other open-top container

Prep:

  • Find a stable way to make a ramp using the box.

Time to Play:

  • Invite your child(ren) to join you rolling the eggs down the ramp.
  • Try mixing it up to see what happens. Does the egg roll faster if it has something heavy inside it? Does it roll as fast as a toy car?
  • For a bigger challenge, try catching the rolling eggs in the basket before they reach the floor. This works best if your ramp has a drop at the end high enough to hold the basket under.

Brain Boosting

Easter Egg Painting

Supplies:

  • Plastic Easter Eggs that spilt into two halves. (Alternatively use empty paper tower rolls or toilet paper rolls.)
  • 2-3 Colours of washable paint – think Easter colours: yellow, pink, light blue, light green. (Alternatively use washable ink pads.)
  • 1 Wide shallow container per colour. (Wide enough to easily dip the egg in – paper plates could work.)
  • Paper
  • Optional: Paint shirt

Prep:

  • Prepare a table to paint on. If needed, cover it with a tablecloth, garbage bag, or newspaper.
  • Pour a thin layer of paint into each container.
  • Place one egg half or roll in each container of paint.

Time to Play:

  • Set a piece of paper in front of each child. Show them how dip the Easter egg half into the paint and then touch it on your paper creating a circle of paint.
  • Encourage them to make many circles on their paper.

Let’s Sing

Here Is A Bunny

This fun bunny song does not mention Easter making it flexible for use in various settings as a spring or Easter song.

Let’s Read

Find Spot At Easter
By: Eric Hill

A fun lift-the-flap book with plenty of spring animals, a few Easter eggs, and no Easter Bunny or religious content.

Let’s Sing

Christian Song

He Rose Again and Lives Today
Words by S. J. Little

Read the lyrics here.

Let’s Read

Bible Story

Jesus’ Death and Resurrection
John 18-20

Beginner’s Bible Chapters:
Jesus Is Arrested and Crucified
Jesus Is Risen!
Page 446


Add A Little – 2 Year Old Curriculum – Unit 2.5

Squish

Developmental Focus: Colour Mixing / Secondary Colours

Want to learn more? Check out the Add A Little 2Y Parent / Teacher Guide

Disclaimer: All activities require adult supervision and discretion. Read more…

Muscle Moving

Stomp That Colour

Supplies:

  • 3 blank sheets of paper that are the secondary colours – green, orange, and purple. (You can add more colours later if desired.)
  • Tape that won’t damage your flooring

Prep:

  • Clear an area for active running-around play.
  • Place a piece of paper on your floor and step on it to check for slipperiness. If it is slippery, tape each paper to the floor.
  • Place all three sheets of paper on the floor with some distance between them.

Time to Play:

  • Invite your child to play a game with you.
  • Run around the area with your child.
  • Call out a colour, for example, “Green!” Run with your child to the green paper and stomp on it.
  • Repeat the game calling out other colours.

Brain Boosting

Sponge Painting

Supplies:

  • 2 small containers (washed plastic applesauce or cream cheese containers work well)
  • Paper
  • 1 unused dishwashing sponge
  • 1 paint smock, or old shirt you don’t mind getting paint on
  • Optional: newspapers or plastic tablecloth to cover the table
  • 2 colours of washable or tempera paint
  • Tip: Limiting to only 2 colours often results in a better overall painting experience. The child focuses more on painting and less on choosing which colour to use. For a more attractive final result, choose colours that mix well such as yellow and blue instead of colours that create brown when mixed such as red and green

Prep:

  • Cut the sponge into pieces approximately 2.5 x 2.5 x 7 cm, or 1 x 1 x 3 in. (see picture below).
  • Pour a small amount of paint into each container (one colour per container).
  • For crisper colours, use 1 sponge piece per colour.
  • Optional: cut the paper into approximately 22 x 28 cm, or 8.5 x 5.5 in. (half a letter-sized paper). This tends to encourage children to fill more of the paper with paint.
  • Optional: covering your table with newspapers or a plastic tablecloth to prevent staining.
  • Tip: After painting, the cut sponges can be rinsed clean and used again the next time you paint.

Time to Play:

  • Invite your child to sit at the table. Put a piece of paper in front of them and another piece of paper in front of you.
  • Demonstrate how to dip the sponge into the paint, then press it onto your paper.
  • Encourage your child to have fun painting.

Let’s Sing

The Colour I’m Seeing
Adapt this song by Amy Essen to whichever colour you are learning about.


Let’s Read

Colin Collects Colors
By: Jess McGeachin

Let’s Sing

Christian Song

Who Did Swallow Jonah?


Let’s Read

Bible Story

Jonah
Jonah 1:1-3:10

Beginner’s Bible Chapter:
Jonah and the Big Fish
Page 257

Preschooler doing a craft behind title: Quick Craft Inspiration


Have you ever found yourself struggling for inspiration when it comes to planning preschool crafts? Do you need art that corresponds with your current theme?

Fear not. This article includes five basic preschool art ideas that can be adapted to any theme.

Better yet, they don’t require all sorts of expensive supplies. A pair of scissors, paper, paint, and white glue will get you through most of them.


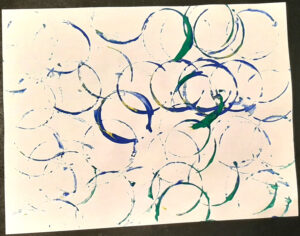
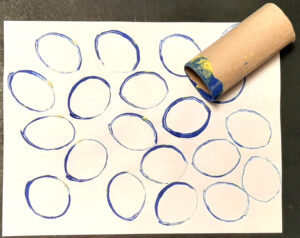
1. Free Paint With an Object

Choose a size and colour of paper, which colour of paint, and what to paint with. The children paint freely on the paper. These crafts are simple to prep, though they can be messy to clean up.


Tips:

I typically choose only 1-3 colours of paint. Choosing colours that don’t result in brown when mixed can keep the finished products looking bright and cheery even with free painting.


Example of Adapting for Theme:

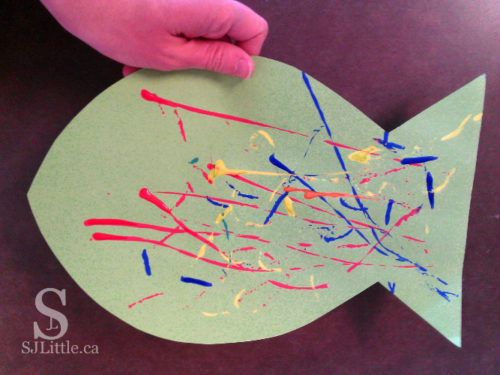
For under the sea, I cut the paper into a fish shape. I then let the children paint on it using yarn. 

For forest animals, I cut the paper into the shape of a fox and give them orange paint.

Additional Resources: Beyond the Paintbrush


2. Put the Pieces Together


Pre-cut the pieces of a craft and let the child glue them together.

Expect a lot of prep with these crafts. Older children can cut out simple pieces for themselves (with supervision), but younger children will need you to prep all the pieces for them. The benefit of all that prep work is that the craft will turn out looking (mostly) like the example.

For those of you concerned that this type of craft is product oriented rather than process oriented art, consider it as a chance for your children to practice their puzzle making skills. They are learning: same/different, following instructions, sequencing, names of colours and shapes, and more. These are all valuable skills for a preschooler. Don’t be surprised to see a gleam of pride in their eye when they hold up their completed craft. At the same time, give them freedom within the craft to position their pieces as they wish.


Tips:

Pinterest is full of examples of these sorts of crafts.

Rather than using glue sticks, pour white glue onto a flat dish and give your children popsicle sticks to dip in the glue and apply it.


Example of Adapting for Theme:

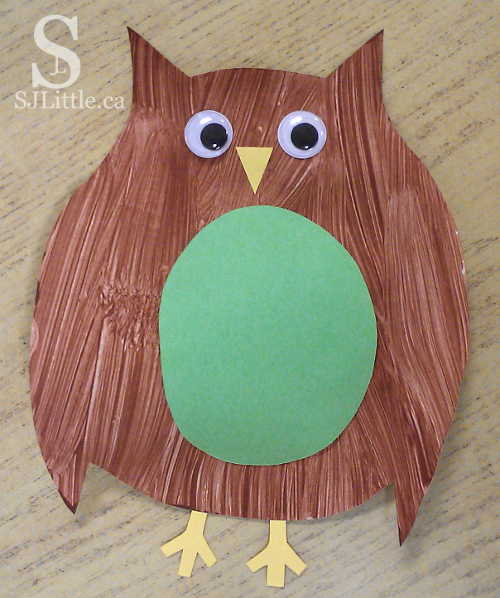
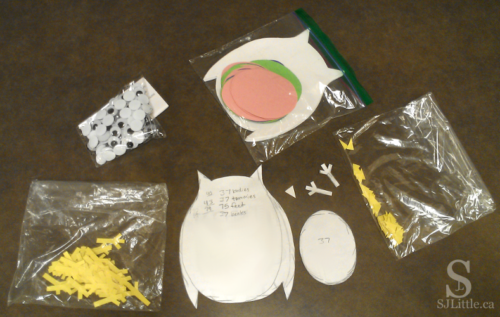
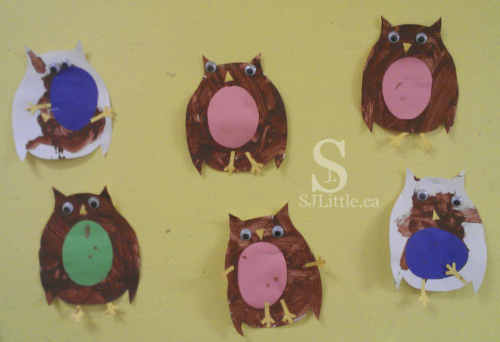
For forest animals, I cut out the parts of an owl, then let the children glue the pieces together. In the example shown, I also encouraged the children to paint the body of the owl.

For transportation, consider pre-cutting the parts of a car and then letting your children glue them together. You’ll need the car body, the wheels, and the windows.


3. Glue Cut Outs to a Paper

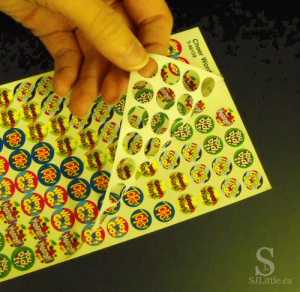
This is one of my favourite types of crafts when teaching 2 year olds. I give them a popsicle stick, a small dish of white glue, a piece of paper, and small cutouts to glue onto that paper. Some of them cover the page with glue but only put one cutout on, while others cover the entire page with cutouts.


Tips:

Try adding a drop of food colouring to the glue. This makes it feel like paint and show up when dried on that picture with hardly any cutouts.


Examples of adapting for theme:

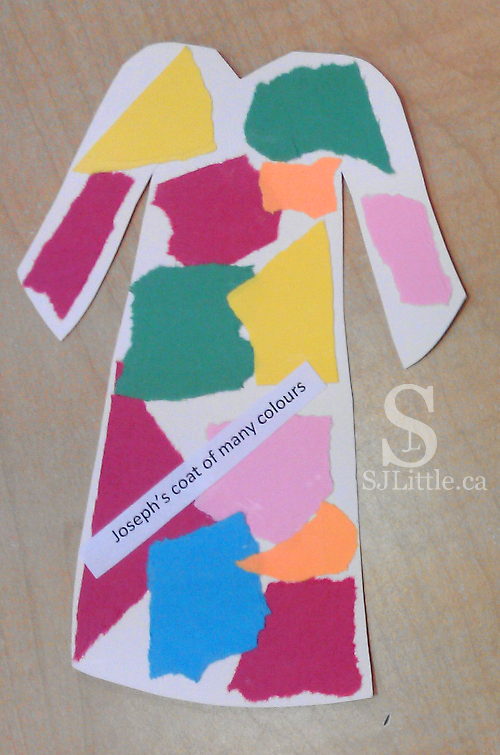
For the story of Joseph’s coat of many colours, I give the children coloured pieces of paper to rip and glue onto the pre-cut shape of the coat.

For zoo animals, I give them a giraffe colouring sheet and a piece of brown paper. I encourage them to rip the brown paper into small pieces. Once done, I provide glue with orange food colouring to stick the pieces on the giraffe.
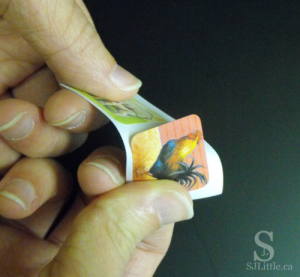
 

4. Cut Around It

This is a fantastic way to add scissor practice into your craft time. I choose a colouring sheet or draw a shape on a paper and have the children cut it out. After they’ve finished cutting it, give them something to decorate it with.


Tips:

Start with one simple large shape to cut. As your children improve their scissor skills, you can give them harder shapes to cut. 

When having children cut out a colouring sheet, I find it helpful to draw a thick line an inch wider than the picture on the colouring page. This way the children have a clear line to follow and are less likely to clip off some of the picture.


Example of Adapting for Theme:

When doing outer space, I draw a circle on a piece of coloured paper and have the children cut it out. I then let them decorate it with watercolour paints or crayons (depending on the children’s ability level and the number of adults available to supervise.)

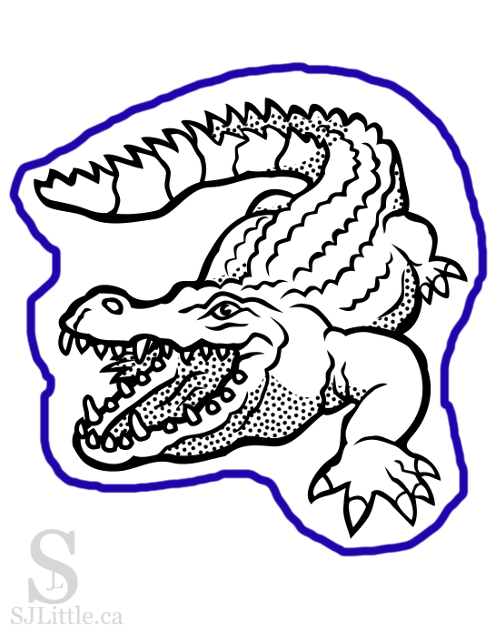
Another time, for zoo animals, I took a crocodile colouring sheet and drew a line around it. I had the children cut along that line and then gave them green paint.
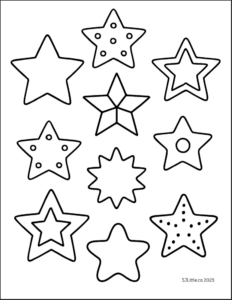
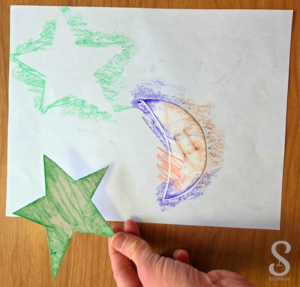
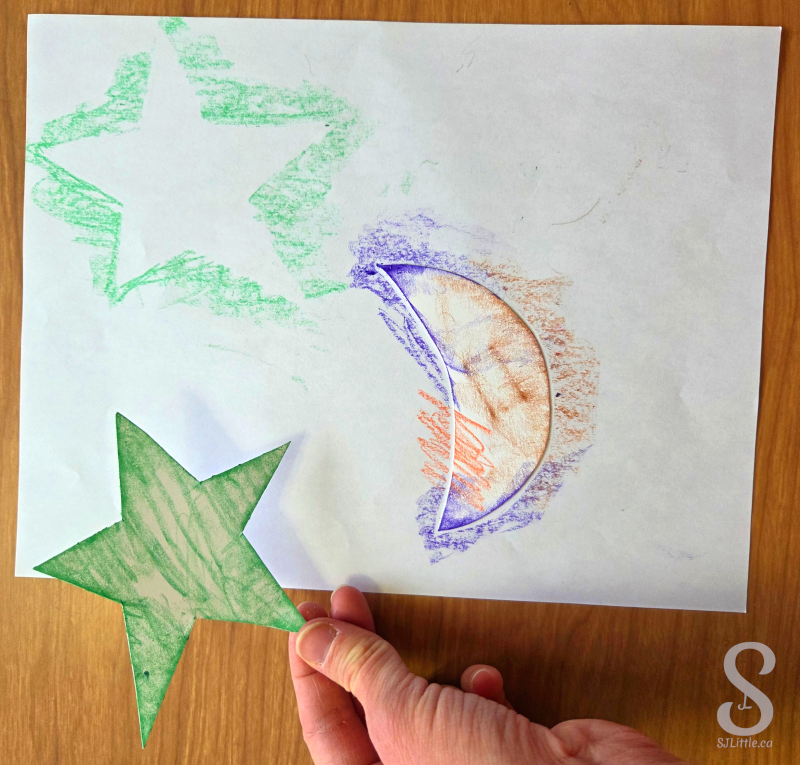
 

5. Stencils

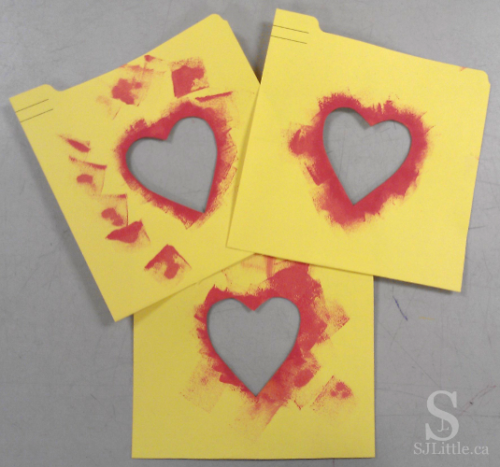
Stencils can be a lot of fun. I grab a piece of cardboard, sketch a shape on it, then cut it out. Sometimes I use the cut out shape, but other times I use what remains of the cardboard as a stencil. I place the stencil over a piece of paper and let the children paint whatever they can see of the paper. I pull the stencil off and – ta da – you have a picture.


Tips:

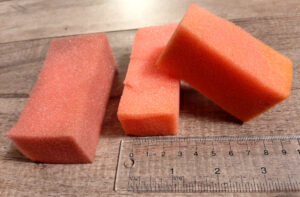
If you want the stencil to last several classes, use a more durable material such as fun foam. 

I find using sponges and a small amount of paint works best with stencils.

Using a couple of small pieces of tape can help keep the stencil and paper in place.

Not good at drawing? No problem, find a colouring sheet to trace in order to get the outline for your stencil.

Especially if you’re using cardboard for your stencils, I recommend cutting a couple of extra stencils for just in case.


Example of Adapting for Theme:

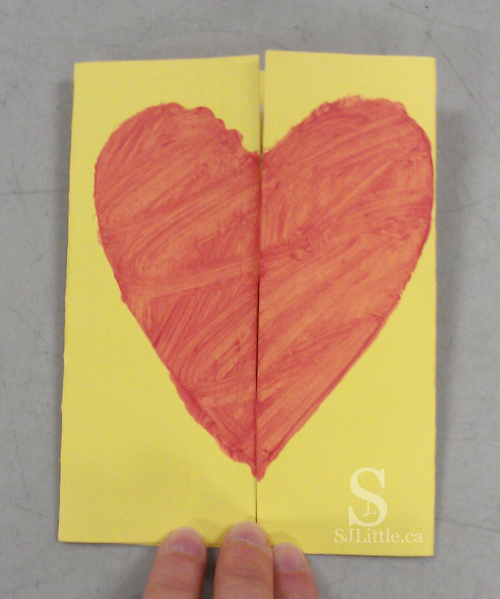
For Valentines Day, I cut out heart shaped stencils which we could use to paint cards for the children’s families.

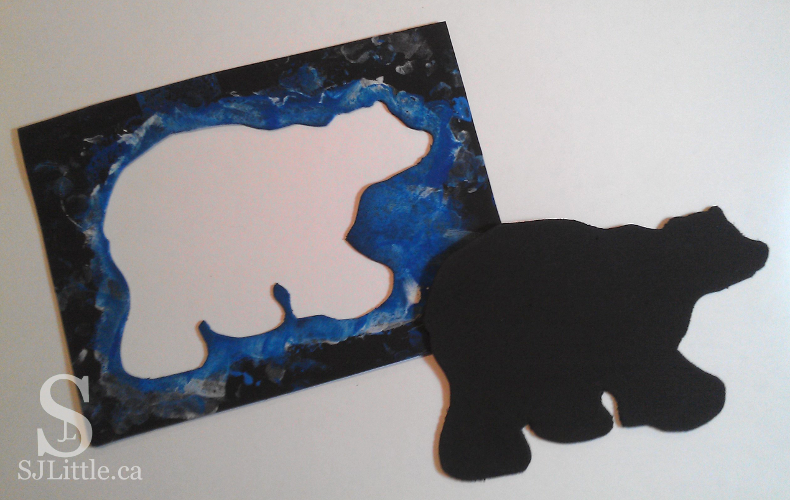
When teaching about winter animals, I cut out a polar bear. We could use the outer part of the stencil over black paper and the children could paint with white.


I hope this list gives you the inspiration you need as you plan your upcoming preschool art times.

Do you have other ideas to add to the list? Put your favourites in the comments below to help us all out.

Why I Give Preschoolers Stickers for Craft Time - post by S. J. Little

Why do I sometimes give preschoolers stickers for craft time? Am I being lazy? No. When used intentionally, stickers provide multiple benefits for preschoolers.

Benefits of giving preschoolers stickers

  1. Before they can effectively hold a pencil, a child needs to strengthen their fine motor muscles and hand-eye coordination.
    • Simply put, fine motor muscles are the small muscles in the hands. These muscles are used to do fine detail tasks such as holding a pencil, picking up a spoon, and putting beads on a string, among countless other tasks. When a child strengthens these muscles in their pre-writing years, they have an advantage when it comes time to learn to write. Peeling stickers and putting them on paper, exercises those fine motor muscles.
    • Hand-eye coordination is another super valuable skill for preschoolers to develop. In basic terms, it is getting one’s hand to go where one wants it to go. Activities such as feeding oneself with a spoon, writing letters, and giving high fives require good hand-eye coordination. Coordinating hands to peel the stickers and then placing the stickers where they want on the paper, are great ways to practice using hand-eye coordination.
  2. In our fast-paced world, teaching a child toStrips of stickers ready to be used by preschoolers. sit down and focus on one task for a length of time can be challenging. Stickers, I have found, can bring surprising results in this regard. Some children, though not all, are willing to sit down and work hard on peeling those stickers for longer than they would typically sit. Please don’t get me wrong with this one. Yes, we want children to be up and moving, engaged in active play, but it is also important for them to be developing their attention span. Having a longer attention span can enable them to get deeper into play rather than bouncing from one toy to the next.
  3. Most children enjoy stickers. As a teacher, I have a few children who do not enjoy craft time. Stickers might grab the interest of a child who typically dislikes crafts and help them begin to realize that sitting down to do crafts can be fun.

Tips for a smoother sticker time

  1. Cut the sheet of stickers into strips
    • Rather than handing a full sheet of stickers to a child, cut the sheet into strips. For really small stickers I find 6 or 7 stickers per strip is a good number as the paper is then big enough for the child to hold. For bigger stickers, I often cut them into groups of two or three. Giving the child only one of these strips of stickers at a time helps keep them focused and motivated as it isn’t an overwhelming number of stickers and there are fewer stickers to choose from at a time.
  2. Remove sticker blank areasPeeling back part of sticker sheet to make stickers easier for children to use.
    • I recently discovered that removing the blank areas around the actual stickers makes it far easier for little hands to peel the stickers. (See picture.)
  3. Teach children to bend the paper
    • Some children need me to teach them how to get the stickers. I show them that bending the paper causes the sticker to lift up for easy removal. (See picture.)Teach preschoolers to bend the sheet of paper to remove the sticker.
  4. Avoid “thin papery” stickers
    • Beware of thin papery stickers as they may rip easily when being peeled from the paper, making the activity difficult and discouraging for children.
  5. Mess-free craft
    • This is an excellent craft for picture day. When all my children are dressed in their finest outfits, and feeling fidgety due to the special day, stickers are my go-to. They won’t stain fancy clothes and the children are excited to use them.

What are your tips for giving preschoolers stickers for craft time? Do you see other benefits of using them?

Looking for more engaging craft ideas for your preschooler? Check out Beyond the Paint Brush