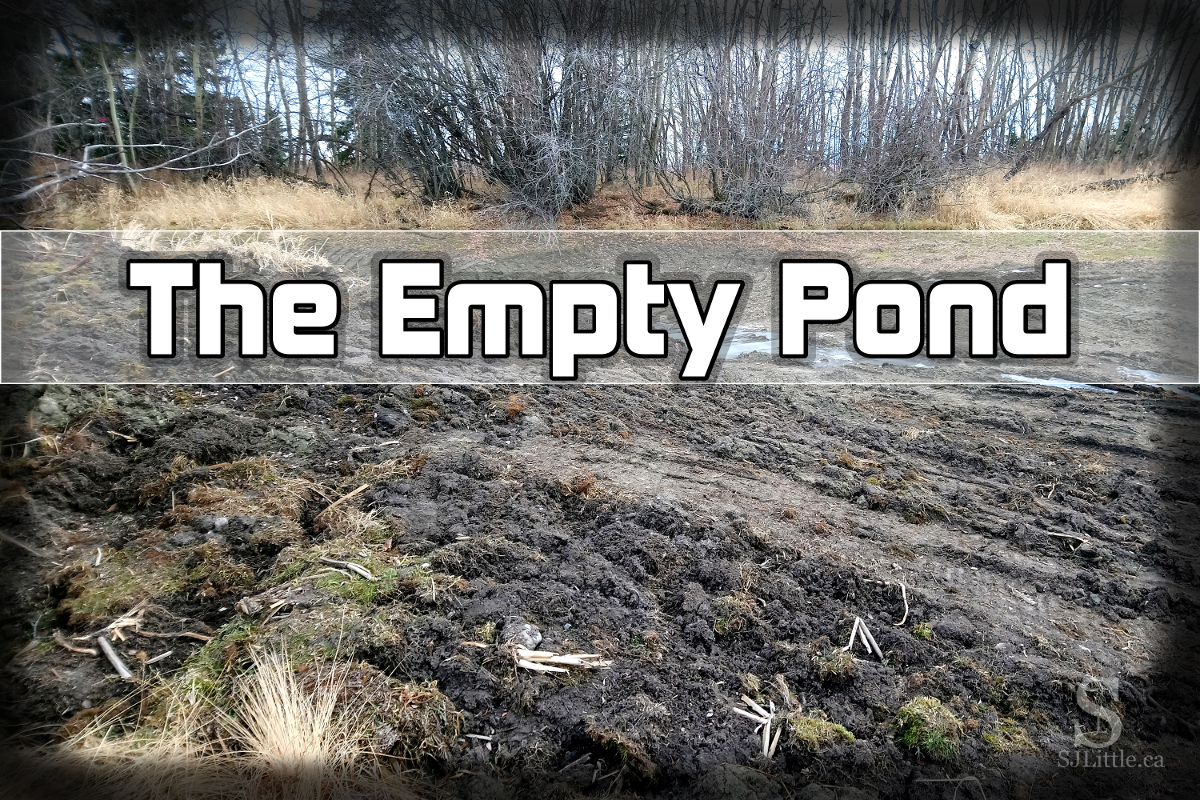
Brown grass and an empty pond


I followed the familiar path, thankful for a chance to get outside. The air had a chill, but only the smallest patches of snow lay where the sun could not find them hidden beneath the shadows. Otherwise, the ground was dry.

In fact, everything was dry. The grass was brown and the trees stood bare. The leaves, the trees had dropped, crunched under my feet. There was little colour anywhere beyond brown, brown, and more brown.

I stepped through the fence and swept fallen leaves off the bench before sitting on it. I stared at the pond in front of me. It was empty. There was no water.

Our summer had been longer and more dry than most years. The pond that typically had at least a little water all year round – indeed, sometimes enough to skate on in the winter – now lay empty.

It was more than that, though. This fall, not only had the pond become empty, but the typically impassable gooey mud of the pond bed had dried out to the extent that the property owner was able to drive heavy machinery through the pond. I could still see the thick tread marks.

The heavy machinery had been used to push dirt around. A large mound lay to the side. Much of the pond bed was now raw exposed dirt.

Yet, as I sat there, I was not displeased at the sight of thick tread marks and mounds of dirt because I knew the purpose.

The property owner had dug the pond deeper. Why? To increase its capacity. When the winter snow melts and spring rains come, the pond will be able to hold even more water than before. This will make it less likely to dry out when the following summer turns to autumn.

This deepening of the pond bed was something the property owner could only do during the rare times when the pond dried up. Not only did the pond need to be empty for such work to be done, but the mud at the bottom of it needed to dry for long enough to support the weight of the heavy machinery without causing it to sink and get stuck.

I leaned back on the bench listening to the occasional bird call in the otherwise silent afternoon.

Surely there was something to be learned from this pond, a lesson I could learn.

A sober thought came to me.

It is only when I am empty that God can do the work of increasing capacity in me.

True, there are many ways God works in my life.

While the property owner could trim the bushes around the edge of the pond, or add stones to the path leading to it while it was full, there are some kinds of work he could not do until the pond was beyond empty.

Likewise, God can work in my life in many ways, but some kinds of deepening can only be done when I am empty – empty of myself.

So what is it that the Lord wants to increase my capacity for? Some things, such as His love, His joy, and abundant life, He wants to give everyone who believes. Not a problem-free life, but a life marked with the inexpressible joy and peace that only comes from Him.

In John 10:10b, Jesus said, “I have come so that they may have life and have it in abundance.” (CSB)

Other translations say, “have it to the full.” (NIV2011)

Paul prayed that God would enable the Ephesians to “know Christ’s love that surpasses knowledge, so that you may be filled with all the fullness of God.” (Ephesians 3:19 CSB)

Next time I am feeling empty and surrounded by the browns of a winter not even brightened with snow, I hope I will remember not to panic. Instead, I ought to seek God and trust that this is the time when He can do His work of increasing capacity in me for more of Him.

“Now may the God of hope fill you with all joy and peace as you believe so that you may overflow with hope by the power of the Holy Spirit.” (Romans 15:13 CSB)


 

How young should we teach a child to call 911? That’s a good question. Many preschools will dedicate a week to teaching 3-4 year olds how to call 911 and other safety information they might need in case of trouble.

If you do a quick search on Google, such as “4 year old calls 911” you will likely find various news articles and recordings of humorous reasons young children have called 911 along with tales of heroic children who knew just what to do when the only adult with them passed out, such as this news clip on YouTube.

Yes, a preschooler might needlessly call 911, but they may also be in a situation one day where calling 911 saves someone’s life. With this in mind, I encourage you to teach your child how to call 911, but be sure to tell them that it is only if there is an emergency.

The following song is a great way to start teaching your child about calling 911.

If you have a different emergency number in your area, this song may still work, just switch out the number as you sing.

*As this is an original song, please be sure to include my name as the songwriter any time you share this song.

9-1-1 Song

Original song by: S. J. Little

Tune: If You’re Happy And You Know It

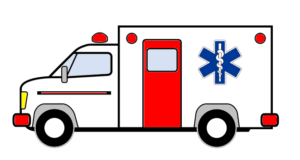
If you need the ambulance, call 9-1-1.

If you need the ambulance, call 9-1-1.

If you need the ambulance, if you need the ambulance,

If you need the ambulance, call 9-1-1.


If you need the police, call 9-1-1.

If you need the police, call 9-1-1.

If you need the police, if you need the police,

If you need the police, call 9-1-1.


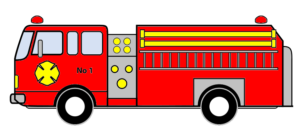
If you need the fire truck, call 9-1-1.

If you need the fire truck, call 9-1-1.

If you need the fire truck, if you need the fire truck,

If you need the fire truck, call 9-1-1.


Actions

Every time you sing “9-1-1” hold up the correlating number of fingers – 9 fingers, then 1 finger and then 1 finger again.

If you want, find pictures of an ambulance, police car, and fire truck and point to each one as you sing about it.

Other Safety Tips to Teach Preschoolers

There are many other safety tips you can teach a preschooler. What follows are a few I recommend. If you know others, feel free to mention them in the comments section below.

  • Teach your child their own first and last name
  • Teach your child their parents’ first and last names
  • Teach your child their parents’ phone number
  • Teach your child “stranger danger”
    • If you aren’t there with them, a stranger, no matter how nice they may seem, might want to hurt them. They should never go anywhere with a stranger, unless you give them permission, even if the stranger offers candy or a chance to see puppies.
  • Teach your child who is safe
    • Explain to your child that if they ever get lost in a crowd, they should look for either someone who works there or a mom with kids as these are more likely to help them find safety. Next time you’re out at a large store or venue with your child, practice spotting employees or other safe people your child could go to if they need help.
  • Teach your child what to do in case of a fire
    • Stay low and go outside. You could even practice having a fire drill.
    • Show your child pictures of a fireman with his mask on. Teach your child that this is what a fireman might look like if he was coming to rescue them from a fire.

Let us pray that our children never need to use any of these safety tips, but, just in case, the preschool years are a good time to begin teaching these important things.

Watering can behind title: You Don't Know What I'm Doing


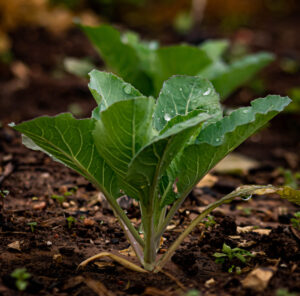
A while back, I decided to do an experiment. With COVID-19 concerns circling around, I figured it would be nice to have a homegrown supply of fresh lettuce so that, if we did get quarantined, we could still have fresh vegetables to eat along with our non-perishable pantry items.

With this in mind, and since it was too cold to plant outside where I live, I found a planter, filled it with dirt, and planted some lettuce seeds.

For the following weeks, I kept an eye on the plants as I watered them. Sure enough, the seedlings came up, though not all of them. I’d known some of the seeds might not come up, so I wasn’t entirely surprised.

I kept watering and observing the plants as they sat in my kitchen window. A few weeks after the seedlings sprouted, however, I began to suspect a problem. They weren’t getting enough sun.

Once I realized this and began moving the planter to various windows throughout the day or leaving it outside when the afternoons were warm enough, the lettuce began to grow strong.

I tell you all this to set the backdrop of what I really want to focus on.

Because some of the seeds hadn’t sprouted, the planter had sections of dirt that were bare and not growing anything. I wanted to change that.

Having realized that the lettuce needed more sunlight than the window provided, I decided to plant something else in those empty spaces.

Radishes, I thought. They grow easily and quickly. Therefore, I found a few radish seeds and hid them in the dirt where nothing was growing.

A couple of days later, as I went to water the lettuce, I poured the water where the lettuce plants needed it, then I poured water on those blank empty spaces of dirt.

In my head (I don’t think I said it out loud, though I may have) I told the lettuce plants, “You don’t know what I’m doing, but I do.”

It seems like a silly statement, especially when addressed to plants. Yet, when I think about it, I believe I can learn something from it.

From the lettuce’s perspective, I’d just given them the water they needed. Then, for no apparent reason, I poured water where no visible plant was growing.

It’ll probably be a few more days until the radishes show their heads. Until then the lettuce will continue to wonder why I would water the lifeless dirt rather than just watering the plants.

I wonder how often God has used me to water what to me appeared to be empty lifeless dirt?

It could be a random conversation I had with someone at the bus stop, or a smile I gave the woman who was clearly having a hard day. Perhaps it’s even a Facebook post with a Bible verse. I don’t know.

Some of these moments seem small and insignificant to me. Some of them feel random and impulsive, but maybe, just maybe, God is using those moments to water the unseen seeds that will begin to sprout one day.

I might wonder at what God is doing, and why He pours the perfectly good water on the lifeless dirt. It might appear to be a waste, but with God, nothing is wasted.

God knows what He is doing.

My job is to trust and keep following Him.

“Therefore, my dear brothers and sisters, be steadfast, immovable, always excelling in the Lord’s work, because you know that your labor in the Lord is not in vain.” 1 Corinthians 15:58 CSB


Isolated for Halloween

By S. J. Little

Entered in Susanna Hill’s Contest – Halloweensie

Contest URL: https://susannahill.com/2021/10/29/the-11the-annual-halloweensie-writing-contest-aahhhrrrooooooooo/comment-page-1/#comment-75129

Max word count: 100

Word count: 99

“It’s no fun if we can’t go out for Halloween,” Jess moped.

“COVID’s too rampant,” Dad explained.


Later, Dad whispered, “You got them?”

Mom handed him a bag.

“Glow-in-the-dark paint. Perfect!”

They worked hard. Finally they finished.

“Now wait until tonight.”


At supper, Mom smiled sneakily. Jess didn’t notice.

Dad glanced at Mom. “Time for lights out.”

Jess frowned. “It’s not bedtime.”

Dad flipped off the lights.

The room transformed. Goosebumps tickled Jess’ spine. Everything glowed.

Mom uncovered goodies.

Jess licked her lips.

“Time for glow-in-the-dark foosball?” Dad asked.

Jess grinned. It would be an exciting night after all.


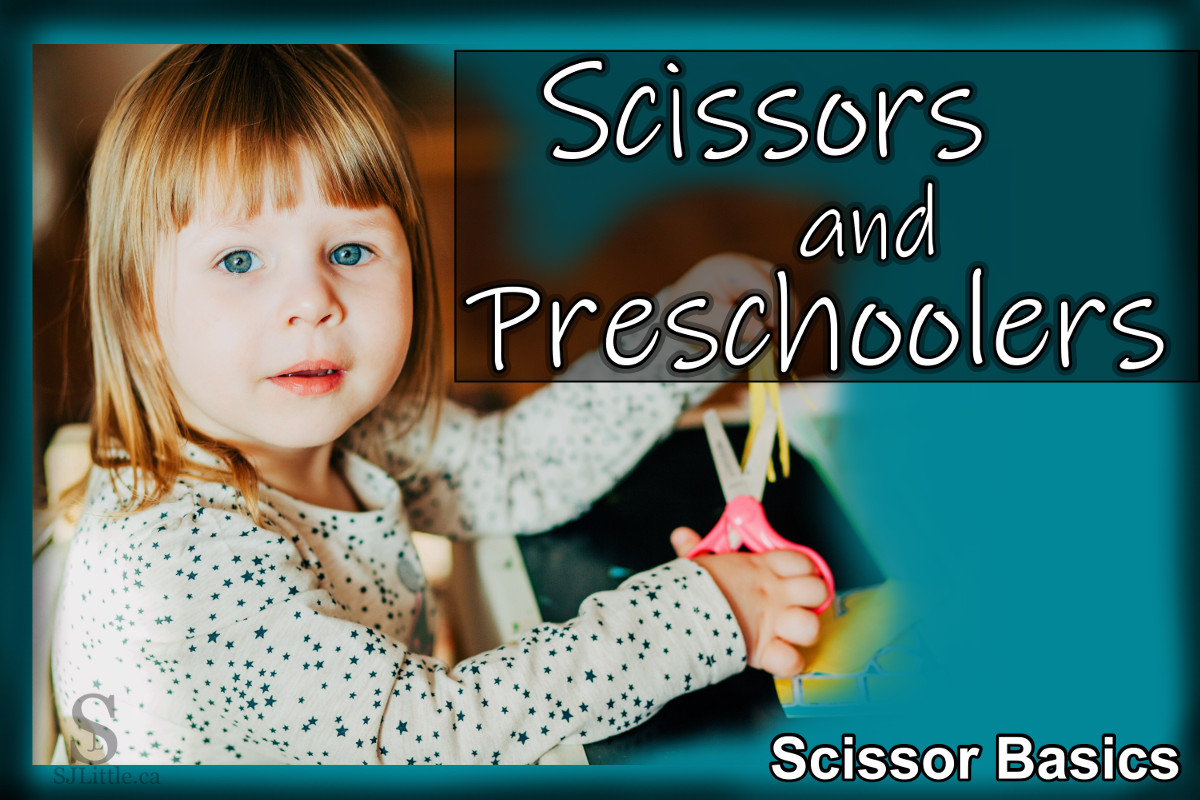
Child cutting with scissors behind title: Scissors and Preschoolers - Scissors Basics


When should children learn to use scissors? At what age are they too young? How should I teach my preschooler to use scissors?

If you’ve asked any of these questions, then you’re in the right place. As a preschool teacher who has worked closely with children, 2-5 years old, for over 9 years, I’ve learned a thing or two when it comes to teaching young children how to use scissors. In this blog post, I’m going to share what I’ve learned with you.

Why teach preschoolers how to use scissors?

If you’ve been around early learning and child care settings, you will likely have heard the term “fine motor muscles.” Fine motor muscles are the small muscles in the hands, especially those needed to hold a pencil. A child with strong fine motor muscles has a distinct advantage when it comes to learning to hold a pencil properly for writing. Therefore, we want to provide many opportunities for children to exercise their fine motor muscles. One excellent way to do so is by using scissors.

Added to that, a child who goes into Kindergarten feeling comfortable and moderately capable with scissors will have an advantage during various crafts and activities that require the use of scissors.

Which scissors to start with?

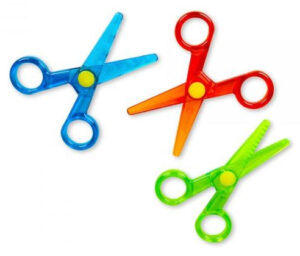
There are three basic types of scissors for preschoolers.Crayola Safety Scissors

  1. Entirely plastic safety scissors – These are the type of scissors that can cut playdough, but not much else. Most of them do not work well on paper. Crayola makes my favourite type of these scissors. They come in a set of three. I have no problem leaving these scissors freely at the playdough table for children even as young as 2 years olds. I have seen these available at various stores that also sell Crayola markers and crayons.
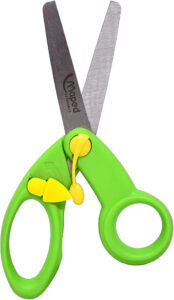
  2. Metal safety scissors – These scissors look like regular adult scissors except that they are smaller and have a rounded point rather than a sharp tip. These sorts of safety scissors are widely available in stores. Note that they are sharp enough to cut various materials and, therefore, require adult supervision.Maped Spring Safety Scissors
  3. Spring safety scissors – These scissors look identical to typical metal safety scissors, except for the addition of a spring. Children with weak fine motor muscles are typically able to close the scissors, but may find it difficult to reopen the scissors without using their second hand to help. Preschools often have a pair or two of these spring scissors. If you are only teaching one or two children how to use scissors, buying these special spring scissors typically is not needed. If your child struggles to open the scissors at first, don’t be worried. Simply keep practicing with the scissors and providing other fine motor exercises to strengthen their muscles.

Going forward in this article, I will be referring to the second (and/or third) type of scissors, but not the first entirely plastic ones.

When to teach preschoolers how to use scissors?

If you asked me to pinpoint an age when most children are ready to begin using scissors, I would say 2.5 years old. However, I say that cautiously. Having worked with countless children, I have noticed that some children are very impulsive and unaware of what they are doing with their hands. These children may not be ready to begin using scissors until they have matured more as scissors can be dangerous when not handled well.

Also, only bring out the scissors during calmer parts of the day. If you have multiple children around, you do not want the others running nearby while scissors are being used.

How to teach preschoolers to use scissors?

Before I tell you how to teach your preschooler to use scissors, a word of caution. Scissors are dangerous. Children, and those instructing them, must treat scissors with a degree of respect.

  • ModelYoung girl using scissors
    • If your child has never watched someone use scissors before, take a moment to grab a piece of paper and a pair of scissors and show them how to cut.
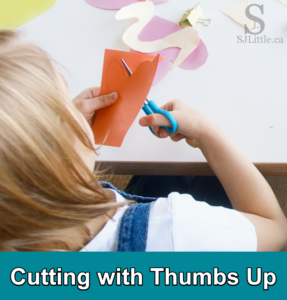
  • Thumbs up
    • Although this may feel awkward for your child at first, the proper posture when using scissors is to have thumbs up. By that, I mean that the hand holding the scissors has the thumb on the top and the fingers on the bottom when cutting. Similarly, the hand holding the paper, which I like to call the “helper hand”, should have the thumb on top of the paper and the fingers underneath. For many children, this takes practice and several gentle reminders.
  • Supervise
    • Again, scissors are dangerous – to you, your child, and to the environment around them. Be intentional to tell your child that scissors are only for paper. A child left unsupervised with scissors is prone to cutting something that shouldn’t be cut, whether the tablecloth, their clothing, the nearest ribbon, etc. This is also the age for self-haircuts. Nearly every year one of my children shows up one day with a very short haircut accompanied by their parent’s explanation that the child gave themselves a haircut. Therefore, I repeat, keep an eye on your child when they are using scissors.

Techniques for teaching children to use scissors

1. Hand-over-hand – this technique I recommend for the first few times your child uses scissors, especially if they are younger than 4 years old. For some children, only one time of hand-over-hand is needed. For other children, I would use hand-over-hand for several months before trusting them to use scissors on their own.

    • The hand-over-hand technique is exactly what it sounds like. I put my right hand over the child’s right hand and my left hand over their left hand. I find this works best if I sit on a low seat and have the child stand in front of me. In this way, I am more or less providing training wheels for the child as they learn to use scissors. While using the hand-over-hand technique, I help the children make crafts.

2. Free cutting – Some children are able to skip the hand-over-hand technique and move right to this one. Some teachers start all their children with this technique.

    • Collect a pile of papers, flyers you are planning to recycle work well. Have the child sit at a table. Give them a pair of scissors and several pieces of paper. Allow them to freely cut the paper however they wish. Many children will end up cutting the paper into itsy bitsy bits. That’s just fine. The goal of this technique is to give the children space to build the fine motor muscles needed to use scissors and to become comfortable using scissors on their own.

3. Following a line – Some children will be more engaged with their scissors if they are making something. There are various ways to give them an opportunity to do this, even when they are just starting out with scissors. I will list a few below.

Ways to incorporate scissor practice into a craft

  1. Choose a colouring sheet that matches your theme, draw a line around the image on the colouring sheet. Be sure the line is distinct from the lines of the image, perhaps by being a different colour. Have the child cut along the line. Then allow the child to colour, paint, or otherwise decorate the picture.
  2. If your craft includes several parts that you would typically cut beforehand and then give to the child to glue together, consider allowing your child to cut out one of the bigger pieces. For beginner cutters, it should be no smaller than a quarter of a sheet of paper. Once they have cut it out, have them proceed with the craft as usual.
  3. Let the child cut something to glue on. For example, if you’re talking about food, you could give your child a grocery store flyer and encourage them to cut out various food items and glue them on a piece of paper. Alternatively, let them cut a piece of paper into itsy bitsy bits and then glue the paper onto a picture to make a flower, etc.

Tips

  • Round lines are harder than straight lines
  • If your child gets distracted while holding scissors, gently remind them to look at their scissors when they are cutting.
  • Teach children that their helper hand is the one that should be turning the paper to follow the line. Their scissor hand should stay mostly straight in front of them rather than turning with the line.
  • Slightly thicker paper is often easier for children at first.
  • Teach the child, perhaps by modelling it, that when they are following a line and go off track, they need to stop and cut towards the line to get back on track.

What are some of your favourite scissor activities for your child?