
Add A Little – 4 Year Old Curriculum – Unit 3
Plant Eaters Vs. Meat Eaters
Disclaimer: All activities require adult supervision and discretion. Read more…
Want to learn more about Add A Little Curriculum? Check out the Parent / Teacher Guide
Ready, Set, Move
“What They Eat” Sort
Academic Focus: Counting
Supplies:
- Red paper – carnivore
- Green paper – herbivore
- Brown paper – omnivore
- Toy animals (ideally small plastic animals of 20+ different species. Stuffed animals could be used if needed.)
Prep:
- Optional: Write “Carnivore – Meat Eater” on the red paper, “Herbivore – Plant Eater” on the green paper, and “Omnivore – Eats Meat and Plants” on the brown paper.
- Clear an area for active play
Time to Play:
- Show your children the pile of animals in the middle of the room.
- Explain to your children that different animals eat different things. Show each paper, describing what carnivores, herbivores, and omnivores are.
- Place the three papers at the far sides of the room so the children will have space to run to them.
- Have each child choose an animal and guess what it eats. Kindly tell them the correct answer. (Below is a list of common herbivores, carnivores, and omnivores.)
- Encourage your child to run across the room to put the animal on the correct colour of paper.
- Once all the animals have been sorted, go to each paper and count how many animals are on it.
- Depending on your children’s attention span and skill level, consider playing again to see how many they remember.
- Alternatively, extend the play by sorting the animals by different categories: land animal vs water animal vs flying animal, or animal families, or mammal vs reptile vs bird and so on. When done sorting, pause to count how many are in each group.
Here’s a list to help you out:
Plant Eaters
Herbivores
- Alpaca
- Beaver
- Bison
- Buffalo
- Butterfly
- Camel
- Caterpillar
- Cow
- Deer
- Donkey
- Elephant
- Elk
- Giraffe
- Goat
- Goose
- Grasshopper
- Guinea pig
- Hippopotamus
- Horse
- Iguana
- Kangaroo
- Koala
- Llama
- Moose
- Panda
- Porcupine
- Rabbit
- Reindeer
- Rhinoceros
- Sheep
- Tortoise
- Zebra
Meat Eaters
Carnivores
- Alligator
- Cat
- Cheetah
- Cougar
- Crocodile
- Dolphin
- Eagle
- Falcon
- Frog
- Hawk
- Hyena
- Jaguar
- Komodo dragon
- Leopard
- Lion
- Lynx
- Octopus
- Orca
- Owl
- Penguin
- Polar bear
- Praying mantis
- Scorpion
- Sea lion
- Seal
- Shark
- Snake
- Spider
- Squid
- Tiger
- Walrus
- Wolf
Plant and Meat Eaters
Omnivores
- Ant
- Baboon
- Badger
- Bear
- Blue jay
- Chicken
- Chimpanzee
- Chipmunk
- Coyote
- Crab
- Crow
- Dog
- Duck
- Emu
- Fox
- Hamster
- Hedgehog
- Lobster
- Magpie
- Monkey
- Mouse
- Ostrich
- Peacock
- Pig
- Raccoon
- Rat
- Raven
- Skunk
- Snail
- Squirrel
- Turkey
- Wild boar
Explore, Learn, Create
Paper Plate Puppets
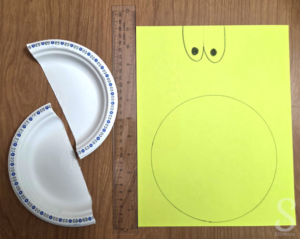
Supplies:
- Paper plates (1 per puppet) (dessert sized work well, but bigger are fine too. Choose plates that do not have a waxy finish.)
- School glue
- Cardstock (1 sheet per puppet)
- Pencil
- Child safety scissors
- Markers (or other means of decorating)
- Optional: Googly eyes
Prep:
- Create an example puppet following the instructions below, then prepare the pieces for each child to make their own puppet.
- Trace the paper plate facedown on the cardstock.
- On the unused portion of the cardstock, draw a rectangle about 2.5″ (6cm) long and 2″ (5cm) wide. This will be the eyes. Gently draw a dividing line down the center of the rectangle and round the edges (as seen in the example photos).
- Either cut the circle and rectangle out, or choose to let your child cut them out as part of the craft.
- Fold the cardstock circle in half. This will be the inside of the mouth.
- Cut the paper plate in half. The bottom of the plate with be the outside of the puppet.
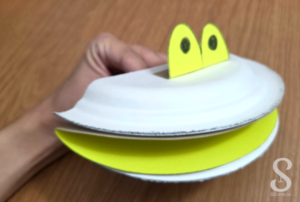
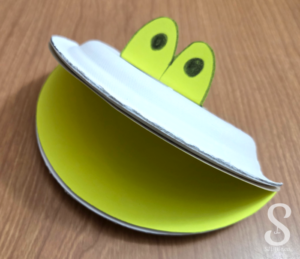
Time to Create:
- Invite your child to the table and show them your example puppet.
- Optional: If your child is cutting out the cardstock parts, have them do so now.
- Give your child the paper plate, the circle, and the rectangle. Encourage them to colour these pieces using the markers.
- Once your child is done colouring their puppet, put glue on the rim of the halves of the plate. Press the plate face down on the outside of the folded circle. Attach the eyes on top.
- Set the puppet aside to dry.
- Extend the fun to practice counting, by playing a game with the dried puppets where you spread pompoms in front of your child and tell them that their puppet can eat a certain number of the pompoms.
Let’s Sing
The Gingerbread Man Song
For lyrics and tips, visit:
https://sjlittle.ca/preschool/gingerbread-man-song/
Let’s Read
The Berenstain Bears’ Nature Guide
Available as part of:
The Berenstain Bears’ Big Book of Science and Nature
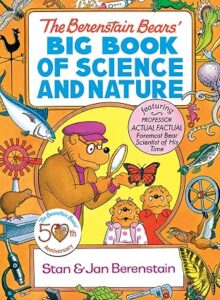
By: Stan & Jan Berenstain
Let’s Sing
Christian Song
Who is the King of the Jungle
Let’s Read
BIBLE
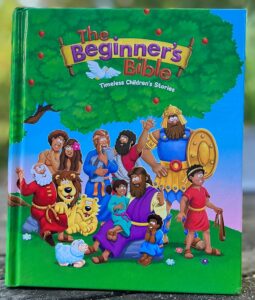
Read the next story in the picture Bible you are working your way through.