Add A Little – 4 Year Old Curriculum – Unit 3

Plant Eaters Vs. Meat Eaters

Disclaimer: All activities require adult supervision and discretion. Read more…

Want to learn more about Add A Little Curriculum? Check out the Parent / Teacher Guide

Ready, Set, Move

“What They Eat” Sort

Academic Focus: Counting

Supplies:

  • Red paper – carnivore
  • Green paper – herbivore
  • Brown paper – omnivore
  • Toy animals (ideally small plastic animals of 20+ different species. Stuffed animals could be used if needed.)

Prep:

  • Optional: Write “Carnivore – Meat Eater” on the red paper, “Herbivore – Plant Eater” on the green paper, and “Omnivore – Eats Meat and Plants” on the brown paper.
  • Clear an area for active play

Time to Play:

  • Show your children the pile of animals in the middle of the room.
  • Explain to your children that different animals eat different things. Show each paper, describing what carnivores, herbivores, and omnivores are.
  • Place the three papers at the far sides of the room so the children will have space to run to them.
  • Have each child choose an animal and guess what it eats. Kindly tell them the correct answer. (Below is a list of common herbivores, carnivores, and omnivores.)
  • Encourage your child to run across the room to put the animal on the correct colour of paper.
  • Once all the animals have been sorted, go to each paper and count how many animals are on it.
  • Depending on your children’s attention span and skill level, consider playing again to see how many they remember.
  • Alternatively, extend the play by sorting the animals by different categories: land animal vs water animal vs flying animal, or animal families, or mammal vs reptile vs bird and so on. When done sorting, pause to count how many are in each group.

Here’s a list to help you out:

Plant Eaters
Herbivores

  1. Alpaca
  2. Beaver
  3. Bison
  4. Buffalo
  5. Butterfly
  6. Camel
  7. Caterpillar
  8. Cow
  9. Deer
  10. Donkey
  11. Elephant
  12. Elk
  13. Giraffe
  14. Goat
  15. Goose
  16. Grasshopper
  17. Guinea pig
  18. Hippopotamus
  19. Horse
  20. Iguana
  21. Kangaroo
  22. Koala
  23. Llama
  24. Moose
  25. Panda
  26. Porcupine
  27. Rabbit
  28. Reindeer
  29. Rhinoceros
  30. Sheep
  31. Tortoise
  32. Zebra

Meat Eaters
Carnivores

  1. Alligator
  2. Cat
  3. Cheetah
  4. Cougar
  5. Crocodile
  6. Dolphin
  7. Eagle
  8. Falcon
  9. Frog
  10. Hawk
  11. Hyena
  12. Jaguar
  13. Komodo dragon
  14. Leopard
  15. Lion
  16. Lynx
  17. Octopus
  18. Orca
  19. Owl
  20. Penguin
  21. Polar bear
  22. Praying mantis
  23. Scorpion
  24. Sea lion
  25. Seal
  26. Shark
  27. Snake
  28. Spider
  29. Squid
  30. Tiger
  31. Walrus
  32. Wolf

Plant and Meat Eaters
Omnivores

  1. Ant
  2. Baboon
  3. Badger
  4. Bear
  5. Blue jay
  6. Chicken
  7. Chimpanzee
  8. Chipmunk
  9. Coyote
  10. Crab
  11. Crow
  12. Dog
  13. Duck
  14. Emu
  15. Fox
  16. Hamster
  17. Hedgehog
  18. Lobster
  19. Magpie
  20. Monkey
  21. Mouse
  22. Ostrich
  23. Peacock
  24. Pig
  25. Raccoon
  26. Rat
  27. Raven
  28. Skunk
  29. Snail
  30. Squirrel
  31. Turkey
  32. Wild boar

Explore, Learn, Create

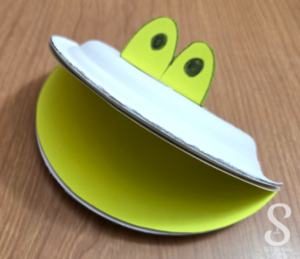
Paper Plate Puppets
Supplies:

  • Paper plates (1 per puppet) (dessert sized work well, but bigger are fine too. Choose plates that do not have a waxy finish.)
  • School glue
  • Cardstock (1 sheet per puppet)
  • Pencil
  • Child safety scissors
  • Markers (or other means of decorating)
  • Optional: Googly eyes

Prep:

  • Create an example puppet following the instructions below, then prepare the pieces for each child to make their own puppet.
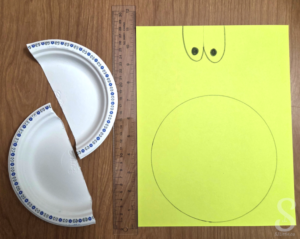
  • Trace the paper plate facedown on the cardstock.
  • On the unused portion of the cardstock, draw a rectangle about 2.5″ (6cm) long and 2″ (5cm) wide. This will be the eyes. Gently draw a dividing line down the center of the rectangle and round the edges (as seen in the example photos).
  • Either cut the circle and rectangle out, or choose to let your child cut them out as part of the craft.
  • Fold the cardstock circle in half. This will be the inside of the mouth.
  • Cut the paper plate in half. The bottom of the plate with be the outside of the puppet.
Time to Create:

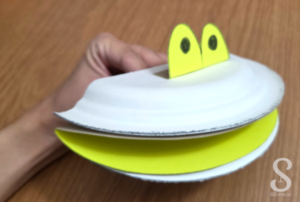
  • Invite your child to the table and show them your example puppet.
  • Optional: If your child is cutting out the cardstock parts, have them do so now.
  • Give your child the paper plate, the circle, and the rectangle. Encourage them to colour these pieces using the markers.
  • Once your child is done colouring their puppet, put glue on the rim of the halves of the plate. Press the plate face down on the outside of the folded circle. Attach the eyes on top.
  • Set the puppet aside to dry.
  • Extend the fun to practice counting, by playing a game with the dried puppets where you spread pompoms in front of your child and tell them that their puppet can eat a certain number of the pompoms.

Let’s Read

The Berenstain Bears’ Nature Guide

Available as part of:

The Berenstain Bears’ Big Book of Science and Nature
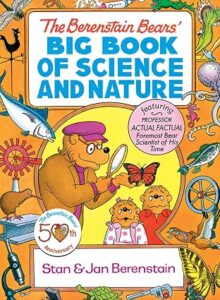
By: Stan & Jan Berenstain

Let’s Sing

Christian Song

Who is the King of the Jungle

Let’s Read

BIBLE
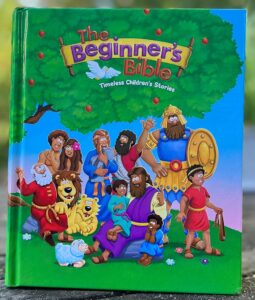
Read the next story in the picture Bible you are working your way through.
 

Add A Little – 4 Year Old Curriculum – Unit 2

Healthy Eating

Disclaimer: All activities require adult supervision and discretion. Read more...

Want to learn more about Add A Little Curriculum? Check out the Parent / Teacher Guide

Ready, Set, Move

I’m Hungry For…

Academic Focus: ABCs

Supplies:

  • One puppet or stuffed animal
  • Use the pieces from an alphabet puzzle
  • Alternatively use:
    • Paper
    • Marker
    • Scissors

Prep:

  • If not using an alphabet puzzle, cut a sheet of paper into 2″ (5cm) pieces. Write one letter on each paper.
  • Clear a space for active play.

Time to Play:

  • Show your children the letters, then place the letters at one side of the room.
  • Sit with the puppet at the other side of the room.
  • Have the puppet say something along the lines of: “Hi! My name is Harry. It’s nice to meet you. Oh, I’m really hungry. I’m especially hungry for the letter ‘A’.”
  • Ask a specific child to find letter “A” and give it to the puppet.
  • Have the puppet pretend to eat the letter and say thank you.
  • Have the puppet say something like: “That was delicious! But I’m hungry again. This time what I really want to eat is letter ‘G’.”
  • Continue until all the letters have been fed to the puppet.


Explore, Learn, Create

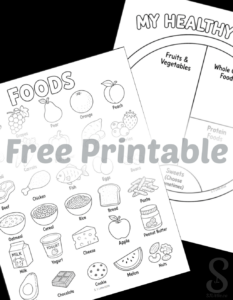
Healthy Eating Plate

Supplies:

  • Print one serving plate per child or draw your own
  • Either use grocery store flyers
  • Or print the foods colouring sheet. Print enough for every child to have at least a quarter page.
  • Child safe scissors
  • Glue stick

Prep:

  • Print the needed papers (or collect your own resources)
  • Note, the food groups shown on the plate are based on Canada’s Food Guide (2026). This guide classes meats, meat alternatives (nuts and beans, etc.), and dairy as “Protein Foods”. I added a small “Sweets” section to help teach that some sweets are fine, but the majority of our food should be in the other food groups.

Time to Create:

  • Show your child the plate. Read the labels on each section.
  • Explain to your child that it is healthy to have foods in those proportions.
  • Give your child a flyer or the foods print out and a pair of child safe scissors. Encourage them to cut out various food items.
  • Next, help your child sort the foods into the different sections of the plate.
  • Give your child the glue stick to glue the foods onto the plate.

Let’s Sing

Preschool Harvest Song
An S. J. Little original

For lyrics and actions, click here.

Let your children take turns choosing which fruit or vegetable to sing about and this song will quickly become a favorite.

Let’s Read

Five Little Monkeys Bake a Birthday Cake

By Eileen Christelow

Let’s Sing

Christian Song

Fruit of the Spirit (Galatians 5:22-25)

Let’s Read

BIBLE

Read the next story in the picture Bible you are working your way through.
 

Add A Little – 4 Year Old Curriculum – Unit 1

Four Seasons

Disclaimer: All activities require adult supervision and discretion. Read more...

Want to learn more about Add A Little Curriculum? Check out the Parent / Teacher Guide

Ready, Set, Move

Spring’s Coming

Prep:

  • Clear a large area for active play
  • For your own reference, write down which commands you will use. Have a few extra at the bottom of the list in case your children need an added challenge. Options include:
    • Spring – pretend to grow like a flower: crouch low and move your arms upwards until you are standing tall. Spread your arms wide like a flower.
    • Summer – pretend to go swimming to cool off
    • Fall – pretend your hands are leaves: reach up high with your hands, then have them float gently to the ground.
    • Winter – pretend to put on winter clothing – snow pants, boots, coat, toque, mittens.
    • Could add directions: run to North, East, South, or West. (These would be easier to remember if you put up letter posters for each side. Keep each direction on its true compass direction since your children may use these as a reference point in the future.
  • For an added challenge, could use partner actions that involve two children or all the children.
  • Optional: Consider making visual cues for each action. For example, hold a yellow object for summer, orange for autumn, white for winter, and green for spring.

Time to Play:

  • Gather your children and explain that you are going to play “Spring’s Coming”. They will walk around the area until you call a command. When you call that command, they stop and do the action wherever they happen to be standing.
  • Show them two or three actions to begin with.
  • Play with those actions until your children get the hang of it, then you can add in more actions one or two at a time.
  • Have fun and smile. Participate with your children by doing the actions too.

Explore, Learn, Create

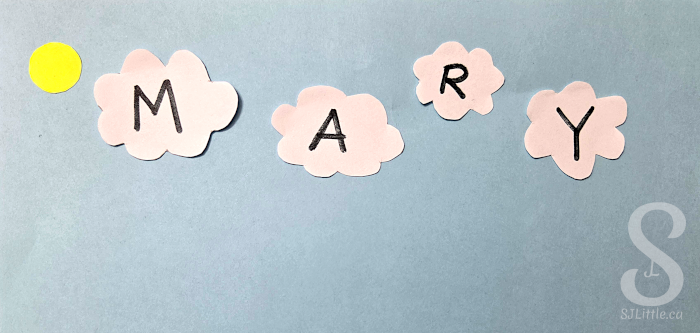
Cloud Names

Academic Focus: Name Writing

Supplies:

  • White paper
  • 1 blue paper per child
  • Optional: yellow paper (to make a sun)
  • Crayons to decorate with
  • Child-safe scissors
  • Glue stick (or tape)

Prep:

  • On the white paper, draw enough cloud shapes to have one cloud shape per letter of each child’s name.
  • Decide whether you will cut out the cloud shapes or have your child cut them out. If you will cut them out, do that now.
  • Consider making a sample picture with your name to show your children.

Time to Create:

  • If you made one, show your child the example picture, if not, show them the supplies. Explain that they are going to write their name on the clouds.
  • Have your child cut out the clouds, unless you already cut them out.
  • Help your child line up the correct number of clouds for the letters in their name.
  • Encourage your child write one letter of their name on each cloud.
  • Name Writing Tip: If needed, use a yellow marker to write your child’s letters for them, then give your child a dark coloured crayon to trace over top. Be encouraging. It won’t be prefect. (Emphasize how they draw the letters, i.e. starting at the top and the order of which part of the letter to draw first. Don’t worry about proper grasp yet.)
  • Help your child glue the clouds on the blue paper in order.
  • Optional: Decorate the picture by adding a sun or drawing rain, etc.

Let’s Sing

What’s the Weather

Let’s Read

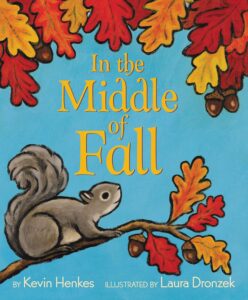
In the Middle of Fall

Author: Kevin Henkes
Illustrator: Laura Dronzek

Check out their books about other seasons as well.

Let’s Sing

Christian Song

Seasons for Us: God Made It So

Let’s Read

BIBLE

Read the next story in the picture Bible you are working your way through.