
Add A Little – 3 Year Old Curriculum – Unit 1
Transportation
Disclaimer: All activities require adult supervision and discretion. Read more…
Want to learn more about Add A Little Curriculum? Check out the Parent / Teacher Guide
Movement Moment
Walk or Wait
Prep:
-
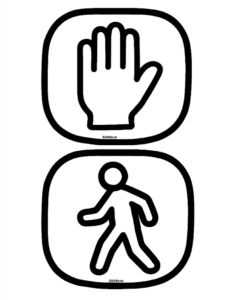
- Print the pedestrian crossing signal picture below (choose the image that best suits your neighborhood) or draw your own.
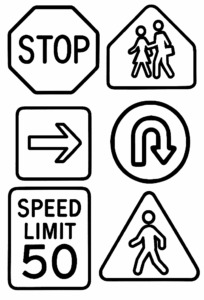
- Optional: Print (or draw) additional road signs (See image below).
- Colour and cut out the images.
- Prepare an area for running.
Free Downloads
Select the image you want above to access the downloadable PDF.
Time to Play:
- Introduce your child to the images. Explain where to cross the road and which picture means wait or walk.
- Play “Red Light Green Light” with the pedestrian crossing signal pictures.
- Have all the children start at one side of your running area. You stand at the other side with the signs.
- When you hold up the walk sign, all the children can move towards you.
- When you hold up the wait sign, all the children must stop.
- Play until all the children reach the other side of the running area. Repeat as desired.
- Optional: Make the game more interesting by adding other road signs.
- U-turn sign = spin around
- Arrow sign = move in the direction the sign is pointing
- Stop sign = stop
- School zone sign = go slow
- Speed Limit sign = run
Art Activity
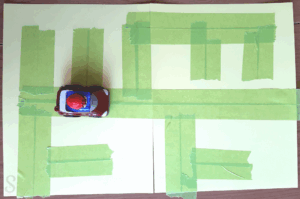
Make a Car Map
Supplies:
- Sheet of cardboard or at least 2 sheets of thick paper
- Masking tape or painters’ tape
- Paint (2 colours)
- Paintbrushes (ideally thick paintbrushes but other methods of painting work too)
- 2 Small containers to put paint in (alternatively pour the paint directly onto the paper)
Prep:
- Decide what size of car you want to make the map for. Check to see if your tape is wide enough. You may want to use two strips of tape to make the roads wide enough.
- If using sheets of paper, tape them together to create a bigger surface.
- If you have several children, decide whether to:
- give each child a sheet of paper that will join to create a bigger map
- create one large one-piece map all together
- or each make their own personal map
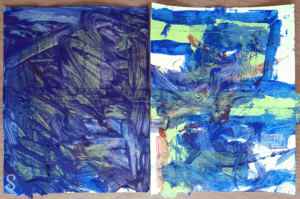
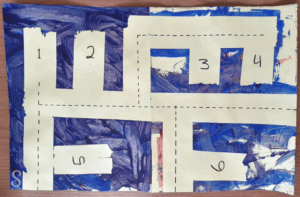
- Use the tape to create a network of roads and parking spots on the paper.
- Consider covering your table if you are concerned about getting paint on it.
- Consider using paint shirts.
Time to Create:
- Invite your children to the table. Show them the taped map. Explain that their job is to cover the entire map with paint, especially on the edges of the tape.
- Chat with your child while they paint.
- If needed pick up your own paintbrush and help paint directly around the tape so that there will be a clear boarder when the tape is removed.
- Allow the paint to dry.
- Remove the tape from the painting. It should reveal the car map.
- Optional: Use a marker to add dotted lines to the roads or numbers to the parking spots.
- Let your child have fun playing with the car map.
Five-Minute Focus
Let’s Learn the ABCs
Letters of the Unit
- A B C
Letter Activity
- Sing the Letter Sound
-
For other letter teaching techniques, visit: https://sjlittle.ca/preschool/teaching-the-abcs-at-circle-time/
Let’s Read
I’m the Digger Driver
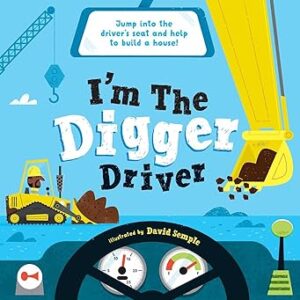
Little Genius Books
Illustrator: David Semple
Let’s Sing
Christian Song
Walking With Jesus
Let’s Read
BIBLE
Read the next story in your picture Bible. Need recommendations for a good Children’s picture Bible? Click Here